Table of Contents
This practical guide walks through how to install apache netbean on Windows 10, explains the main requirements, and highlights common issues that may appear along the way.
However, the old Netbean versions are no longer suitable for modern programming purposes anymore. Therefore, the new Netbean version under the development of Apache has been gradually returning to popularity as before.
And in today's article I will guide you to install Apache Netbean 12 on Windows 10 operating system.
Ok, now we start now!
How to install the latest Apache Netbean on Windows 10
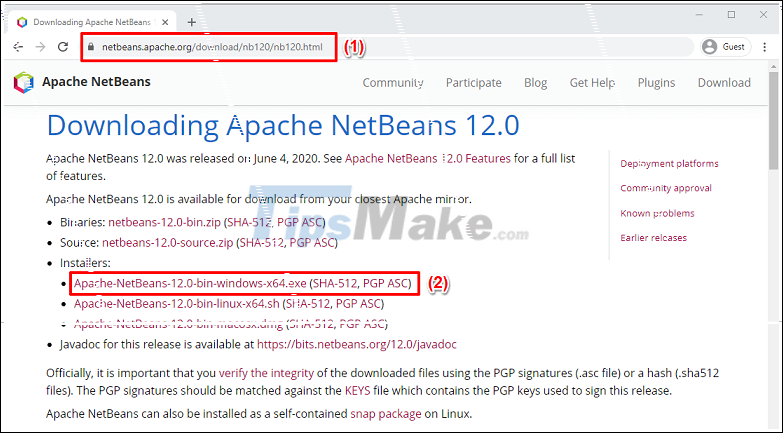
+ Step 1: First, go to the home page to download the installation file. You download the installation file by visiting the link here:
You click on the link in position (2) in the image below to navigate to the download file.
Note: Apache Netbean 12 supports both Linux and MacOS as well.
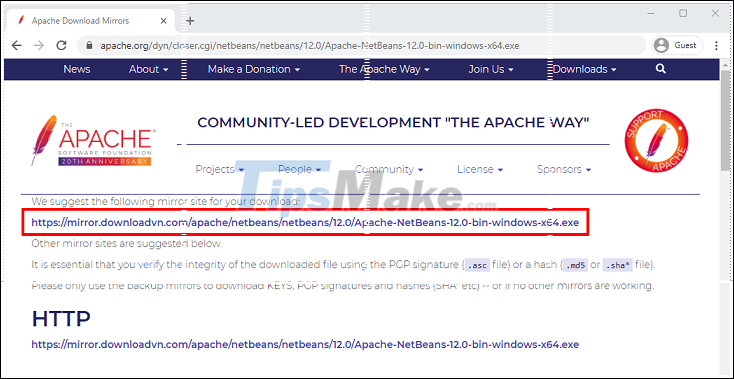
You click on the link as shown in the image below and the installation file will be downloaded to your computer (about 300MB).
+ Step 2: Installation:
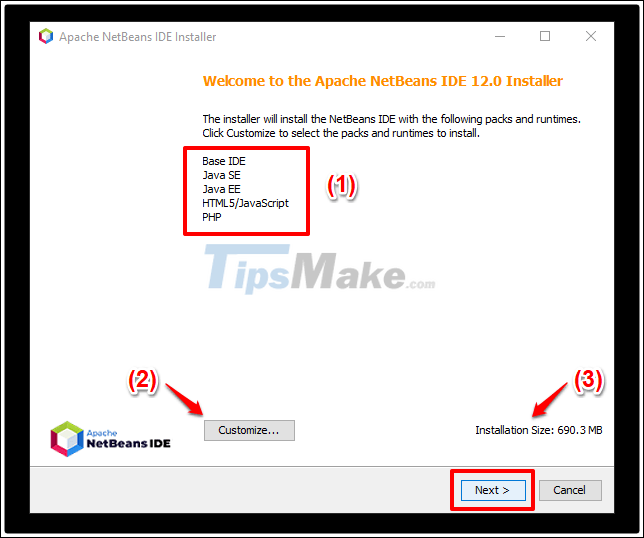
Double-click the downloaded installation file to open Apache Netbean Installer.
- (1) Default settings (Base IDE, Java SE, Java EE, HTML / JavaScript, PHP)
- (2) If you ever want to change the settings click on Customize .
- (3) Total disk space is occupied after installation (Full options).
=> If you do not customize, then click Next to continue.
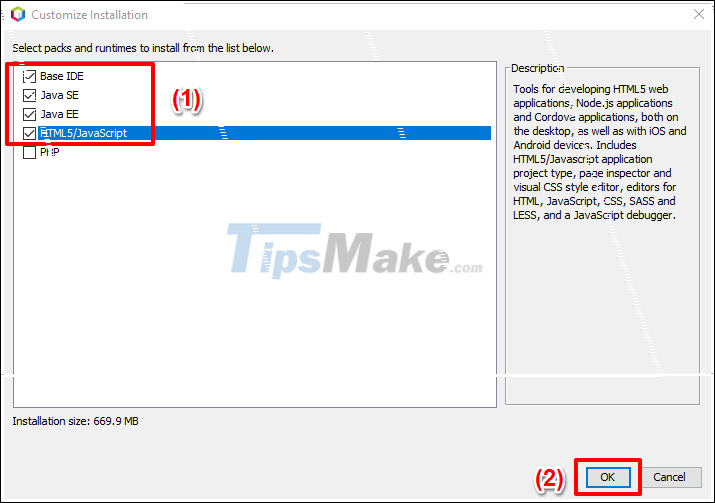
If you do want to customize then click on Customize and a dialog box will appear as shown below.
If you do not want to install PHP package for example, you can uncheck it => then click OK to continue.
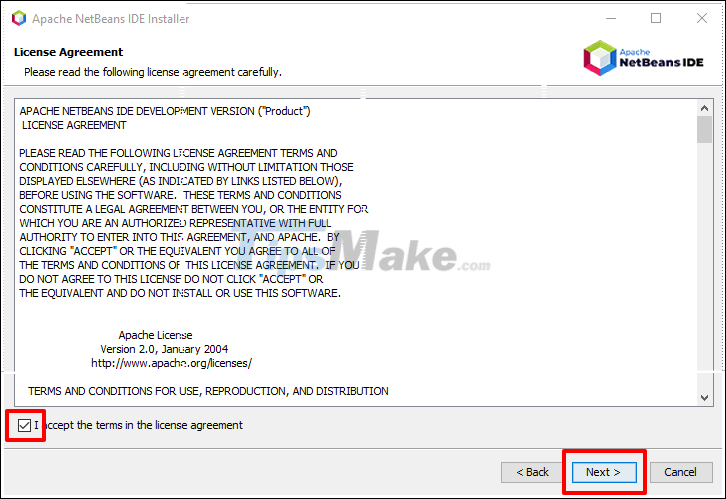
At this step, you check the I accept the terms in the license agreement to accept the terms of the application and continue.
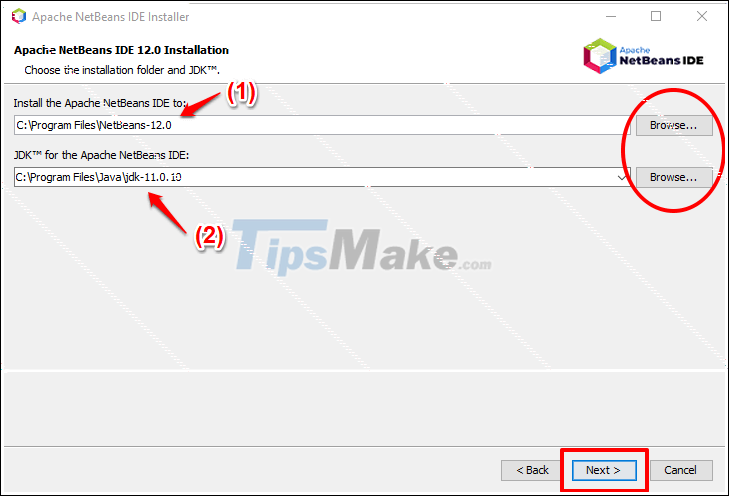
Next, you will choose the installation location of Netbean (1) and the path to the JDK in the machine (2) so that Netbean can compile Java programs.
You can completely change these paths by clicking the Browse… button next to them. After selecting, click Next to continue.
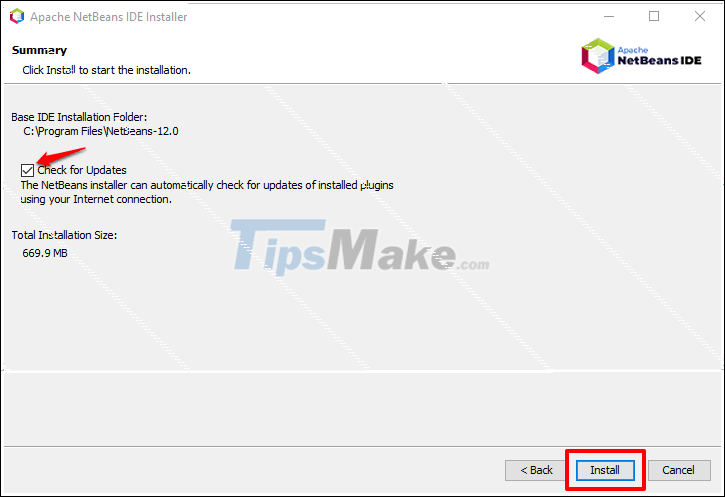
In this step, you can check the Check for Updates box so that Netbean can automatically update the plugin when installed from the internet. Then click Install to begin the installation process.
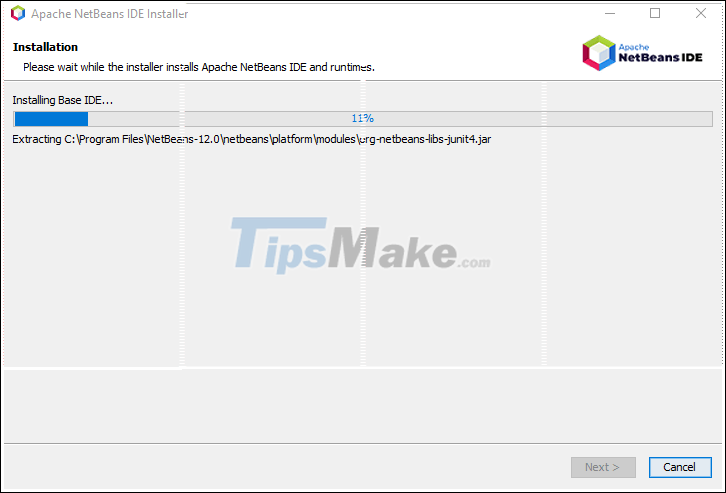
The installation process is quite fast, depending on your computer configuration and Internet speed.
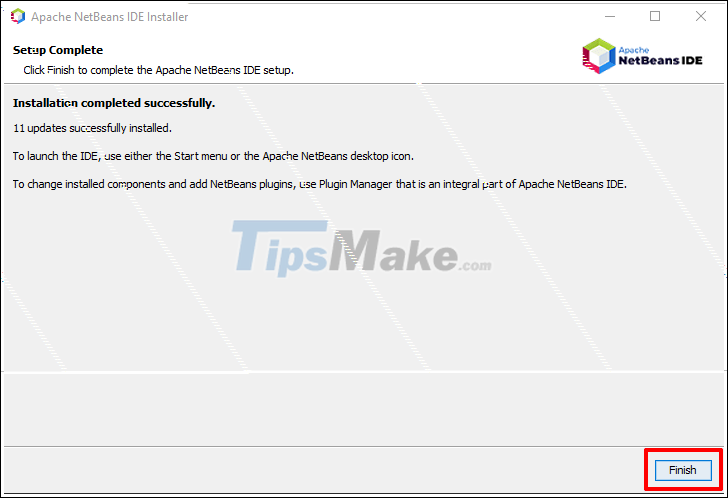
Ok, so the installation is complete. Now you can use Apache Netbean to program Java. Click Finish to finish.
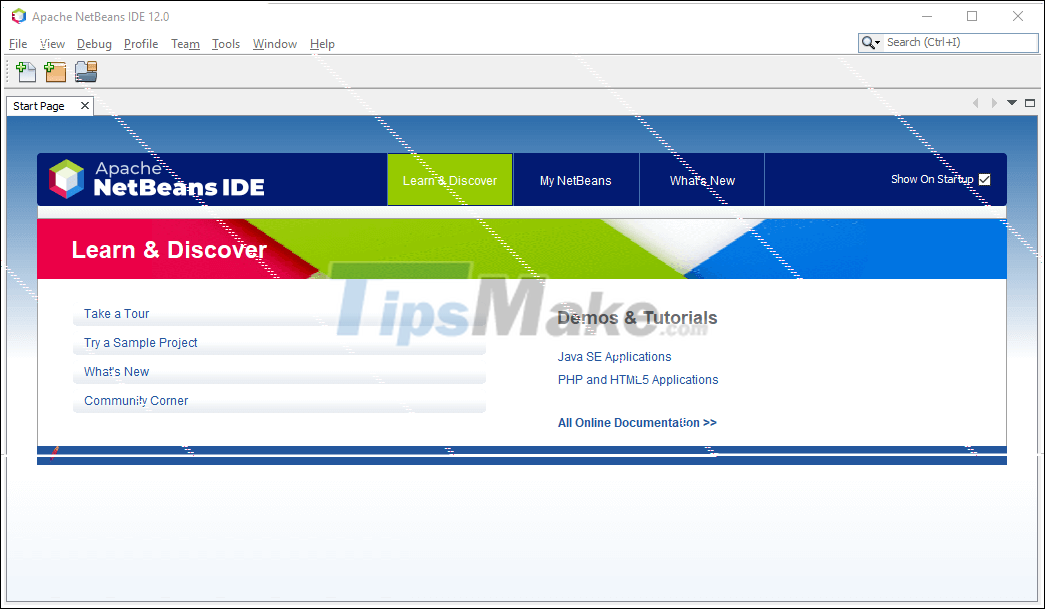
This is the opening interface of Apache Netbean 12, not too different from the old versions in terms of design!
Yes, so in this article I have instructed you how to install Apache Netbean on Windows 10. straightforward, right. Good luck.
Key Takeaways
Use the information above as a practical reference for how to install apache netbean on Windows 10. Review each step carefully, confirm any requirements, and choose the option that best fits your situation.
FAQ
What does this guide explain about Install Apache Netbean on Windows 10?
It explains the main concepts, practical considerations, and useful steps related to install apache netbean on Windows 10 without requiring advanced knowledge.
Who can benefit from learning about Install Apache Netbean on Windows 10?
This information is useful for readers who want a clear overview, practical guidance, and reliable steps related to install apache netbean on Windows 10.
What should I check before applying this information?
Review the requirements, confirm that your device, software, or situation matches the instructions, and back up important data before making major changes.
Related Articles
 How to Install Apache Guacamole Via Docker on Ubuntu 22.0416 minutes read
 How to Install XAMPP, How to Configure XAMPP on Windows 107 minutes read
 Get Familiar with Netbeans Java IDE6 minutes read
 How to Install Apache, MySQL and PHP in OS X2 minutes read
 Tutorial: Install and Configure Apache in Ubuntu6 minutes read
 Compare Nginx and Apache6 minutes read
Reader Comments 0
Sign in with email or Google to join the discussion.