How to enable microphone in Windows 10
After installing Windows 10, the microphone may be disabled. If this happens, there are several ways you can fix the problem before you go out and buy a new sound card.
Table of Contents
The free Windows 10 upgrade is available to everyone, but disables the microphone in the PC. For users who want to troubleshoot, please consider the following solutions.
How to re-enable microphone on Windows 10?
1. Use third party software
There may be instances where the problem with the microphone occurs due to some sort of problem with the microphone driver. To fix this, the article recommends you to use DriverFix.

The tool will easily scan your PC for missing and outdated device drivers, and then automatically update them.
You can rest assured that you will receive the latest version of the driver, all you need to make sure the device is connected to the Internet. Use the best driver updates to make sure the microphone is working properly.
Download DriverFix here
2. Turn on the microphone from Device Manager
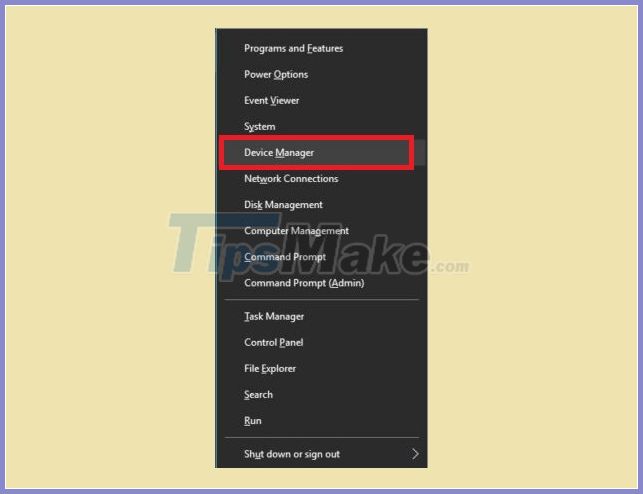
Step 1: Access the Winx menu by pressing Windows + X keys simultaneously .
Step 2: Select Device Manager from the list.
Step 3: Click Sound Video and Game Controllers .
Step 4: Click on the sound card currently installed on the PC.
Step 5: Right click and select Enable.
Step 6: Restart your computer to finish the process.
Note : If there is a yellow warning icon next to the name of the sound controller, the driver for that driver has been corrupted or uninstalled.
3. Turn on the microphone from Sound Settings
Step 1: In the bottom right corner of the Windows menu, right-click the Sound Settings icon .
Step 2: Scroll up and select Recording Devices.
Step 3: Click Recording.
Step 4: If there are devices listed, right-click on the desired device.
Step 5: Select Enable.
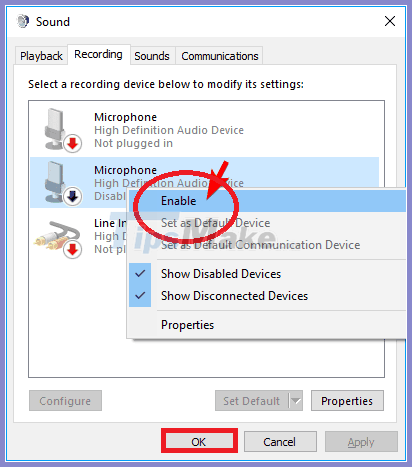
Step 6: Right-click anywhere on the screen and choose Show Disabled Devices .
Step 7: Select the microphone from the created list.
Step 8: Click Properties.
Step 9: In Device Usage , select Use this Device (Enable) .
Step 10: Click Apply> OK .
4. Turn on the microphone from Windows Settings
Step 1: Access Windows Settings by pressing Windows and I keys simultaneously .
Step 2: Click Privacy.
Step 3: On the left menu, select Microphone.
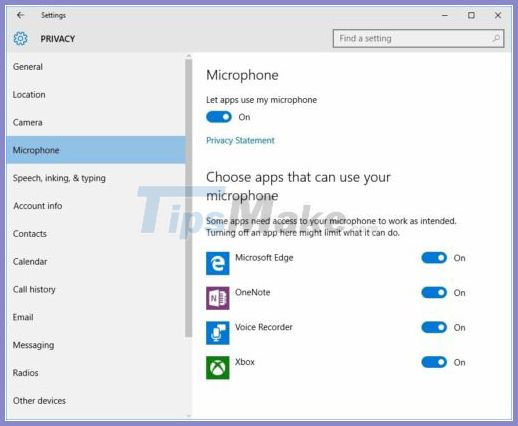
Step 4: In Let apps use my microphone , make sure that the indicator is set to On.
If these solutions do not solve the problems with the microphone, then the computer hardware may be damaged.
Hardware problems can be solved by purchasing external components or installing new internal components. Resolving the sound problems might require a few reboots and reinstallation.
Make sure to use up all possible options before buying new hardware to avoid losing money!
Was this article helpful?
Your feedback helps us improve.
Related Articles
 How to test the Windows 10 microphone3 minutes read
 How to enable and disable Micro on Windows 104 minutes read
 Steps to install microphone on Windows 103 minutes read
 Instructions for setting up and installing Microphone on computer9 minutes read
 How to choose default microphone on Windows 104 minutes read
 How to Adjust Microphone Sensitivity on Android, iOS, Mac and Windows7 minutes read
Reader Comments 0
Sign in with email or Google to join the discussion.