How to choose default microphone on Windows 10
With so many options, here's how to tell Windows which microphone to use by default.
You can set a default microphone in some applications
Before you begin, it's worth noting that in some apps (such as Zoom) you can choose your microphone device in the app and that will work independently of your system's audio settings. Windows.
You can also specify which microphone you want to use on an app-by-app basis using the hidden menu in Settings. But if you want to set the default microphone system-wide, follow the steps below. Any app that uses Windows' default microphone - which is the default option for most apps - will use this microphone.
How to choose the default microphone using Settings
You can easily choose your default microphone in Settings. First, open Settings by clicking on the Start menu and selecting the gear icon on the left. You can also press Windows + I for quick opening.
Alternatively, you can also right-click on the speaker icon in the system tray on the right side of the taskbar and choose Open Sound Settings . Windows will open the Sound Settings screen .
In the Settings window , click System.
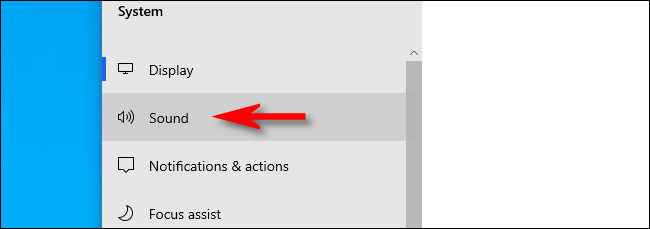
On the System screen , click Sound from the sidebar menu.
 Click Sound from the sidebar menu
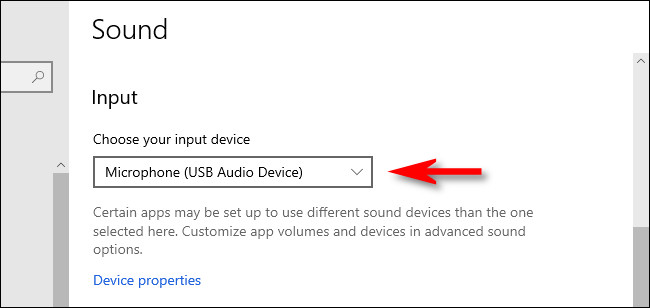
Scroll down to the Input section on the Sound screen . In the drop-down menu labeled Choose your input device , choose the microphone you want to use as your default device.
 Select microphone as default device
After you have selected a device from the drop-down menu, Windows will use that device as your default microphone. Then just close Settings.
How to choose the default microphone using Control Panel
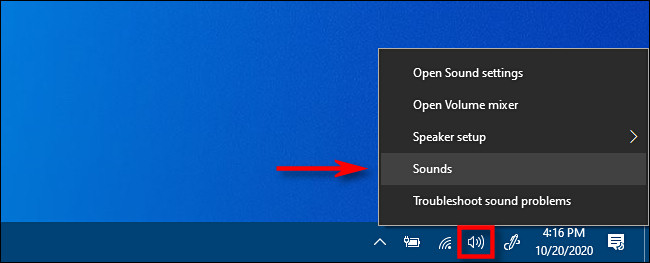
You can also set your default microphone using the classic Control Panel. You can access it using the speaker icon in the system tray, located on the far side of the taskbar opposite the Start menu.
Right-click the speaker icon in the system tray and select Sounds from the pop-up menu.

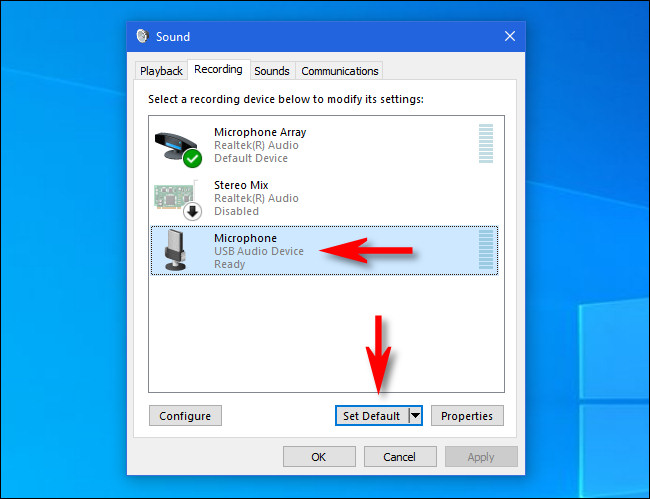
In the Sound window that appears, click the Recording tab .

Next, you will see a list of recording devices recognized by the system, including the microphone. Select the microphone you want to use as default from the list and click the Set Default button .

Then the microphone you have selected will have a green check mark next to it in the list, indicating that the microphone is set as the default recording device. The list will also include the words Default Device .
 The microphone you selected will have a green check mark next to it
Click OK and the Sound window will close. If you need to change back to your default microphone, just select Sounds from the speaker icon in the system tray.