Steps to find and replace text in Notepad on Windows 10
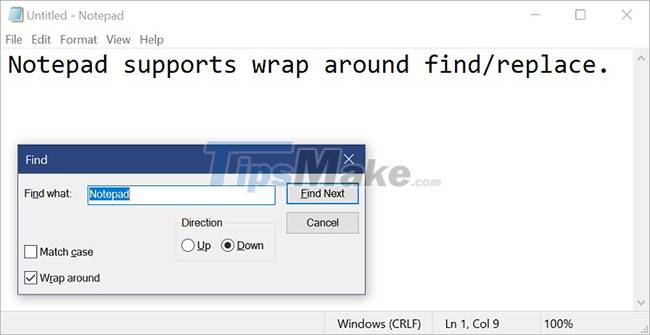
Starting with Windows 10 build 17713, Microsoft has made significant improvements to the find/replace experience in Notepad. Microsoft added an option to do a find/replace to the Find dialog, and Notepad will now remember the previously entered values and the state of the checkbox, automatically filling them in the next time you open the Find dialog . Also, when you have selected text and open the search dialog box, the selected text will automatically populate the search field.
This tutorial will show you how to find and replace text in a Notepad document on Windows 10.
How to find text in Notepad
Step 1. While in Notepad, do one of the following to find text:
- Press the Ctrl + F keys .
- Select (highlight) the text you want to search for and press the Ctrl + F keys .
- Click Edit on the menu bar and click Find .
Step 2. Enter what you want to find in the Find what field if it doesn't already have the information you want.
Step 3. Check or uncheck the Match case box depending on what you want.
Step 4. Check or uncheck the Wrap around box depending on what you want.
Note : Wrap around feature isonly available starting with Windows 10 build 17713.
Step 5. Select Up or Down for Direction where the cursor is in the text you want to find.
Step 6. When you're ready to start finding the text entered in step 2, do one of the following:
- Click the Find Next button .
- Press the F3 key . If the Find dialog box is open, you'll need to click the Find Next button at least once first.
- Click Edit on the menu bar and click Find Next. This option will not work if the Find dialog is currently open.
Step 7. Repeat step 6 to find all cases that match the text entered in step 2.

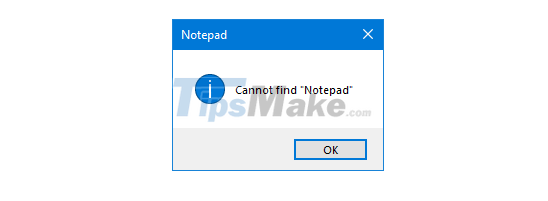
.and/or press OK when no other instances can be found.

How to replace text in Notepad
Step 1. While in Notepad, do one of the following to find and replace text:
- Press the Ctrl + H keys .
- Select (highlight) the text you want to search for and press the Ctrl + H keys .
- Click Edit on the menu bar and click Replace.
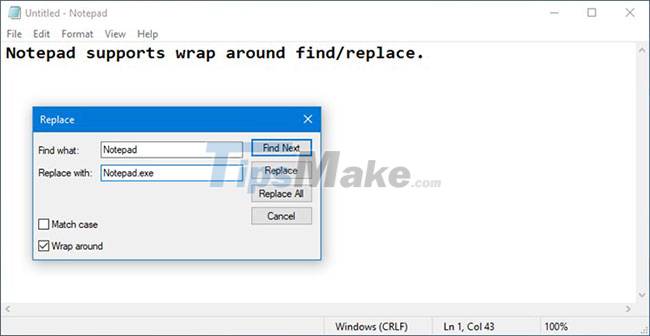
Step 2. Enter what you want to find in the Find what field if it doesn't already have the information you want.
Step 3. Enter what you want to replace the text with from step 2 in the Replace with field .
Step 4. Check or uncheck the Match case box depending on what you want.
Step 5. Check or uncheck the Wrap around box depending on what you want.
Note : Wrap around feature isonly available starting with Windows 10 build 17713.
Step 6. When you're ready to start finding the text entered in step 2, do one of the following:
- Click the Find Next button .
- Press the F3 key . If the Replace dialog box is currently open, you'll need to click the Find Next button at least once first.
Step 7. If you want to replace this specific text with the text entered in step 3, click the Replace button.
Note : You can click the Replace All buttonif you want to automatically replace all the text found from step 2 with the text entered in step 3.
Step 8. Repeat step 6 and step 7 to find and replace all instances that match the text you want and/or press OK when no other cases can be found.

Hope you are succesful.