Steps to fix camera not working on Microsoft Teams
If the camera is not working with Microsoft Teams, in this guide you will find several ways to fix this problem on Windows 10.
How to fix Microsoft Teams camera not working by configuring settings
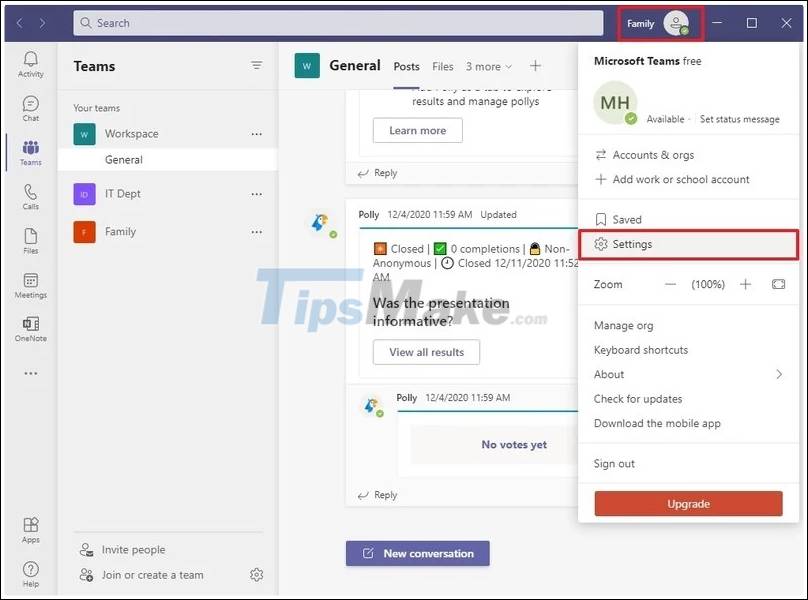
To configure camera settings on Teams, do the following:
Step 1: Open Microsoft Teams
Step 2: Click Profile in the upper right corner
Step 3: Select Settings
Step 4: Click on Devices
Step 5: In the Camera section, choose the right camera máy
Step 6: Confirm with the preview to make sure the camera is working
After completing the steps, call someone in your contacts to make sure the camera is working.
How to fix Microsoft Teams camera not working by enabling privacy settings
1. If Microsoft Teams can't access the camera, Windows 10 security settings may be causing the problem

To allow Teams access to the camera on Windows 10, perform the following steps:
Step 1: Open Settings
Step 2: Select Privacy
Step 3: Select Camera
Step 4: In the Allow access to the camera on this device section, Camera access for this device is on will be displayed, click the Change button
Step 5: In the Allow apps to access your camera section, switch to turn it on
Step 6: In the Allow desktop apps to access your camera section, switch to enable
After completing the steps, the application has access to the webcam
2. If the camera has a built-in microphone, you may also have to allow Teams access to the audio
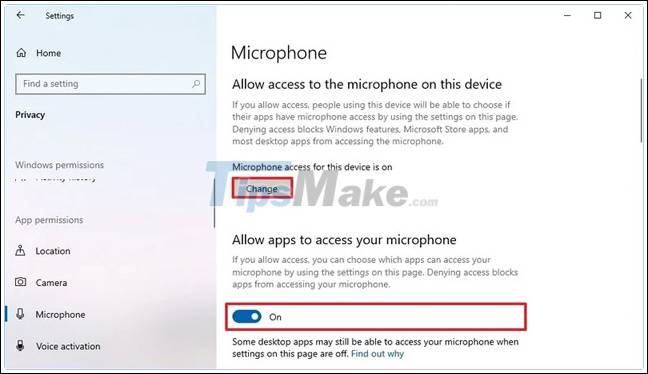
To allow Microsoft Teams to access the microphone, perform the following steps:
Step 1: Open Settings
Step 2: Select Privacy
Step 3: Select Microphone
Step 4: In the section Allow access to the microphone on this device, appear Microphone access for this device is on -> select Change
Step 5: In the Allow apps to access your microphone section, switch to turn it on
Step 6: In the Allow desktop apps to access your microphone section, switch to turn on
In addition, anti-virus software and other security applications can also prevent Teams from accessing the camera, so you need to disable Webcam protection in these software and applications or check the support website. their support for details on configuring security settings for camera access.
How to fix Microsoft Teams camera not working by allowing apps to access add-ons
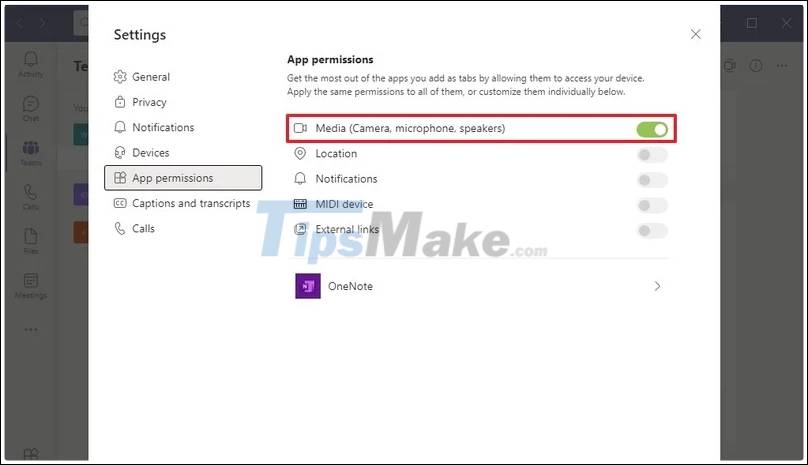
To allow the Teams add-on to access peripherals, perform the following steps:
Step 1: Open Microsoft Teams
Step 2: Click Profile in the upper right corner góc
Step 3: Select Settings
Step 4: Select App permissions
Step 5: Slide the Media button (Camera, microphone, speakers)
How to fix Microsoft Teams camera not working by updating app
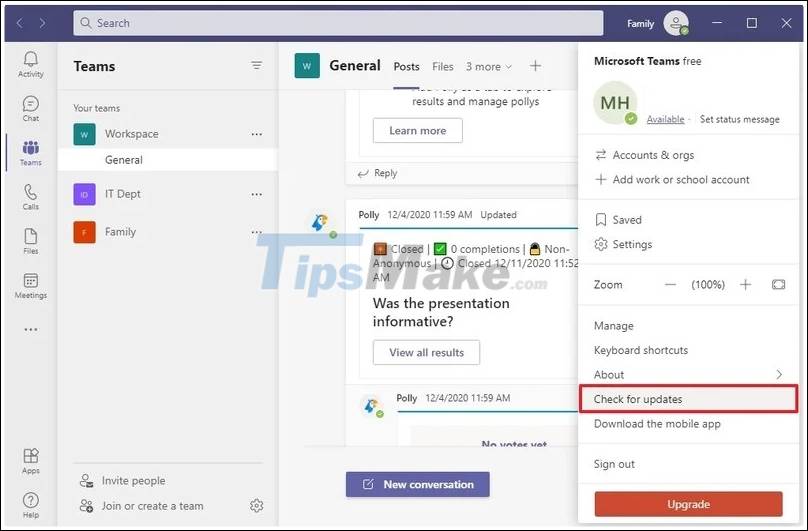
To check for updates on Microsoft Teams, follow these steps:
Step 1: Open Microsoft Teams
Step 2: Click Profile in the upper right corner góc
Step 3: Click Check for updates
Step 4: Close the Teams app
Step 5: Reopen the Teams app
After you complete the steps from the app settings, make sure the camera is working on the Device page. You can also make calls to someone to make sure the camera is on.
How to fix Microsoft Teams camera not working by reinstalling the app
1. Uninstall Teams
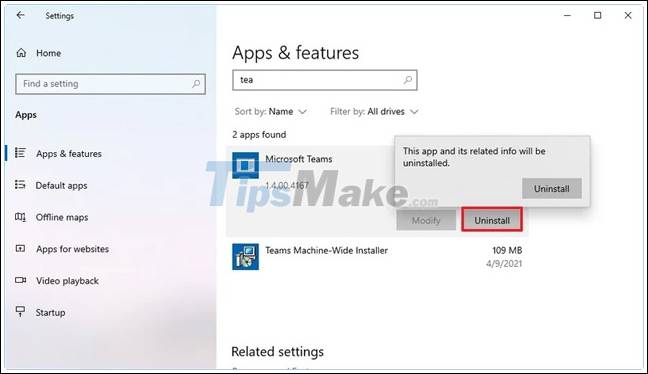
To uninstall Teams, follow these steps:
Step 1: Open Settings
Step 2: Select Apps
Step 3: Select Apps & features
Step 4: Select the Microsoft Teams app
Step 5: Select Uninstall
Step 6: Click Uninstall again to uninstall
2. Install Teams

Step 1: Open Microsoft Teams
Step 2: Click Download Teams
Step 3: Double-click the downloaded file to launch the installer
How to fix Microsoft Teams camera not working by updating driver
1. Update camera driver
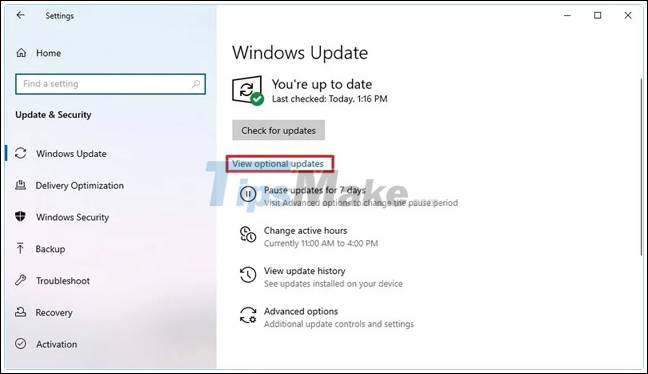
To update the webcam driver on Windows 10, do the following:
Step 1: Open Settings
Step 2: Select Update & Security
Step 3: Click Windows Update
Step 4: Select View optional updates
Step 5: In the Driver updates section, check for a newer version of the camera driver
Note: If it has nothing to do with the camera, Windows Updates does not have updates for the device.
Step 6: Select Download & Install
If Windows Update doesn't have a newer update available for the drive, check your manufacturer's support website to download and install the most up-to-date version according to their instructions.
2. Reinstall the camera driver
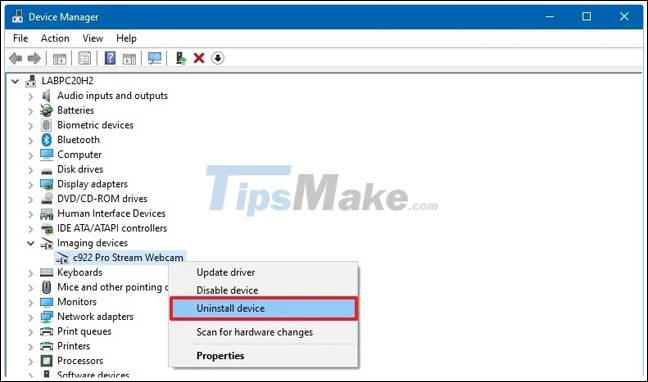
To uninstall and install the camera driver, use these steps:
Step 1: Open Start
Step 2: Search for Device Manager and click on the top result to open the app
Step 3: Select Imaging devices
Step 4: Right click on the webcam and select the option Uninstall device
Step 5: Click the Uninstall button
Note: If yes, you can also select the option Delete the driver software for this device to force the system to re-download the camera driver from Windows Update. However, if the driver is not listed on the Microsoft update server, you will need to download the driver from the manufacturer's support website.
Step 6: Select Actions
Step 7: Select Scan for hardware changes
3. Set the camera driver to the previous version
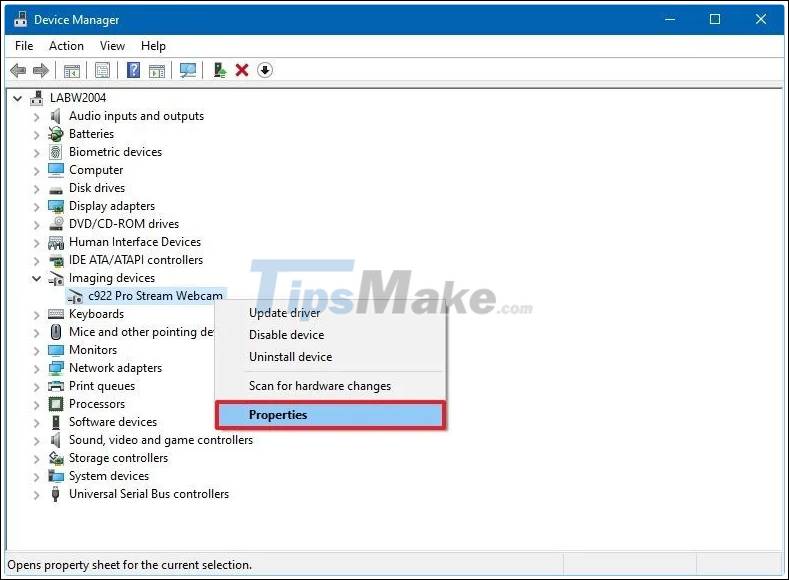
Sometimes, manufacturers may release driver updates with bugs or compatibility issues. If the camera worked before the update, rolling back to the previous version may resolve the issue with Microsoft Teams.
To install the previous version of the camera driver on Windows 10, follow these steps:
Step 1: Open Open
Step 2: Search for Device Manager and click on the top result to open the app
Step 3: Select Imaging devices
Step 4: Right click on the camera and select the option Properties
Step 5: Click the Driver tab
Step 6: Select Roll Back Driver
Note: If the option is greyed out, a backup copy of the previous version of the driver will no longer be available.
Step 7: Choose a reason to come back
Step 8: Select Yes
Step 9: Select Yes again
Step 10: Restart your computer
How to fix Microsoft Teams camera not working using web browser

To start a meeting with Microsoft Teams on a web browser, follow these steps:
Step 1: Open Microsoft Teams on the web
Step 2: Sign in with your credentials
Step 3: Select Use the web app instead
Step 4: Select organization (if any)
Step 5: Select Continue
Step 6: Select Chat
Step 7: Select the contact on the right side
Step 8: Select Video call from the top right corner
Step 9: Select Allow in the notification to allow the browser to access the camera
Browser Permissions
While using the web version of Teams can be an alternative when troubleshooting issues with the desktop app, it's important to configure browser settings to make sure the camera and microphone works correctly.