Table of Contents
To resize an image without stretching it, keep the original aspect ratio locked, enter either the target width or height, and let the software calculate the other dimension. Save the result as a new file so you can return to the full-resolution original.
What image resizing changes
Reducing pixel dimensions usually makes an image easier to upload and can reduce its file size. Enlarging an image creates more pixels but does not restore detail that was never captured, so a large increase can look soft or pixelated. “No quality loss” is therefore not a realistic promise for every resize.
- Pixel dimensions control the width and height of the image on screen.
- Aspect ratio is the relationship between width and height. Lock it to prevent distortion.
- File format and compression affect file size and visible quality. JPEG suits most photographs; PNG is useful for graphics or transparency.
Resize a single image with Microsoft Paint
- Right-click the image, choose Open with, then select Paint.
- Select Resize on the toolbar. You can also press Ctrl+W.
- Choose Pixels for exact dimensions or Percentage for a proportional change.
- Leave Maintain aspect ratio enabled, then enter a horizontal or vertical value.
- Select OK, then use File > Save as to create a copy in the required format.
Paint is convenient for occasional resizing. For more editing controls, Paint.NET can resize and edit images on Windows.
Resize multiple images at once
A batch resizer applies the same size rule to many files. This is useful for website thumbnails, email attachments or a set of product photos. Before processing a folder, copy the originals to a separate location.
- Add the source files or folder.
- Choose a resize rule such as a maximum width, maximum height or percentage.
- Keep the aspect ratio enabled and decide whether smaller images should be enlarged.
- Select an output format, quality level, destination folder and filename pattern.
- Process a few test files and inspect them before running the full batch.
For a practical batch workflow, see how to process multiple photos with XnConvert. The same application's actions can be configured for resizing rather than watermarking.
Using the legacy Free Photo Converter interface
The screenshots below show an older program called Free Photo Converter. Its interface can still explain the basic workflow, but confirm that any installer is current, trustworthy and obtained from its official publisher before installing it.
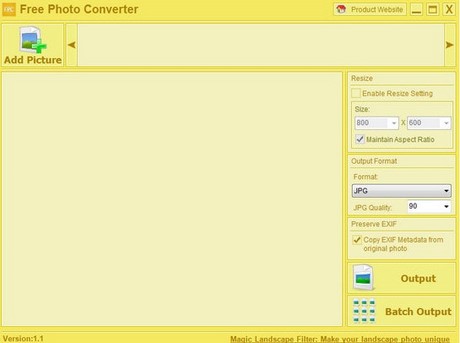
1. Open the program
After installation, launch the application and review its source, resize and output controls.
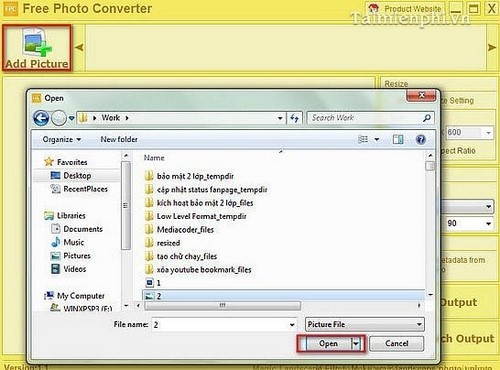
2. Add an image
Select Add Picture, choose the source image and click Open. Add only copies if you are unsure whether the program can overwrite originals.
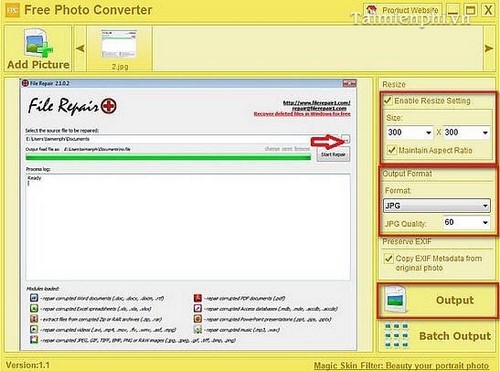
3. Configure size and output
Enable the resize setting, enter the required dimensions and keep the proportions locked. Choose an output format and a separate destination folder, then start the conversion.
How to choose output settings
- Web photos: export a JPEG copy and balance its quality setting against file size.
- Logos, screenshots and transparent graphics: use PNG when its larger file size is acceptable.
- Printing: keep more pixels than you would for a small web image and avoid repeatedly saving over a JPEG.
- Unknown target: retain the original and create separate copies for web, email or print.
Common resizing problems
- The image looks stretched: undo the change and enable the aspect-ratio lock.
- The enlarged result is blurry: use a higher-resolution source or choose a smaller output size.
- The file is still too large: reduce dimensions further or adjust the export quality; changing dimensions alone may not be enough.
- Text or line art looks fuzzy: export from the original design at the target size instead of enlarging a small raster copy.
Related Articles
 In This Way, Resizing Images in Bulk Will Not Take Much Effort as3 minutes read
 Instructions for Resizing Images in Windows 10 Series5 minutes read
 5 Best Best Image Resizing Software and How to Use It6 minutes read
 How to Resize Photos Without Software Is Extremely Fast and Easy4 minutes read
 3 Best Photo Resizing Software, Resizing Photos on the Best Computer4 minutes read
 Instructions for Resizing Photos with Pic Resize Online4 minutes read
Reader Comments 0
Sign in with email or Google to join the discussion.