Table of Contents
During the photography process, unwanted details such as strangers appearing in the frame, extraneous objects, signs, power lines, or other distracting elements can sometimes detract from the beauty of the photo. Instead of using complex editing software, you can now easily remove these details thanks to Google Photos' automatic object removal feature.
With its intelligent photo editing technology, Google Photos can identify and remove unwanted objects, making photos cleaner, more natural, and more focused on the main subject. This feature is especially useful when you want to improve travel photos, portraits, product photos, or important moments without needing extensive editing experience.
In this article, we'll learn how to remove unwanted details from photos using Google Photos completely automatically.
How to automatically remove unwanted details in Google Photos
Step 1:
In the Google Photos app interface, tap the image you want to edit. Then tap Edit below the image. You will see several photo editing tools; tap the Magic Eraser .
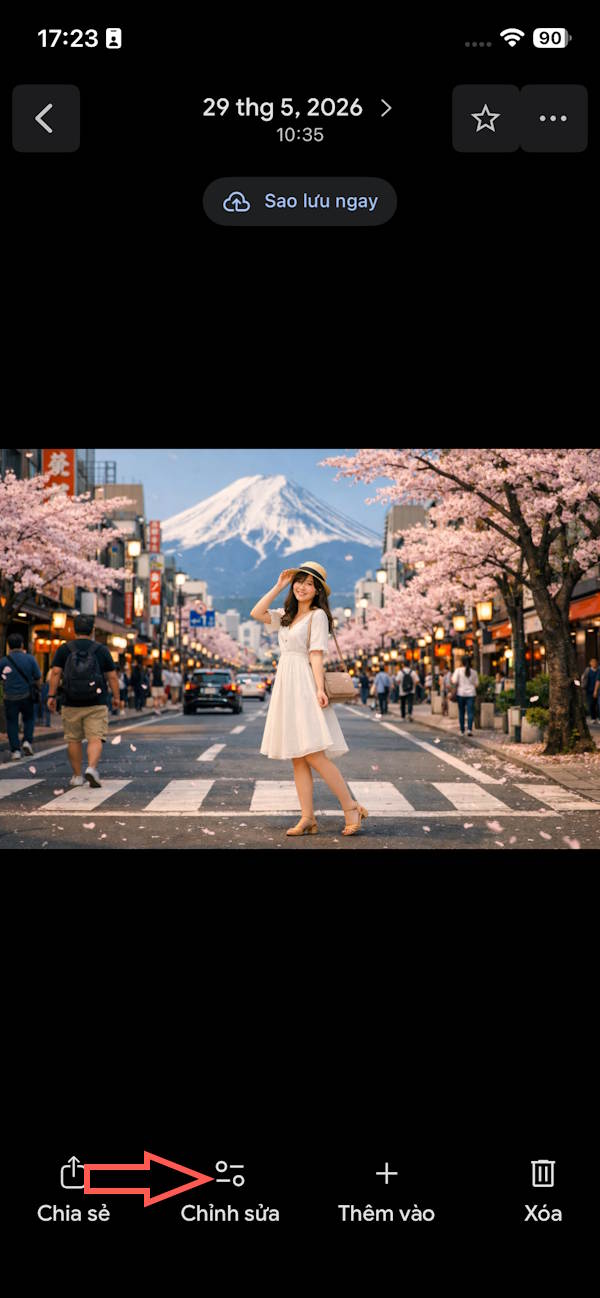
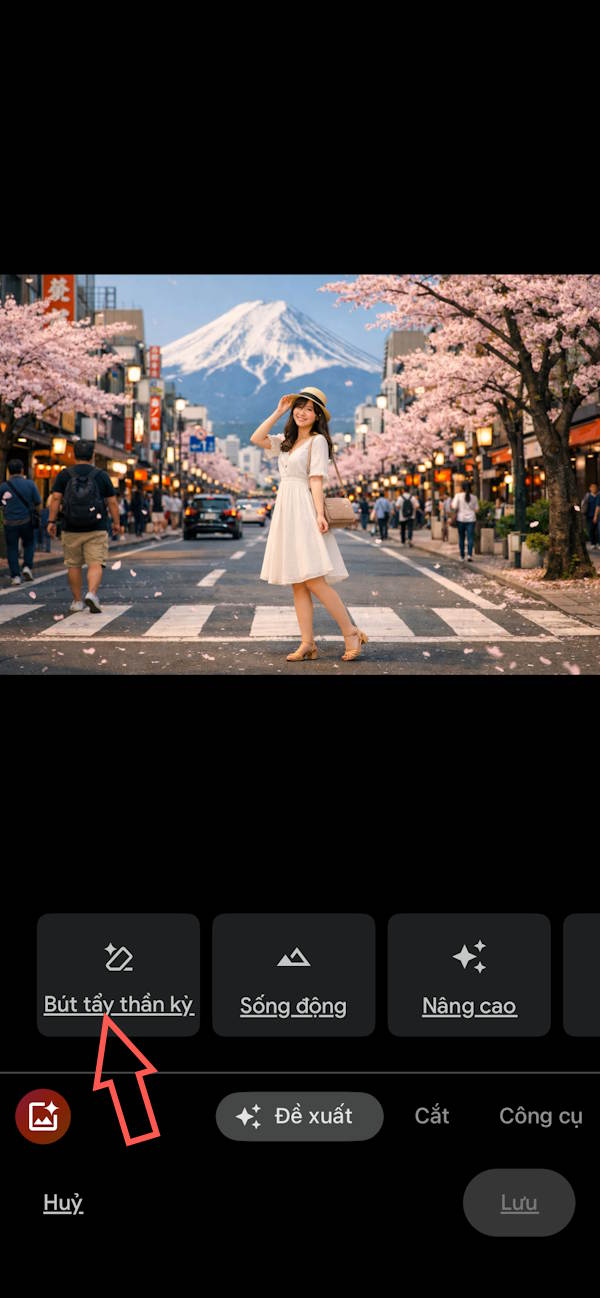
Step 2:
At this point, the tool will recognize the image and identify the main subject in the image and any unnecessary details around it. Once confirmed, it will automatically highlight those details precisely.
To remove unwanted details from a photo on Google Photos, simply tap "Remove All" . Your resulting photo will no longer have those unwanted details.
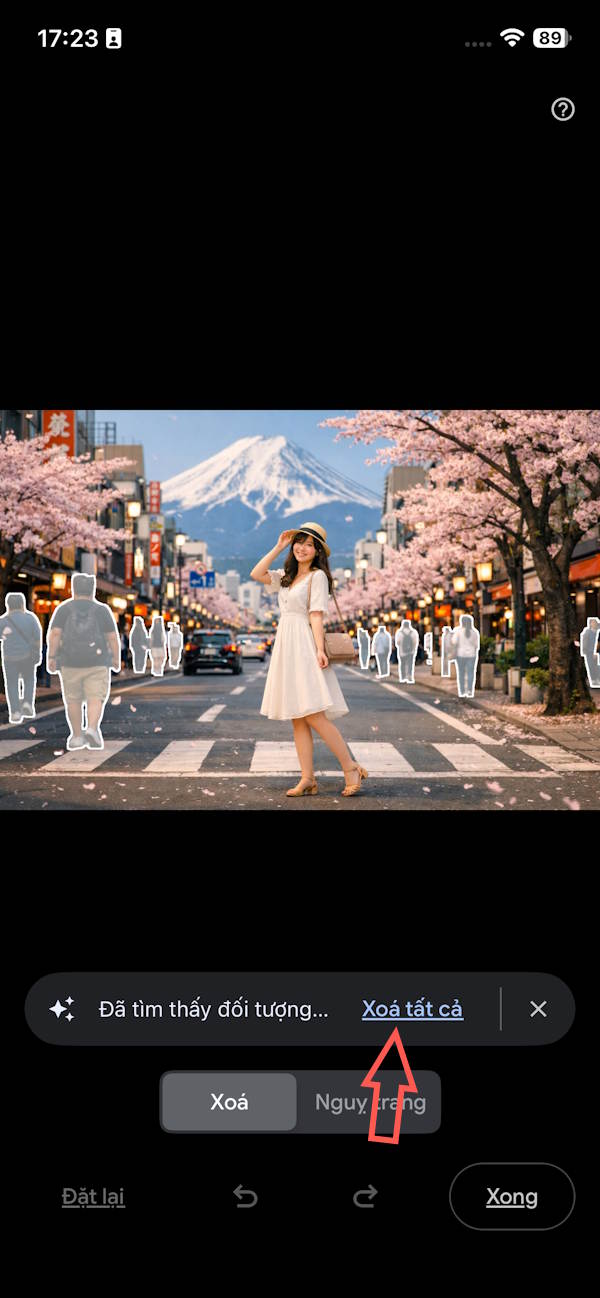
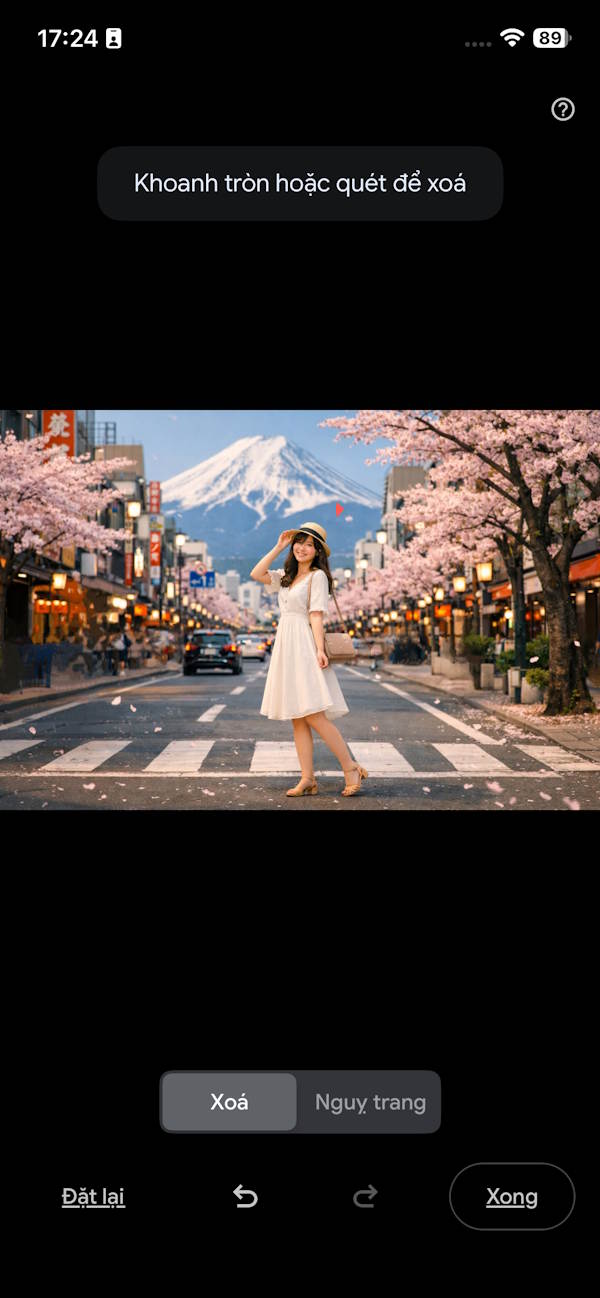
Things to keep in mind when removing unwanted details from photos using Google Photos.
Although the feature to remove unwanted details in Google Photos makes photo editing quick and convenient, to achieve the most natural results, you still need to pay attention to a few factors during use.
1. Choose a high-quality image.
The quality of the original image directly affects the tool's ability to recognize and remove objects. Clear, well-lit photos with prominent subjects will generally yield more accurate editing results.
Conversely, blurry, underexposed, or overly detailed photos can make it difficult for Google Photos to accurately identify what needs to be removed.
2. Avoid deleting too many details at once.
The object removal feature works best when dealing with small details such as passersby, extraneous objects, or distracting elements in a photo.
For large areas or those with many details related to the main composition, removing them can make the image look unnatural. You should edit small sections at a time and check the results after each adjustment.
3. Review the image after editing.
After Google Photos finishes removing unwanted details, you should review all the images to ensure there are no editing errors.
Some issues may arise, such as distorted areas in the image, inconsistent colors, or the background not being naturally reproduced after removal. Checking again helps you get a more polished image before saving or sharing.
4. Avoid making too many changes compared to the original image.
AI tools are designed to remove unwanted elements, not to completely alter the content of a photograph. Removing too much detail can cause the image to lose its original authenticity.
You should use this feature to enhance your photos, highlighting the subject, rather than over-editing them.
How to manually remove objects from photos in Google Photos
Step 1:
Open the Google Photos app, then tap the image you want to edit . In the photo interface, tap Edit to proceed.

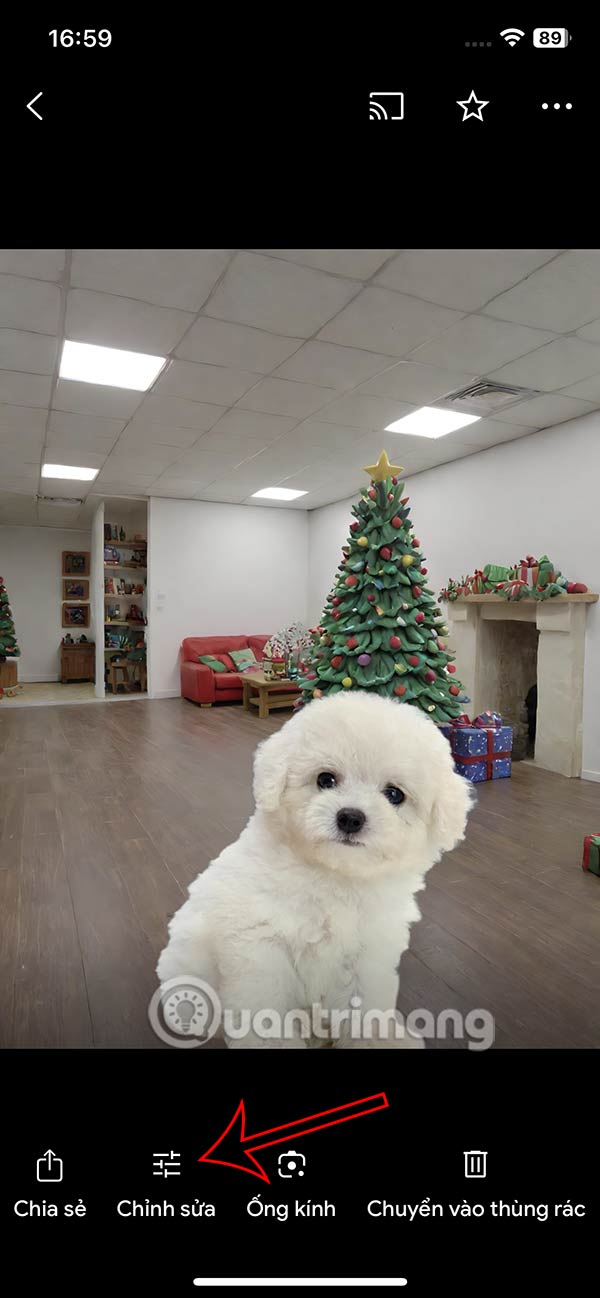
Step 2:
Next, click on the image icon in the bottom left corner. The object deletion interface will then appear; proceed to select the area around the object you want to delete .
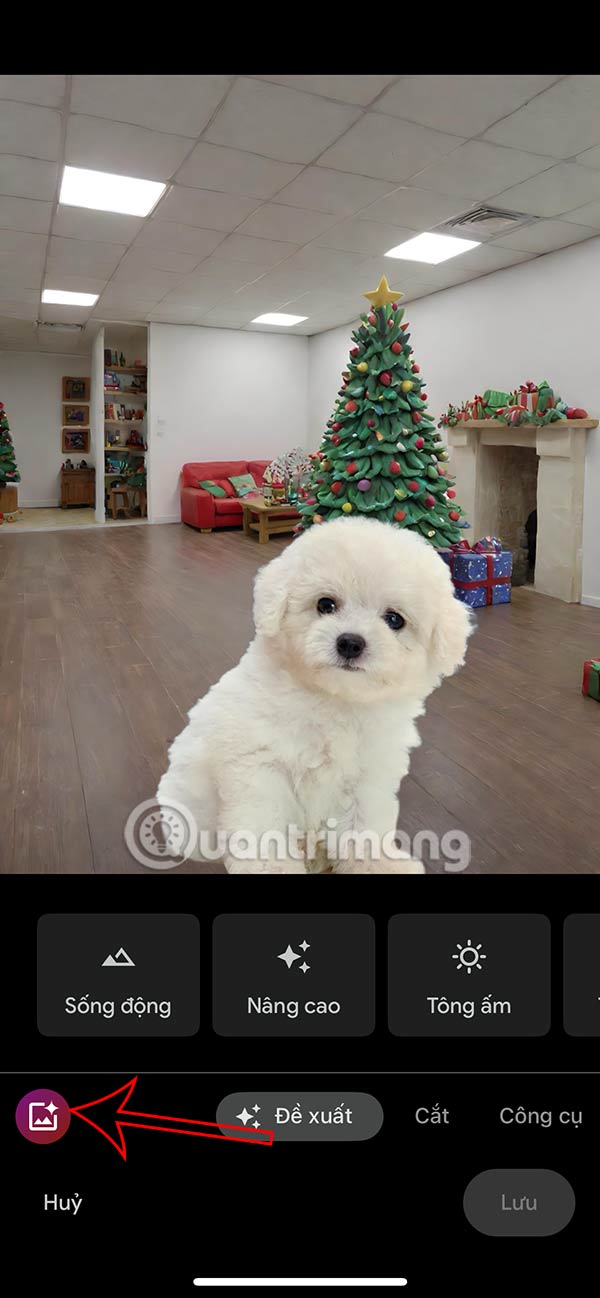


Step 3:
The selected object is shown in the image. If the user wants to make changes, they can click Adjust . Here, they can remove or add areas to be circled . If satisfied, click Done to save the selection .
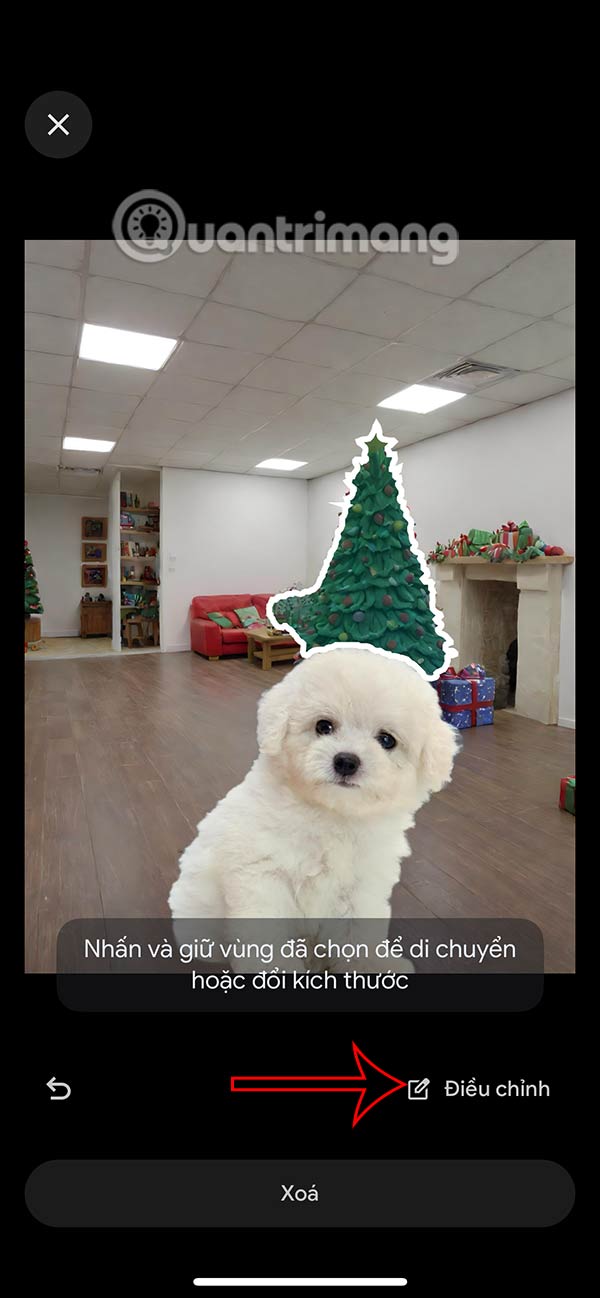
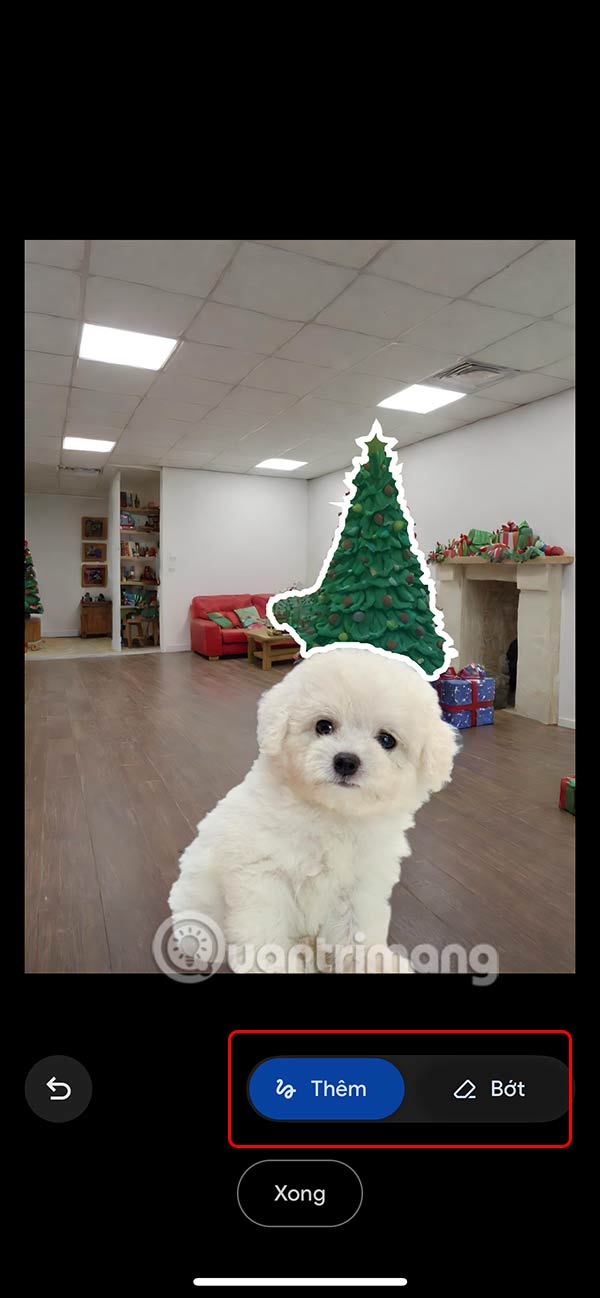
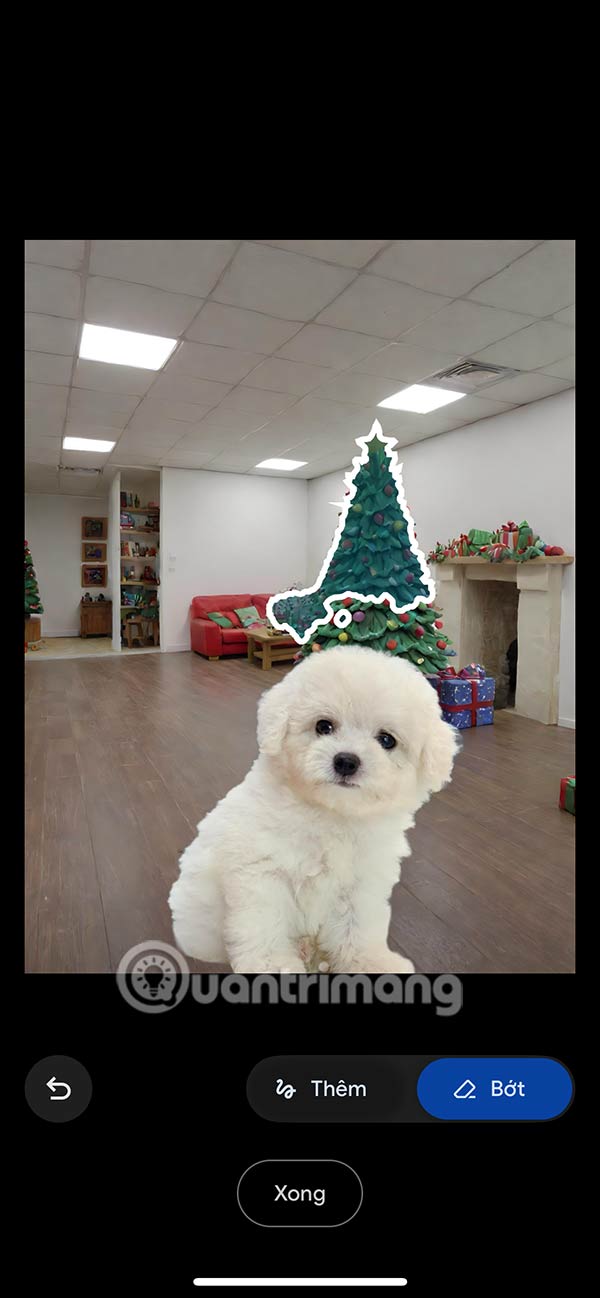
Step 4:
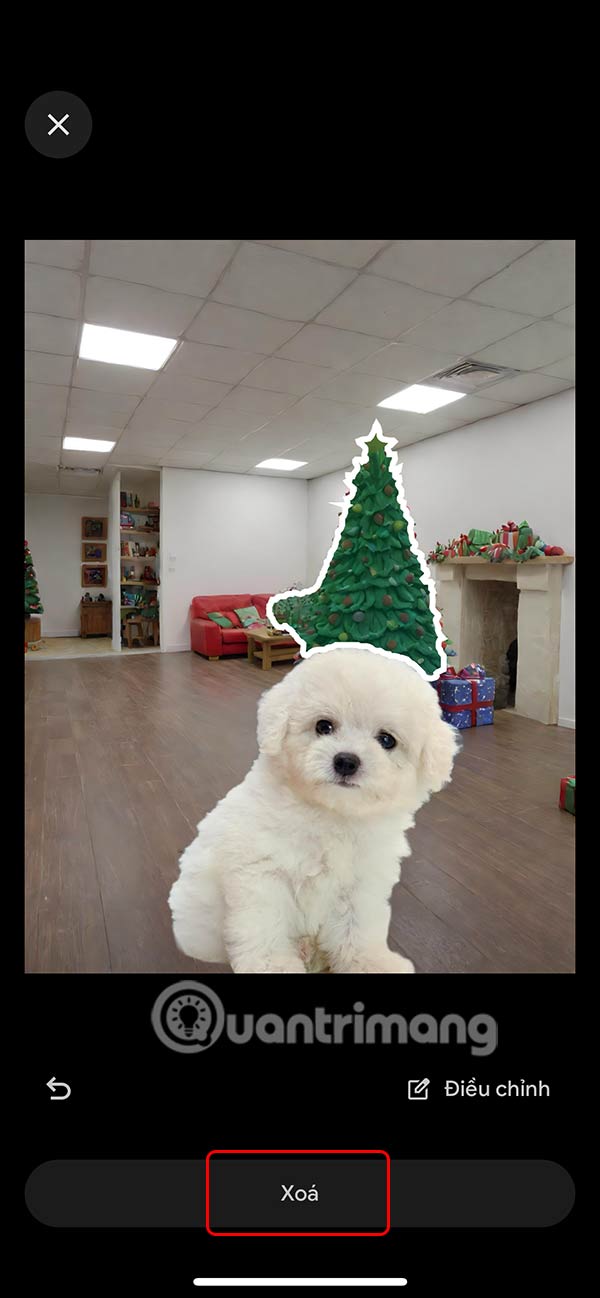
Tap Delete to remove the object from the photo on Google Photos. You will see the object removed and replaced with another object, as shown in the image. Swipe right to see more edited photos.
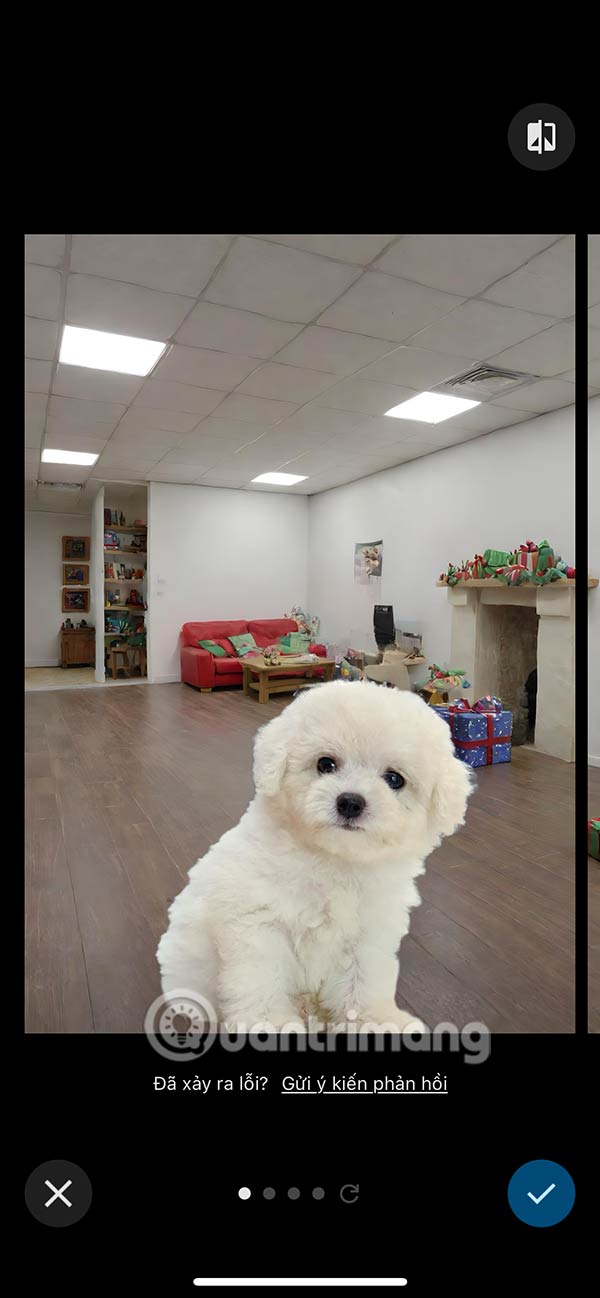
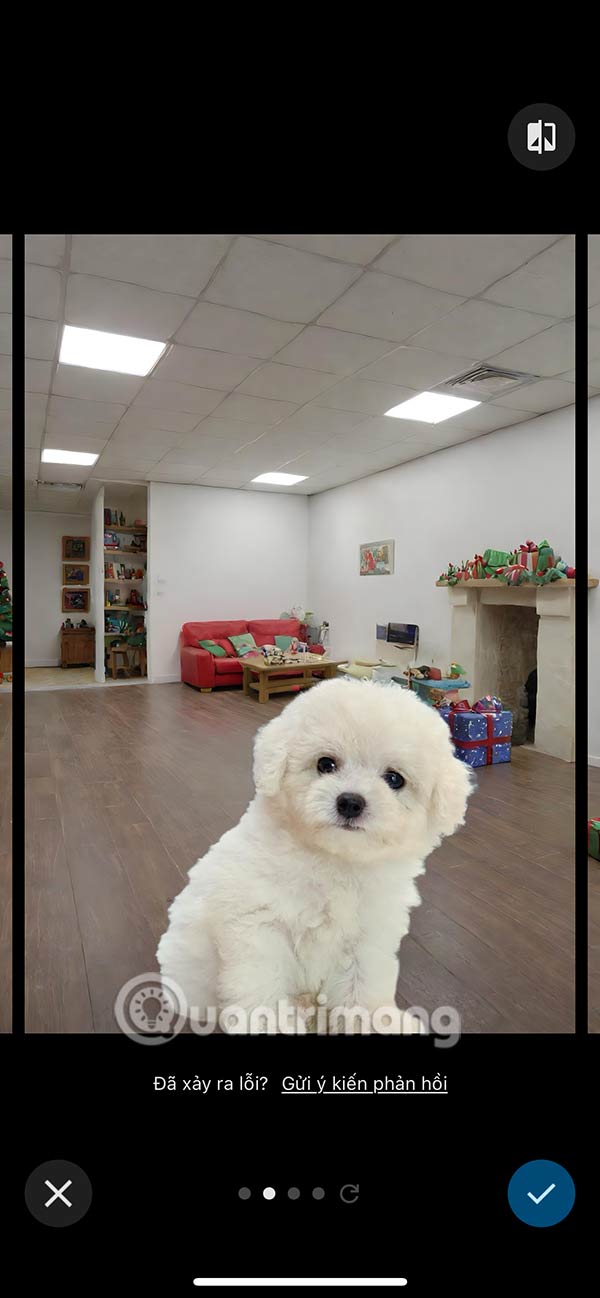
Google Photos offers several different categories of photos with objects removed for you to choose from; if you like one, tap the checkmark to save it.

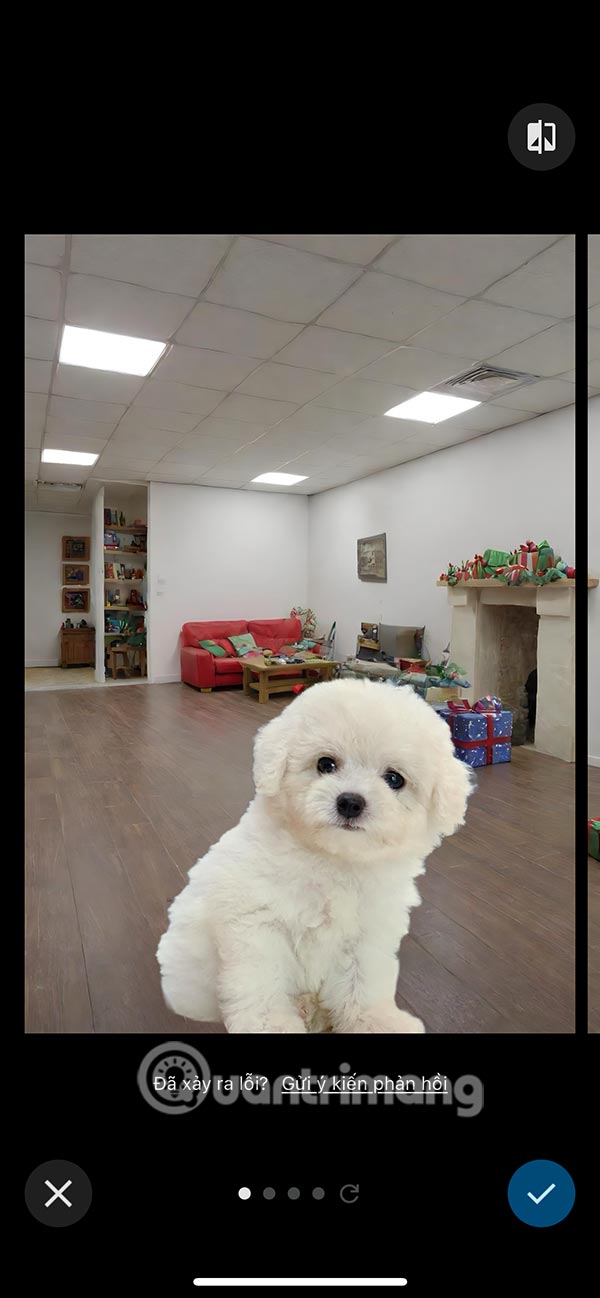
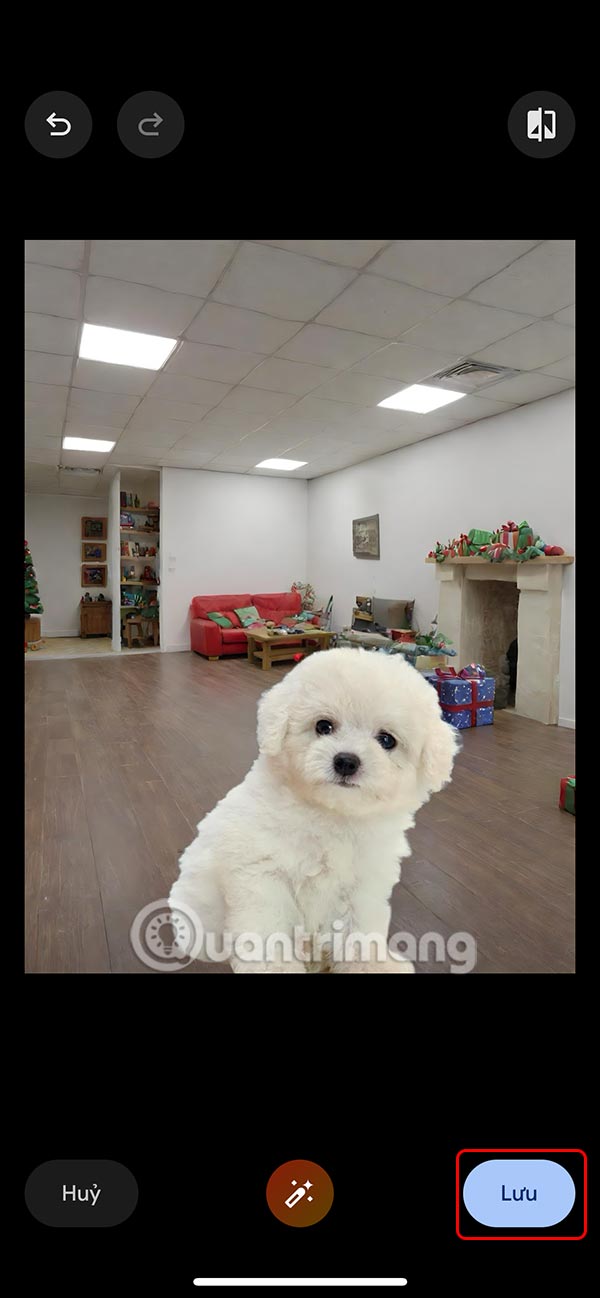
Finally, press Save to save the image and choose whether or not to replace the previous image.

Video tutorial on removing objects from photos in Google Photos.
Related Articles
 Good tips make it easy to remove unwanted details from your photos
 How to Remove Unwanted Objects from Photos Using Adobe Express's Remove Objects
 How to remove pixels in GIMP
 How to automatically add photos to albums on Google Photo
 Instructions for automatically backing up folders to Google Photos
 How to remove subjects in photos on Google Photos
Reader Comments 0
Sign in with email or Google to join the discussion.