Table of Contents
High Quality Photo Resizer is a legacy Windows utility for resizing and converting multiple images. To install it, verify the source and compatibility first, then work through the language, destination, shortcut and installation screens shown below. Because the software was designed for older Windows releases, test it carefully before relying on it for important files.
Check the installer before running it
- Download the application only from the developer's official site or a source you have independently verified.
- Scan the installer and check the publisher shown by Windows.
- Create a restore point if you are testing old software on a production computer.
- Keep original photos in a separate folder; resizing cannot recreate detail removed from a small copy.
If the installer is incompatible with your Windows version, use a maintained alternative. TipsMake explains how to resize photos with Image Resizer for Windows, and also compares broader image-compression tools.
Install High Quality Photo Resizer
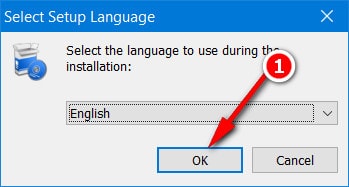
1. Choose the setup language
Open the verified installer, select a language you understand and click OK. English is not required if the installer provides another language you prefer.
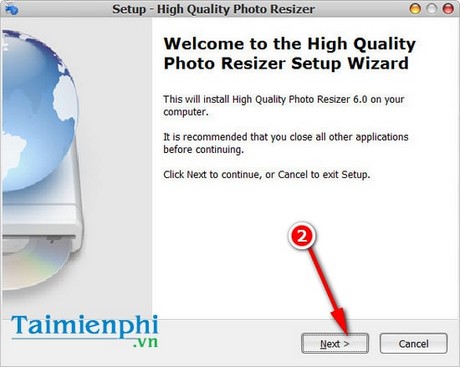
2. Continue from the welcome screen
Confirm that the window names High Quality Photo Resizer and then click Next.
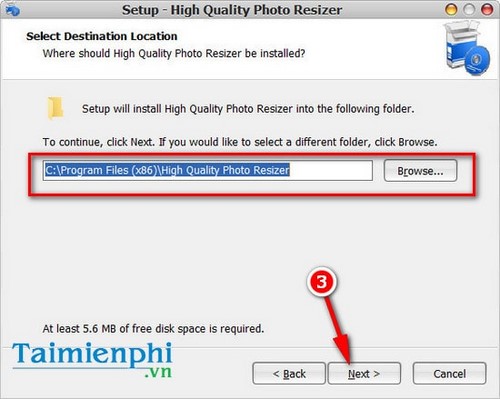
3. Choose an installation folder
Leave the default location unless you have a specific reason to change it. Select Browse for another approved folder, then click Next.
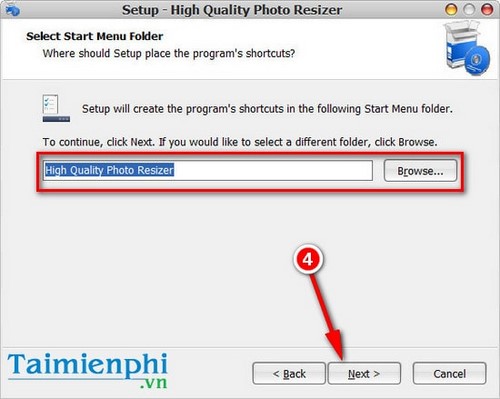
4. Choose the Start menu folder
The next screen controls where the application shortcut appears in the Start menu. Keep the default or select another folder, then continue.
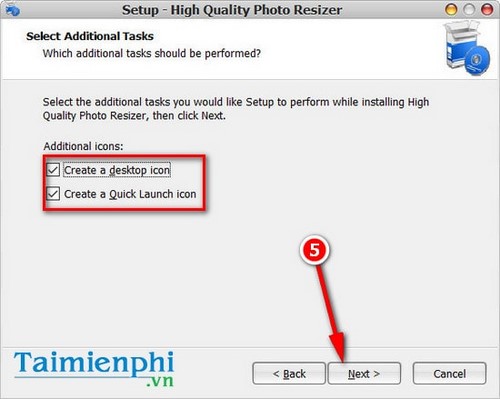
5. Select shortcut options
Create a desktop icon only if you want one. A legacy Quick Launch option may not be relevant on current versions of Windows.
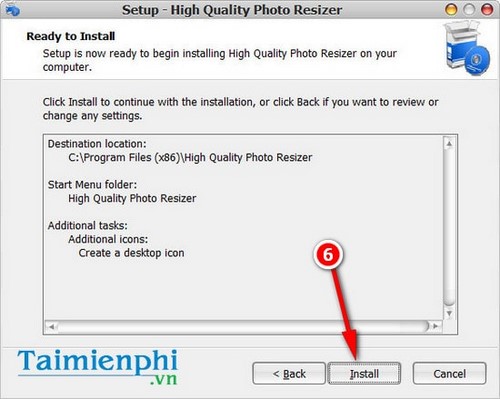
6. Review and install
Check the destination and shortcut selections. Click Install only if they are correct.
7. Complete setup
Wait for the installer to finish. If an error appears, record the exact message rather than repeatedly running an incompatible package.
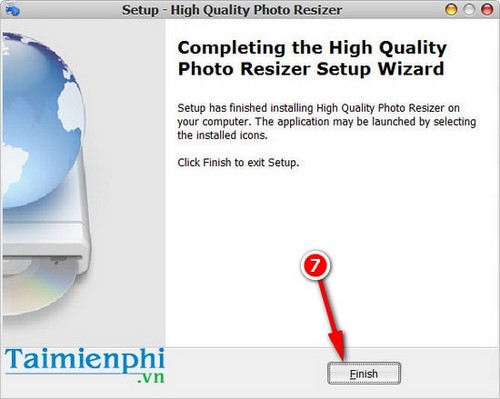
Click Finish. Leave the launch option enabled only if you want to test the program immediately.
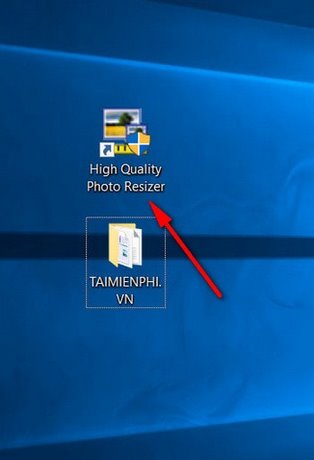
What to check after installation
Open the main interface and process copies of a few non-critical images first.
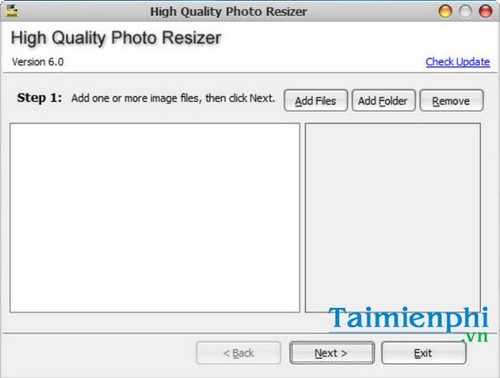
- Confirm that the program can open the source format and save to the required output format.
- Lock the aspect ratio so images are not stretched.
- Select a separate output folder and do not overwrite originals during the first test.
- Open the resized files at 100% zoom and check text, faces and sharp edges.
- Uninstall the program if it is unstable, displays unexpected advertising or asks for permissions unrelated to image processing.
Resizing and compression are different
Resizing reduces pixel dimensions. Compression changes how image data is stored. Either can make a file smaller, but aggressive resizing or lossy compression can reduce visible quality. Choose the dimensions required by the website, email or document, then use the lightest compression that meets its file-size limit.
Related Articles
 How to Batch Edit Photos with Faststone Photo Resizer8 minutes read
 Easily Edit Image Sizes in Vista and XP3 minutes read
 How to Reduce Photo Size in Batches with High Quality Photo Resize6 minutes read
 Reduce Image Size Using Radical Image Optimize Tool (RIOT)4 minutes read
 How to Improve JPEG Image Quality: Practical Guide23 minutes read
 Photo Compression Tips for the Highest Quality7 minutes read
Reader Comments 0
Sign in with email or Google to join the discussion.