Table of Contents
Reinstalling the Wi-Fi driver can repair an adapter that disappears, refuses to enable, drops connections, or stops working after an update. Try a restart and the built-in troubleshooter first. If other devices also cannot connect, troubleshoot the router instead of changing the PC driver.
Before uninstalling the driver
- Download the replacement driver before removing the current one. Use the laptop, motherboard, or Wi-Fi adapter manufacturer's official support page.
- Match the exact model, Windows edition, and system architecture. Avoid third-party driver updater utilities.
- Save the installer locally or on a USB drive. If possible, keep Ethernet or phone tethering available as a fallback.
- Record any custom IP, DNS, VPN, or enterprise Wi-Fi settings.
Identify the Wi-Fi adapter and current driver
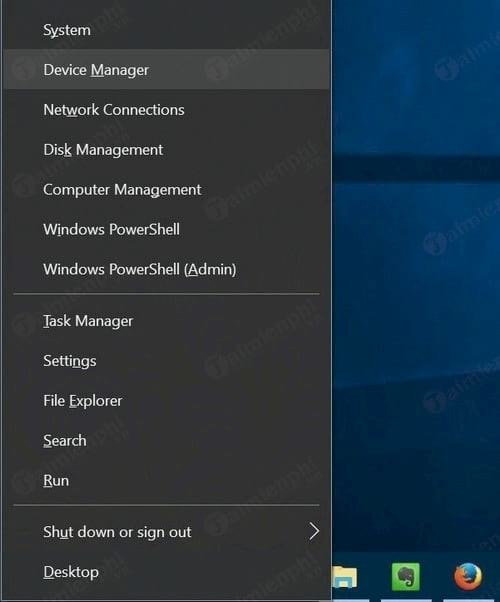
- Right-click Start and choose Device Manager.
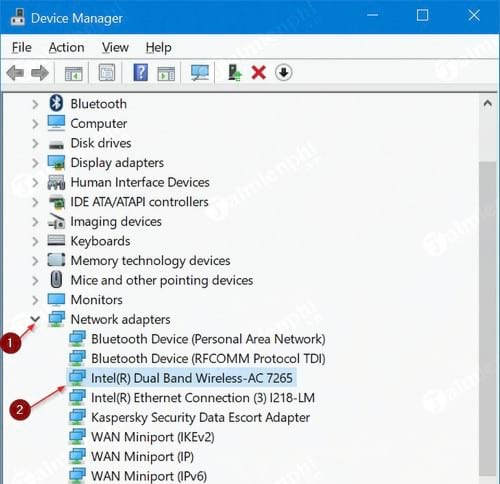
- Expand Network adapters. The wireless device commonly includes terms such as Wireless, Wi-Fi, WLAN, 802.11, Intel, Realtek, Broadcom, Qualcomm, or MediaTek.
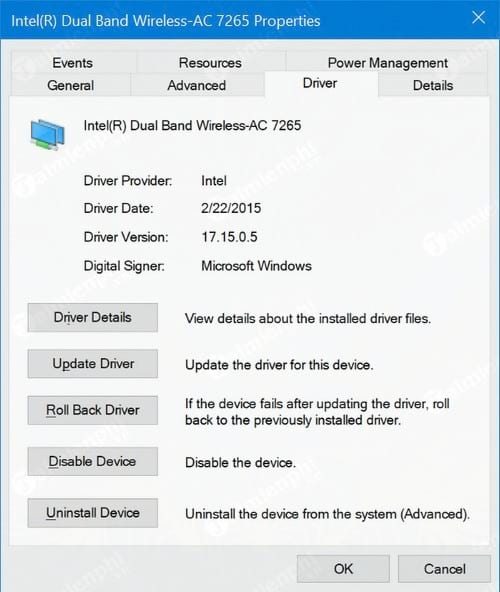
- Right-click the adapter, select Properties, and note the Driver Provider, Driver Date, and Driver Version. Under Details, the Hardware Ids property can confirm the exact model.
Try update or rollback first
If the problem began immediately after a driver update, use Properties > Driver > Roll Back Driver when the button is available. Otherwise, select Update driver and check Windows Update, including its optional driver updates. The broader Wi-Fi troubleshooting guide can help determine whether a reinstall is actually necessary.
Uninstall and reinstall the Wi-Fi driver
- In Device Manager, right-click the wireless adapter and choose Uninstall device.
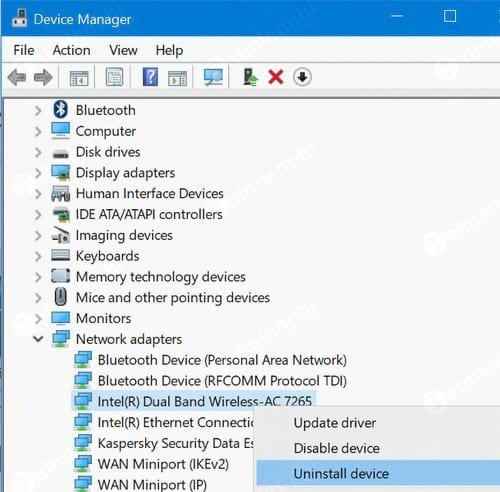
- At the confirmation prompt, first leave Delete the driver software for this device unchecked if it appears. This gives Windows a better chance of restoring the existing package automatically. Select Uninstall.
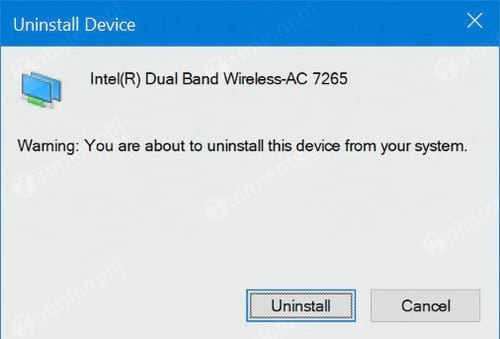
- Restart the PC. Windows normally detects the adapter and loads a compatible driver.
- If Wi-Fi is still unavailable, run the official driver installer you downloaded and follow its prompts.
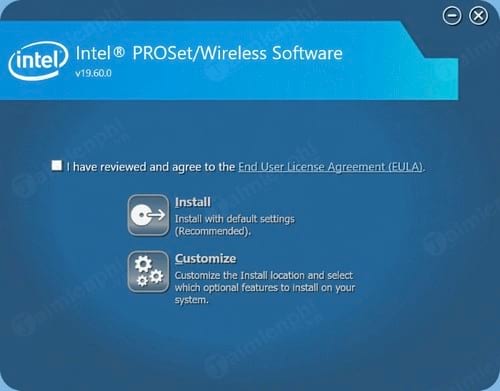
Restart again if requested, reconnect to the wireless network, and test both browsing and a sustained download.
If the adapter does not return
- In Device Manager, choose Action > Scan for hardware changes and View > Show hidden devices.
- Check that Wi-Fi is enabled in Windows, the laptop's wireless key or switch, and firmware settings.
- Look under Other devices for an unknown network controller; install the manufacturer package manually if one appears.
- Test a full shutdown and restart. If the device never appears, the adapter, its connection, or firmware may have failed.
For an address beginning with 169.254 after the driver returns, use the separate IP 169 troubleshooting steps; reinstalling the driver alone may not repair a DHCP or router problem.
Related Articles
 How to Reset Graphics Driver on Windows 11: Step-by-Step Guide4 minutes read
 How to Reinstall Audio Driver on Windows 10, 114 minutes read
 How to Reinstall WiFi Driver: Practical Guide7 minutes read
 How to Uninstall and Reinstall Wi-Fi Drivers on Windows 116 minutes read
 Install/reinstall GPU Driver on Windows: Step-by-Step Guide11 minutes read
 How to Reinstall Audio Drivers on Windows 104 minutes read
Reader Comments 0
Sign in with email or Google to join the discussion.