Networking Ubuntu 8.04 and Windows - Part 2
Network Administration - In the first part of this series, we helped you enable Windows sharing (SMB), configure Workgroup and Computer Name values in Ubuntu. In this part 2, I will introduce you to the network interface in Ubuntu. You can connect, check the connection details and browse connected computers on the network in the Linux world.
 Networking Ubuntu 8.04 and Windows
As in today's operating systems, Ubuntu has a network icon on the main toolbar; As you can see in Figure 1. Once connected to a wireless network, this icon will display the signal strength. The icon itself shows you the signal level with four intensity lines, when you hover over this icon, you will see the SSID (or network name) and the signal strength as a percentage.
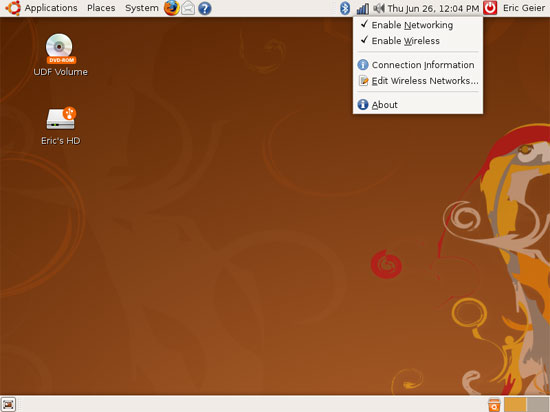
Figure 1
Right-clicking on the network icon will allow you to disable or enable all network connections, not just wirelessly. From the drop-down menu, you can access a shortcut to the Connection Information window, which will show you detailed information about your network connection, such as speed (data rate), location. IP address as well as MAC address. In addition, this menu provides a shortcut to the wireless network manager, where you can edit the encryption keys used for secure networks.
A simple left click on the network icon will bring up another drop-down menu, as you can see in Figure 2. You will see a list of available wireless networks in your area, along with that. is the signal strength. Secure encrypted networks will display an icon to the left of the signal strength bar. The radio button of the network to which you are currently connected will be marked. To connect to a wireless network, simply click on the network you want.
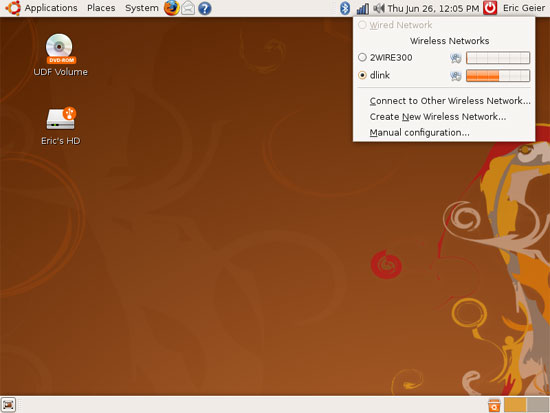
Figure 2
The menu also provides you with three other shortcuts: Connect to Other Wireless Network - Connect to other wireless networks so you can connect to hidden networks or not promote, Create New Wireless Network - create a new wireless network to create computer-to-computer or ad-hoc peer connections, Manual Configuration - take you to the Network Settings window, where you can set a static IP address for your network connection and set up a Workgroup or Domain and Computer (Host) Name.
As mentioned in the previous section, you can see the details for your connection by opening the Connection Information window. To open this window, right-click the network icon and click Connection Information . You should see results similar to those shown in Figure 3, a similarity to the Network Connection Status window of Windows XP by double clicking on the network icon.
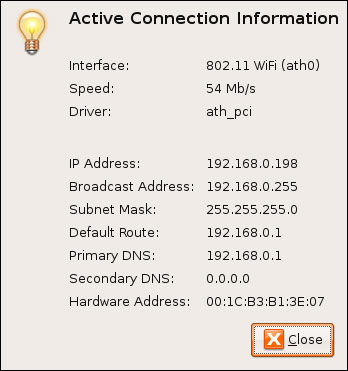
Figure 3
Speed is the speed of data (theoretically) according to Mbps, which is the speed of the data you are connected to the network. If there are the latest wireless devices, 802.11n products, this value can be over 54 Mbps, while for 802.11g devices, your network connection speed is only up to a maximum of 54 Mbps. If you are using an older 802.11b product, this data rate may be even lower, around 11 Mbps.
The IP Address field is the address of your computer, or the address for the network adapter you are using. All devices and computers on your network have their unique IP address. This address helps identify computers on the network and can be used by users to access shared computer resources.
Subnet Mask is the definition of the subnet or part of the range of IP addresses you are using. You will only have to reference this value if you set a static IP address for your computers. The Default Route value is the router's IP address that you can use to access its web configuration utility.
The last information you are interested in in the Connection Information window is the Hardware Address . In most utilities and other documents, you will see this value as a physical address or MAC (Media Access Control) address. You can compare with a motorcycle or automobile registration number, or a product's serial number. Every network product has its own MAC address and is used for identification purposes. Only when setting up the MAC address filter on your router will you need to consider this value, which will better protect your wireless network from unauthorized intruders within the range.
Along with the ability to access the Network Settings window by clicking the network icon and selecting Manual Configuration, you can click System | Administration | Network . When the window appears (as shown in Figure 4), to make changes, click the Unlock button, enter your account password and click the Authenticate button.
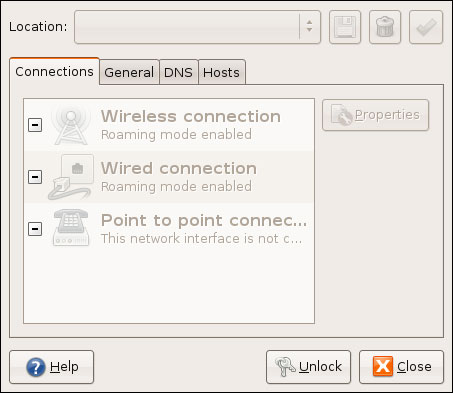
Figure 4
On the Connections tab, you can double-click the connection type (for example, to configure its settings), its IP address settings to configure static addresses. On the General tab, you can change Host (or Computer) Name; although you can configure Domain Name (or Workgroup) somewhere like what was introduced in Part 1. DNS tabs and Hosts contain advanced settings that you may not need at this time.
To finish off a menu of menus, windows and Ubuntu's network connection settings, consider the Network window, as shown in Figure 5. Here, you can browse to computers. and files on your network. You can access this window by clicking Places and selecting Network , or by clicking the Network Servers icon when you are in the File Browser window.
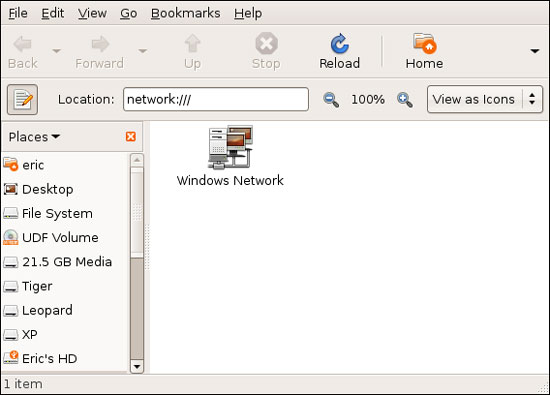
Figure 5
To view files from your Windows computers, first double-click the Windows Network icon. Then double-click on the Workgroup that your computer resides on. Double-click the computer you want to access, identified by their Computer Names. Finally you can browse to the shared folders of this computer.
In the next part of this series, I will show you how to share files and printers in Ubuntu.