Learn about Permission and Role Based Access Control - RBAC part 2
In the previous section of the article, we showed you how to set up and configure the level of authorization with RBAC - Role Based Access by deploying Predefined Role Groups via the graphical interface of the Exchange Control Panel. However, when faced with the need to set more decentralization levels than Predefined Role Groups ....
TipsMake.com - In the previous part of the article, we have shown you how to set up, configure the level of decentralization with RBAC - Role Based Access Control by deploying Predefined Role Groups through the graphical interface of Exchange Control Panel . However, when it comes to the need to set more decentralization levels than Predefined Role Groups can support, this is the time we should use Exchange Management Shell to handle.
Check RBAC settings via Exchange Management Shell:
In this section, we will show you how to view technical information in the Exchange Management Shell as well as in the Exchange Control Panel.
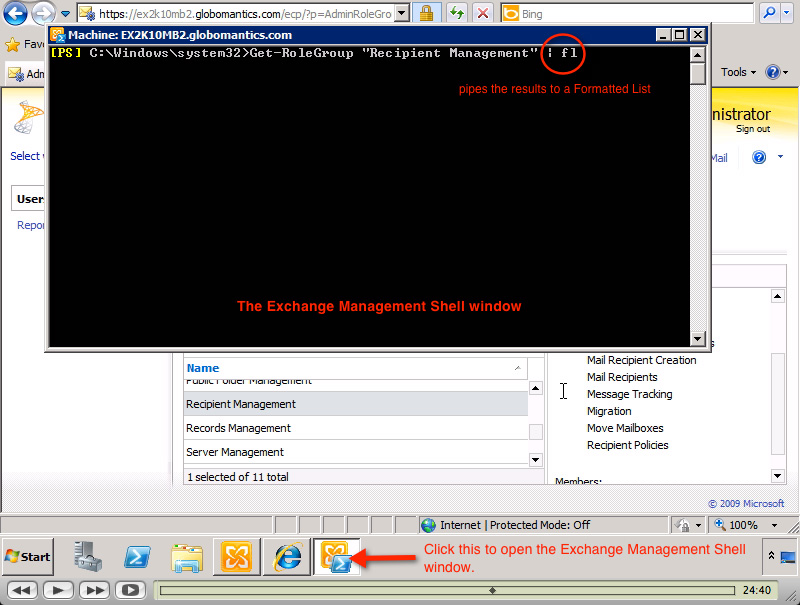
For example, we can apply the Exchange Control Panel mode (screenshot below) to check the Assigned Roles that belong to the role group Recipient Management:

And if you want to do so in the Exchange Management Shell, then type the command:
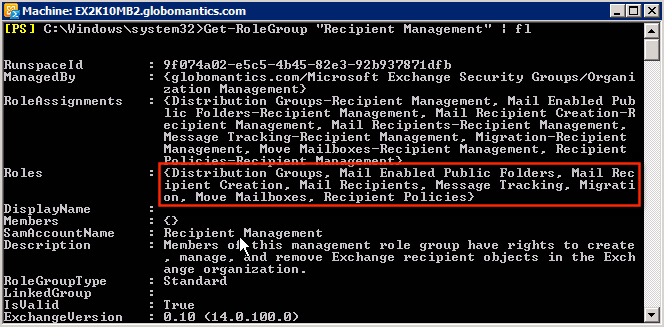
Get-RoleGroup 'Recipient Management' | fl
This is the system result displayed when we press Enter. Note that the Assigned Roles information (in the red box) will display correctly with the above 2 screenshots. Besides the role, you can also see the brief description - Description of the corresponding Recipient Management and member role group (at this time is empty) and many other information:
However, what we have seen here has not shown any advantages of the Exchange Management Shell compared to the Exchange Control Panel.
To find out more, we will have to refer to the sample model as shown below. For example, your company has decided to hire a few administrators to practice, your task is to assign them certain levels of authority to set up and configure related components. such as Office, Phone no., Mobile no., Department and Managers.
As mentioned in Part 1 of the article, we can easily do this by assigning each Admin account to the full Mail Recipients role. However, doing so will also trigger their full access to other parts of the system - this element is not included in the plan nor required. Let's take a look at the level of risk in this situation if the administrator assigns full authority to the Mail Recipients role, Role Entries objects ( cmdlets and parameters ) related to that specific role.
First, open the Exchange Management Shell and type the command:
Get-ManagementRoleEntry 'Mail Recipients *'
The system will display some information as shown below:
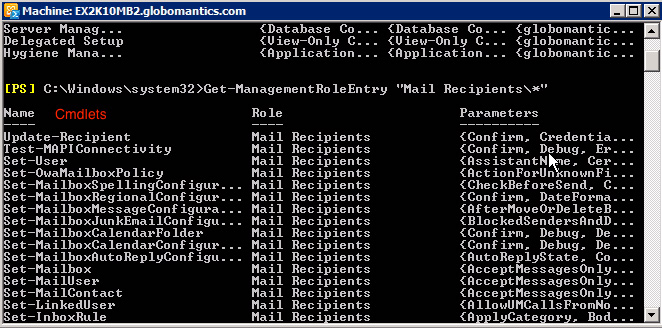
We can easily recognize a lot of role records. Surely no one wants to assign the full Admin rights to the interns ever. The solution is to create a small role within the system of the Mail Recipients role and assign the necessary permissions to them.
Plan with RBAC and learn about Cmdlet:
Before embarking on the process of learning about Exchange Management Shell and executing Cmdlet , we need to prepare and plan specifically. Please refer to the RBAC here.
Scope - Where:
The first is that you need to identify the Scope object or Where . Normally, we need to use the New-ManagementScope cmdlet to create a new scope. However, since the administrator skipped the role parent role, the new management roles will inherit the role and scope role of the role at the higher level. Therefore, there is no need to initialize a scope, nor do you need to use the New-ManagementScope cmdlet. Instead, like the higher-level role, the newly created roles provide Read-Write functionality for the object to receive information, data, and configuration, set up for the entire system.
Role - What:
The next component is mentioned here as Role , because of the Mail Recipients role - we want the new role to be inherited, assigned to many objects that are not really needed. Which way to do it here will include:
- Use the cmdlet New-ManagementRole cmdlet to assign a new name to the management role (eg Exinterns) and specify the upper role to inherit the new role (eg Mail Recipients).
- Remove all objects inherited from the Mail Recipients role, then rearrange everything with the Get-ManagementRoleEntry, Remove-ManagementRoleEntry, and Add-ManagementRoleEntry cmdlets .
Role Group - Who:
The last thing to do here is to initialize the Role Group , or the Who using the New-RoleGroup cmdlet. At the same time, this is also the process of connecting different steps above ( Where and What ) into a complete Role Assignment .
Configuration, set RBAC via Exchange Management Shell:
To create a role named Exinterns that can inherit the functionality of the Mail Recipients role , type the command:
New-ManagementRole -Name 'ExInterns' -Parent 'Mail Recipients'
After pressing Enter, the system will display the results as shown below:
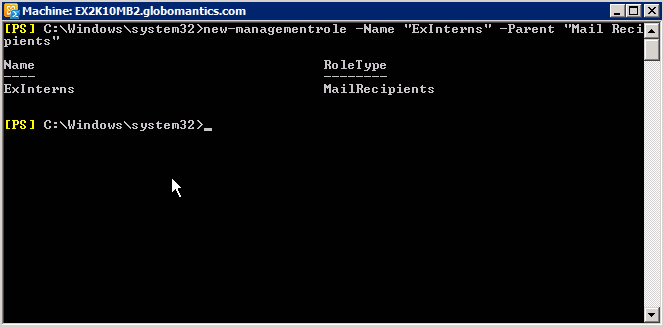
This means we have successfully created the ExInterns role
Next, you need to collect all of the ExInterns management role objects and remove them, except for one component. That's because the system always requires at least 1 role. Therefore, we will retain the Get-User cmdlet because we want the ExInterns role to take advantage of the Set-User cmdlet - which can only work effectively when applied in conjunction with Get-User . Type the command:
Get-ManagementRoleEntry 'ExInterns *' | Where {$ _. Name -ne 'GetUser'} | RemoveManagemRoleEntry
Basically, Set-User will activate the Interns to set up mailboxes. As soon as you press Enter, we will see the message panel shown below:
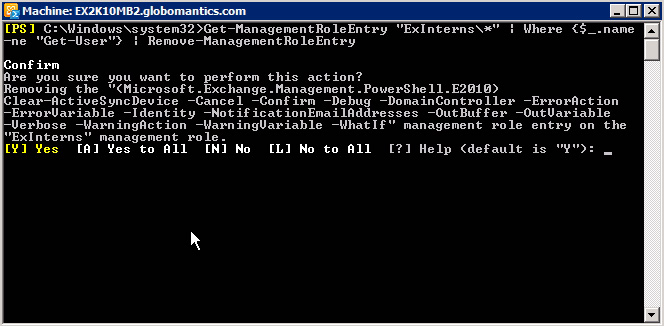
And then there is a lot of display confirmation information, press A corresponding to Yes to All , Y is Yes , N is No and L is No to All . Then, type the command:
Get-ManagementRoleEntry 'ExInterns *'

We can easily see that, unlike the first time we implemented the cmdlet, the new ExInterns role will no longer contain any role that is inherited from the same high-level role. And at this point, we are ready to assign a new role to enable Exchange Interns to configure, set up Office, Phone no., Mobile no., Department and Managers as required. To do that, type the command:
Add-ManagementRoleEntry 'ExInternsSet-User' -Parameters Office, Phone, Mobilephone, Department, Manager

Besides, if you skip the components such as Parameters Office, Phone, Mobilephone, Department, Manager, Exchange Interns will be able to access all parameters of Set-User cmdlet . Therefore, we have not only limited the ability of Interns to receive the cmdlets of Get-User and Set-User , but also become special compared to Set-, Phone, Mobilephone, Department, and Manager parameters of Set- User
And finally, we create the Role Group ( ExInterns example) and specify the role to be assigned to ( ExInterns for example) by typing the command:
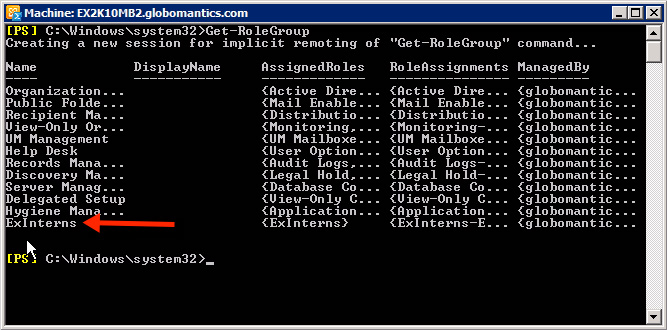
New-RoleGroup 'ExInterns' -Roles 'ExInterns'

The next action to be taken here is to create Role Assignment - ExInterns-ExInterns . To verify this, we can list all the current role groups using Get-RoleGroup . The results displayed will look like the picture below:
After that, you will be able to assign the Interns to the ExInterns role group.
Assign a User account to the role group:
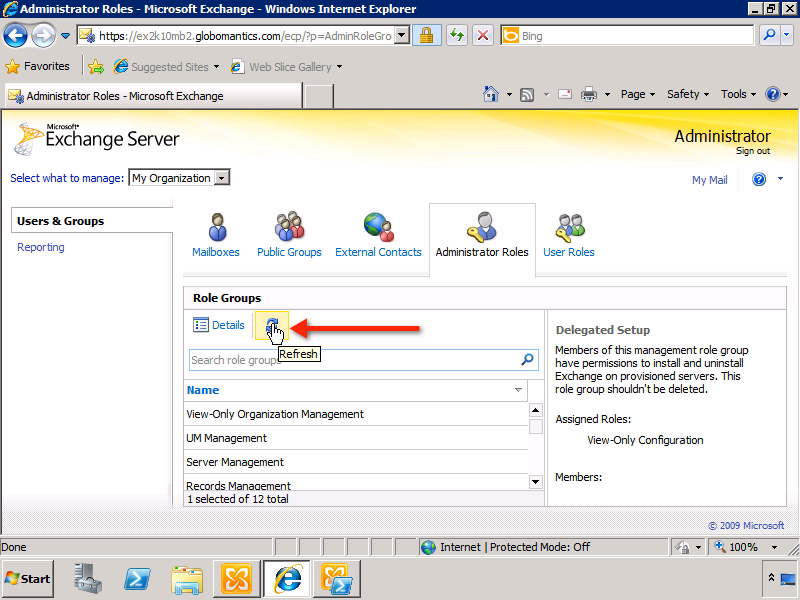
Although we can assign User accounts to the role group using the Exchange Management Shell, this will become simpler if using the Exchange Control Panel. So, go back to the Exchange Control Panel and select the Administrator Roles tab, click the Refresh button several times to check the newly assigned role groups:
Next, find the ExInters role group and double-click on it:

The setup group of the role group will be displayed, click the Add button to assign a new member:
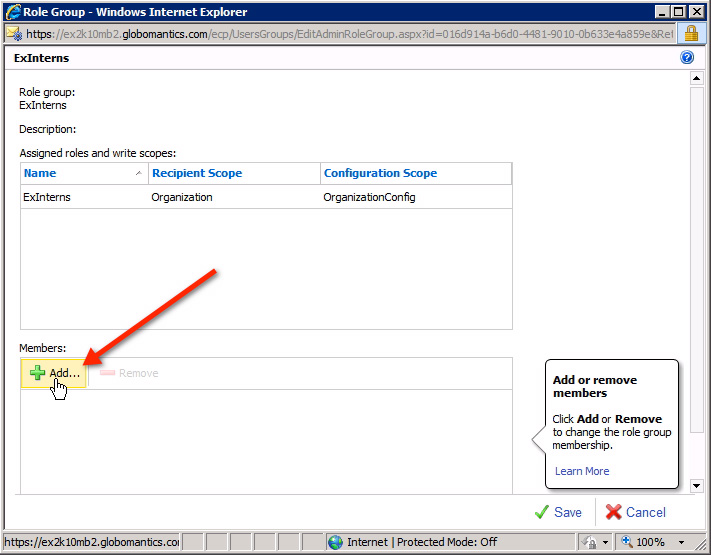
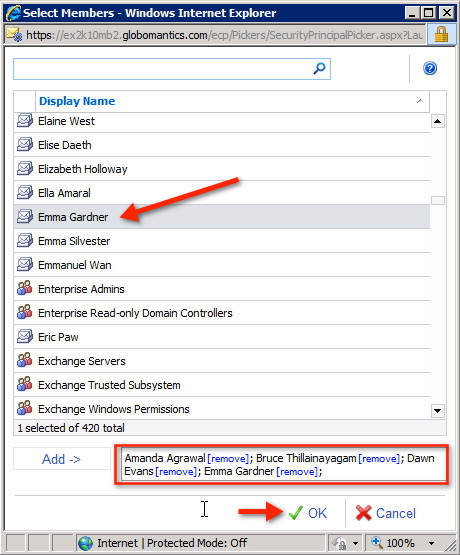
We can choose 1 or more user accounts to assign here, each selected member will be displayed in the text box. Click OK when done:
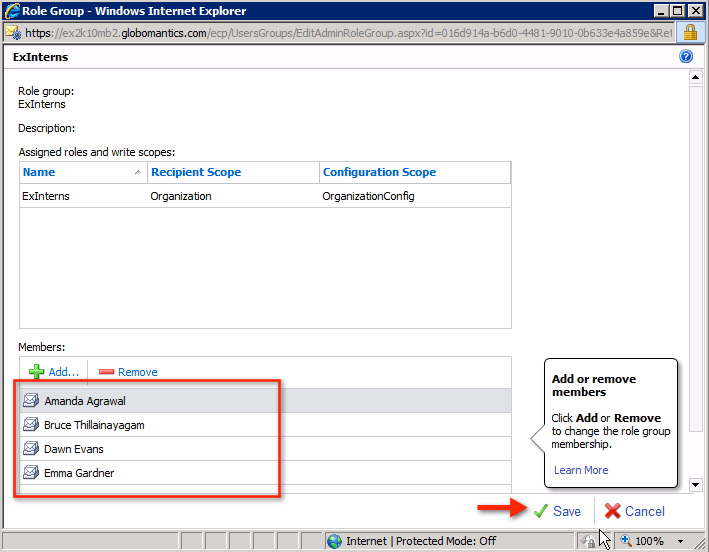
And when we return to the role group's main window, we will see the newly assigned members displayed here. Click Save :
While older versions of Exchange have only a few Administrator groups to choose from, the new RBAC authorization model in Exchange 2010 allows users to set up, initiate more modes, improve and improve flexibility. The role assignment was given by Role Based Access Control , which supports administrators in setting up roles and authorities more precisely and more specifically than before. Good luck!