How to control the Macbook remotely
How to use Mac Screen Sharing
Mac has a feature called Screen Sharing. This way, you can control another Mac remotely. Open files and folders, close files and windows, and you can even use apps that are only installed on remote Macs.
This is an especially handy solution when you're trying to help someone fix a problem with their Mac. With Screen Sharing enabled, a Mac's screen can be viewed by another Mac's screen or remotely.
Here's how to install and use Screen Sharing:
- Open the Screen Sharing app . You can find it by pressing Command + Space and then typing Screen Sharing ).
- Enter the Apple ID of the person you will be sharing the screen with next to Connect To .
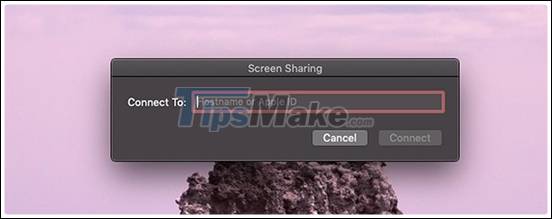
- The notification is waiting for a response from the user, and that user will see a message asking if they want to share their screen.
- Select Accept .
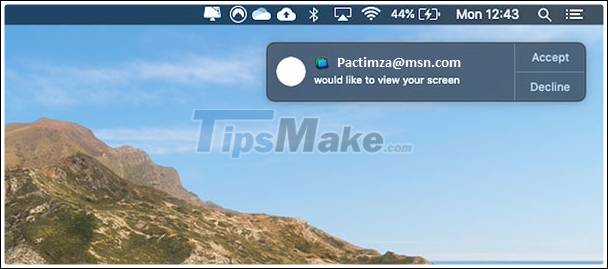
- Next select the options you are allowed to use such as: Monitor control or monitor the screen. If they choose to monitor the screen then you get access.
The machine will probably be a bit jerky. This is not the method you should take in the long run.
You and the user sharing the screen can hear each other.
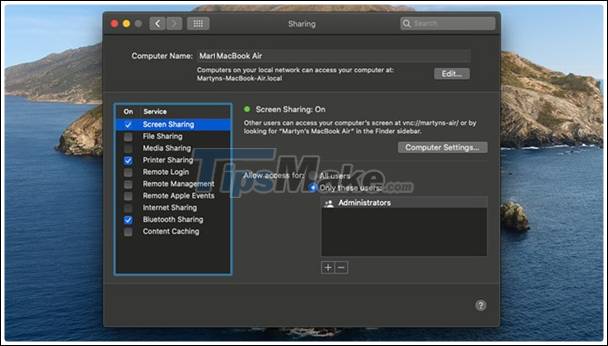
If you want to share your screen with less lag, you can adjust your settings under Sharing in System Preferences and connect to another monitor (these two computers must be connected to the same network).
- Open System Preferences .
- Select Sharing .
- Select Screen Sharing .
- Now on the Mac that you want to access the desktop, press Command + Space and start typing Screen Sharing to open that app.
- Enter a phrase that you will find under the Computer Name section of the Sharing section . [Hostname] .local may be included .
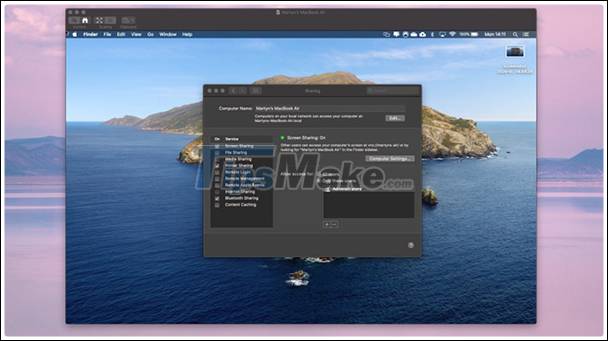
- A window will open with another screen currently displayed. You can close apps, move windows, and more.
How to use Cloud Drive
You can access all your files on all your devices if you store them in iCloud Drive, and you can do this automatically if you agree to the Desktop & Documents folder saved in iCloud. .
Step 1. Open System Preferences .
Step 2. Select iCloud .
Step 3. Click Options next to iCloud Drive . Here, you'll see a list of everything you can save in iCloud. Apps like Pages and Numbers can be set to save related documents in iCloud.
Step 4. Check the checkbox on the Desktop & Documents folder .
Now all you need to do is make sure that everything you're working on is saved to the Desktop, the Documents folder, or in the case of an Apple app (such as Pages), saved to the folder associated with the app. use that.

With the Desktop & Documents folder saved in iCloud , everything you need is accessible from any Mac or iOS device signed in with the same Apple ID. In fact, you can sign in to iCloud on any computer - including Windows PCs - and access your iCloud Drive through a web browser.
iCloud Drive is a great way to sync all your Apple devices so you can access everything you need, wherever you are. That also means you can save space on your Mac as everything can be stored in the cloud.
How to use Remote Login
Another feature built into macOS is remote login settings. When enabled, this feature allows users to access your Mac over SSH and SFTP. If you are unsure of what these are then this method can be skipped.
To enable this feature, go to System Preferences> Sharing and check the Remote Login option in the Service section on the left side of the screen. Once there, you will see a message appear under the blue button, giving you the address of the person who is requesting to access your device.
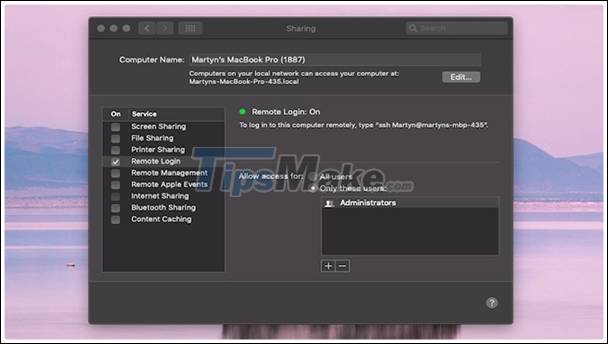
Now, on the remote computer, your colleague needs to open a Terminal window and enter the SSH command, followed by the details you gave them. This will create the connection.
How to use Google Chrome Remote Desktop
Here's another way to remotely control your Mac, and it's free to use in particular.
Chrome Remote Desktop allows you to remotely access your Mac from the Chrome web browser on any computer. You can also access it through your iPad and iPhone if you have the Chrome Remote app installed.
To install Chrome Remote Desktop on Mac, follow these steps:
Step 1. Open Google Chrome .
Step 1. Find Chrome Remote Desktop on the Chrome Webstore .
Step 2. Select Add to Chrome .
Step 4. Install Chrome Remote Desktop software on Mac.
Step 5. Now, log into the Remote app on your iPad or other Mac.
How to use Apple Remote Desktop
Another way to access another Mac is to use Apple Remote Desktop, although the app is primarily aimed at business customers as it allows managing multiple computers.
Apple Remote Desktop makes it possible to install and configure apps, help remote users and generate detailed reports, it's also ideal for educational use. It can be downloaded from the Mac App Store and costs a small fee.
How to use Back to my Mac
Back to my Mac was an app in macOS (or Mac OS X) prior to Mojave that lets you access your other Macs remotely.
You can still use it if you are running Mac OS X version from Lion to High Sierra.
You need a router that supports Universal Plug and Play (UPnP) or NAT Port Mapping (NAT-PMP). Some ISPs turn this feature on immediately. Others do not. Usually, the best solution is to call or email the people who support the ISP or visit Google. (Enabling UPnP or NAT-PMP doesn't matter but without it the connection would be significantly slower. Especially, when screen sharing, this can be frustrating.)
You'll need a 300 Kbps (or faster) bidirectional (up / down) Internet connection. Also, your firewall needs to allow remote connections - maybe your Mac at work might be protected by a firewall, which could prevent you from accessing it from home.
Both Macs will need to be signed in to the same iCloud account and have Back to my Mac enabled in the iCloud section of System Preferences .
On your home or office Mac that you want to access remotely, turn on File Sharing or Screen Sharing in the Sharing section of System Preferences .
You may also need to enable Wake For Network Access in the Energy Saver section , but if you've already used Find My Mac this feature will be enabled.
You will also need to enable screen or file sharing in System Preferences .
By enabling Back to My Mac, the remote Mac will automatically show up in the Finder at all times. If the remote Mac is connected to the AirPort Express or uses Time Capsule, then it can go to sleep and will wake up on demand when you connect. If none of the above hardware is present, the remote Mac should always be running. An app like Caffeine, activated before you leave the home office, will prevent your Mac from going to sleep.
To install Back To My Mac, follow these steps (before Mojave):
Step 1. Open System Preferences.
Step 2. Select iCloud .
Step 3. Sign in if prompted.
Step 4. Select Back to My Mac .
Step 5. Select login options.
To access your Mac remotely from another Mac using Back to My Mac:
Step 1. Open Finder.
Step 2. Choose Finder> Preferences.
Step 3. Select the toolbar next to it
Step 4. Select Back to My Mac .
Step 5. Now when you open Finder, you will see shared computers in the sidebar.
Step 6. Select the computer you want to connect to and click Connect As .
Step 7. Alternatively, you can select your Mac and select Screen Sharing .