Table of Contents
This updated guide examines Install Role, Configure Role on Windows Server 2012 and organizes the essential facts, background, and practical takeaways in clear American English.
In this article, we will learn how to install and configure the most important roles.
The figure below shows you all the rollers in Windows Server 2012.

Instructions for installing roles in Windows Server 2012
To add a role and server, you need to follow the steps below:
Step 1: Click on Server Manager on the task bar as shown below:
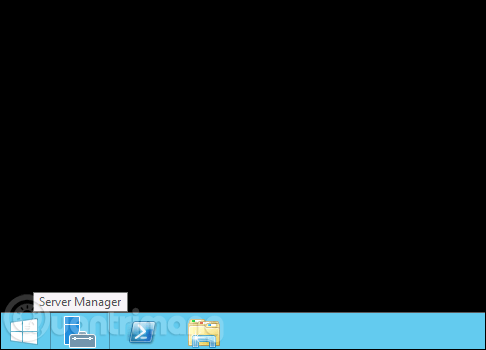
Step 2: Click Add roles and features.

Step 3: Click the Next button when the screen below appears.

Step 4: Select Role-based or feature-based installation and click Next .
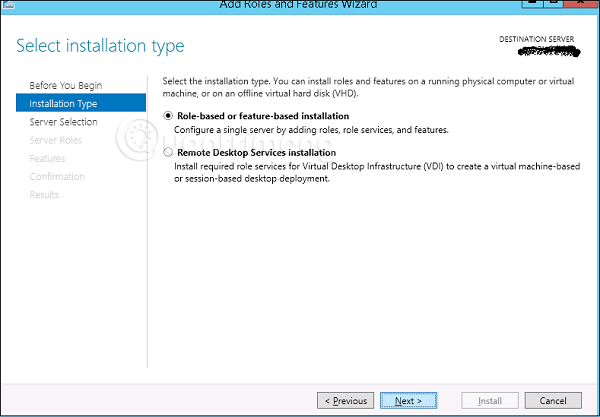
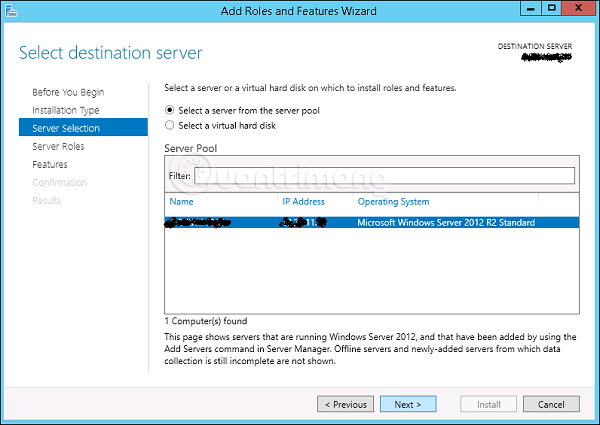
In the next screen, you will have 2 options:
- Select a server from the server pool: If you want to install services on the physical server.
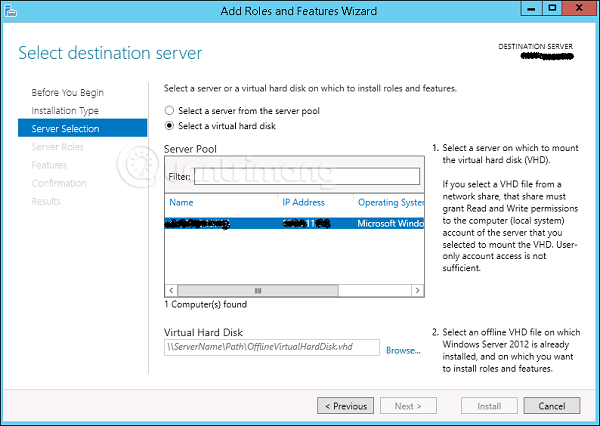
- Select a virtual Hard disk: If you want to install the service on a virtual drive located on the network drive. Look at the picture to make it easier to understand:
Step 5: In the last step, you will check the service you want to install.
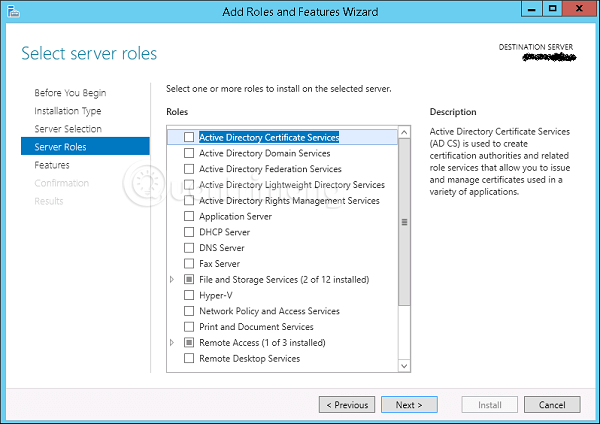
In the following sections we will continue this installation step for important services.
Next article: How to use PowerShell in Windows Server 2012
Previous article: Instructions for installing Windows Server 2012 step by step
FAQ
What is Install Role, Configure Role on Windows Server 2012 about?
It provides a structured overview of role installation for windows server, explains the main context, and highlights practical takeaways for readers.
Why does this topic matter?
Understanding the main concepts helps readers evaluate the issue, avoid common mistakes, and make better-informed decisions.
How should readers use this information?
Use the guidance as a practical starting point, confirm details that may have changed, and follow current product, safety, or security recommendations.
Related Articles
 How to Install DNS Role in Windows Server 20122 minutes read
 How to Install and Configure Backups in Windows Server 20123 minutes read
 Install and Configure Windows Home Server9 minutes read
 How to Install and Open File Server Resource Manager in Windows3 minutes read
 How to Configure DNS Server on Ubuntu Server 11.044 minutes read
 Install and Configure Windows Server 2008 Dhcp Server9 minutes read
Reader Comments 0
Sign in with email or Google to join the discussion.