Controlling Internet Access: Introduction to TMG Access Rule - Part 3
In the third part of the introductory series of TMG Access Rules, I will introduce you to the basics of Web Publishing Rules..
Network Administration - In Part 3 of the series on TMG Access Rules, I will introduce you to the basics of Web Publishing Rules.
[#RelatedNews (8) #]
Web publishing is a term we use in reverse proxy websites so that external users can access websites located within the TMG firewall. Note that there are two ways you can allow external users to use websites: web publishing and server publishing. Web publishing allows the TMG firewall to act as a reverse proxy, while server publishing provides web servers through reverse NAT. In these two methods, Web publishing is the preferred method, with this method you can use the advantages of pre-authentication and many other features that are not available through reverse NAT.
To introduce you to the web publishing process, let's start by publishing a simple HTTP site located behind the TMG firewall. This basic site does not require SSL and does not require authentication. Later, we will look at some more complex examples in which you can use SSL and authentication.
To begin, click the Firewall Policy button in the left pane of the TMG firewall console, as shown in Figure 1 below.
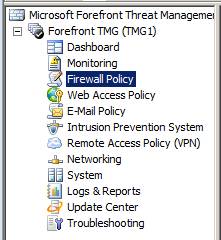
Figure 1
In the right pane of the interface, click Tasks Tab . Then on Tasks Tab, the Publish Web Sites link size is shown in Figure 2 below.

Figure 2
This will bring up the Welcome to the New Web Publishing Rule Wizard page . On this page, shown in Figure 3, you need to name the rule. In the Web publishing rule name text box, for example, we enter the HTTP Web Server name and then click Next .
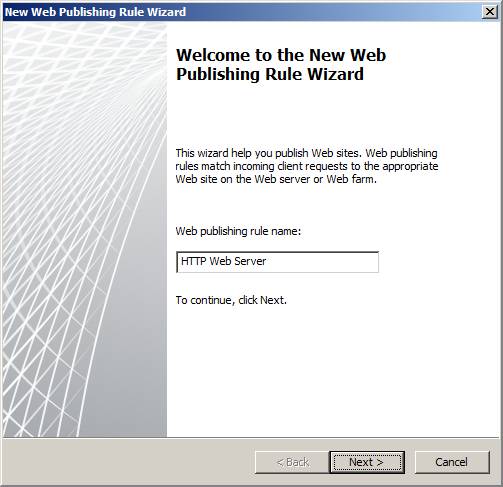
Figure 3
On the Select Rule Action page , as shown in Figure 4, you can configure the rule to Allow or Deny for the connection. In this example, we will select Allow . Deny option is used for special use cases; You can also create web publishing rules to allow connections to certain websites behind the TMG firewall.
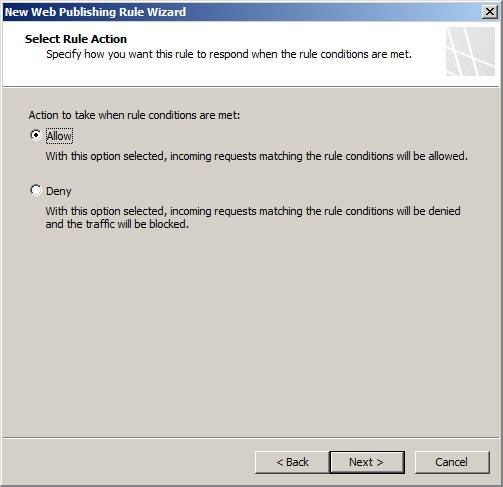
Figure 4
On the Publishing Type page, as shown in Figure 5, you choose one of three scenarios that correspond to your web server environment. In this example, I want to publish a web server behind the TMG firewall, so we choose the Publishing a single Web site or load balancer option and click Next .
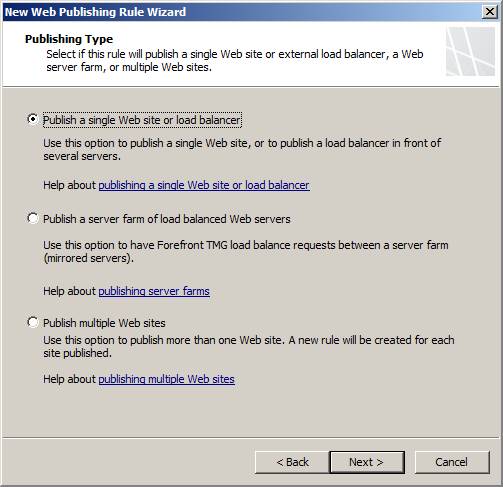
Figure 5
On the Server Connection Security page , shown in Figure 6, you must choose whether the TMG firewall needs to use SSL to connect to the web server. In this scenario, we do not require SSL between the TMG firewall and the web server, so choose the option Use non-secured connections to connect to the published Web server or server farm .
Remember that for the safest connection, you should use SSL.
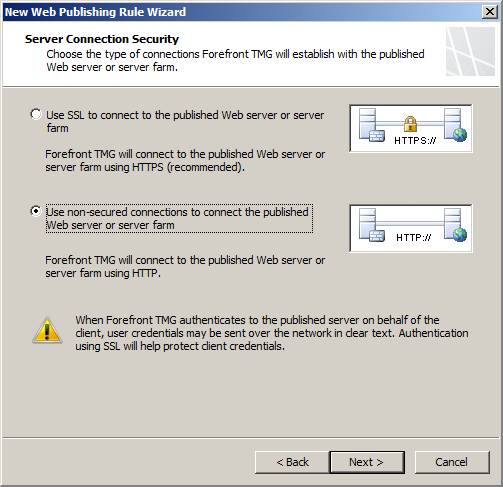
Figure 6
On the Internal Publishing Details page, shown in Figure 7, you will be asked to define the server name in the intranet. In this example, we enter the Fully Qualified Domain Name (FQDN) of the server on the local network hosting the website, dc1.msfirewall.org . You also have the option to activate the checkbox Use a computer name or IP address to connect to the published server, then enter the name or other IP address of the server. This option allows the TMG firewall to find the server if it is using a different name than the one you entered in the Internal site name box. After entering this information, click Next .
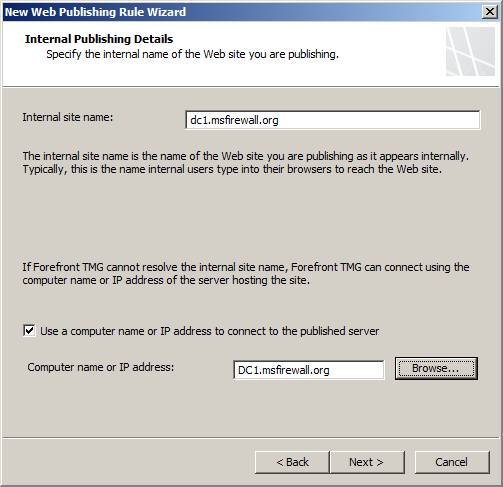
Figure 7
On the Internal Publishing Details page, shown in Figure 8, you can enter the path to restrict users from accessing a certain file or folder on the web server. In this example, because we want to allow full site access, we don't enter any paths here. After making the choices here, click Next .
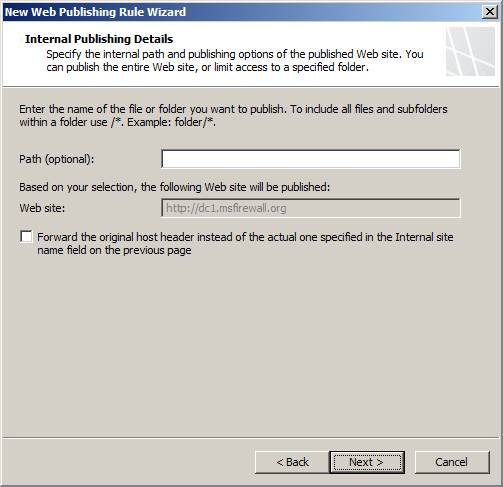
Figure 8
On the Public Name Details page, Figure 9, enter the name of the website that the user will access. This is the name the user uses to access the site. To do this, select this Domain name option (type below) from the Accept requests for drop-down list. After selecting that option, enter the name that the user will access the site in the Public name text box. In this example, the user will use the name www.msfirewall.org to access the site, so we'll enter that name into the text box. Next, we will have the option to enter the path, but we do not do that, click Next .
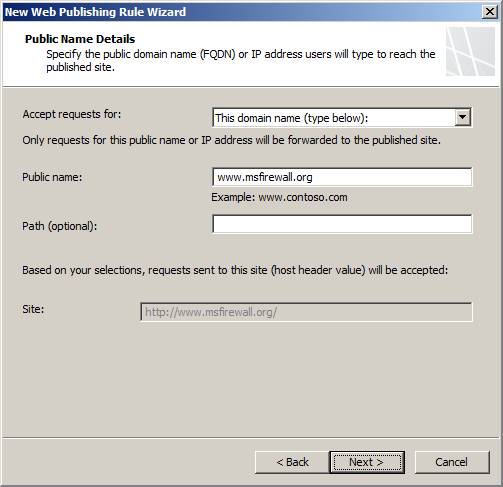
Figure 9
On the Select Web Listener page, Figure 10, select the web listener listener that will be used to accept connections from external users to access the website. In our example, no listener has been set up yet, so there is no option in the drop down box. To create a new HTTP web listener listener, click the New button.
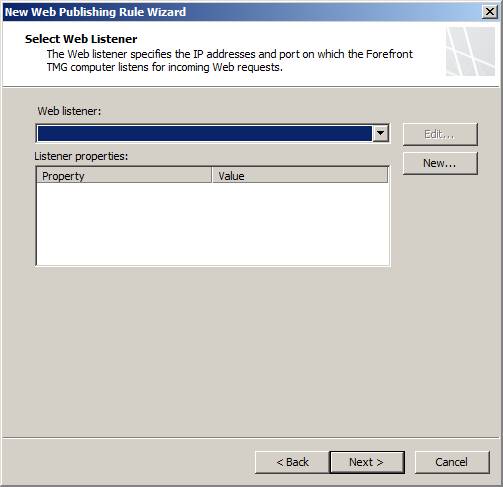
Figure 10
This will bring up the Welcome to the New Web Listener Wizard page , shown in Figure 11. Here we enter the name for the web listener in the Web listener name text box (we will use the HTTP Listener name) and then Click Next .
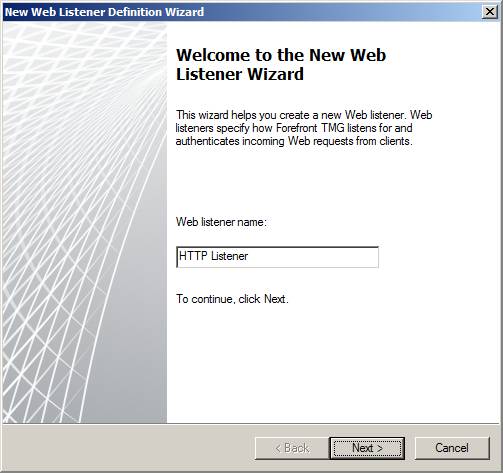
Figure 11
On the Client Connection Security page, Figure 2, you must specify whether or not you want to use SSL to connect to the TMG firewall. In this example, we want to publish a simple HTTP site, so choose Do not require SSL secured connection with clients and click Next .

Figure 12
In the Web Listener IP Addresses page , Figure 13, select the network where you want the TMG firewall to accept connections to the website. In most cases, when publishing a website to external users, you should select the default External network to accept incoming connections. If you have multiple IP addresses bound to the external interface, you can click Select IP Addresses and then select the specific IP address to which you want to accept the connections; In most cases, you should do this instead of accepting connections on all IP addresses that can be configured on the external interface of the TMG firewall. In this example, we only have one IP address on the external interface, but we will choose a specific IP address in case we need to add more IP addresses to the external interface in the future.
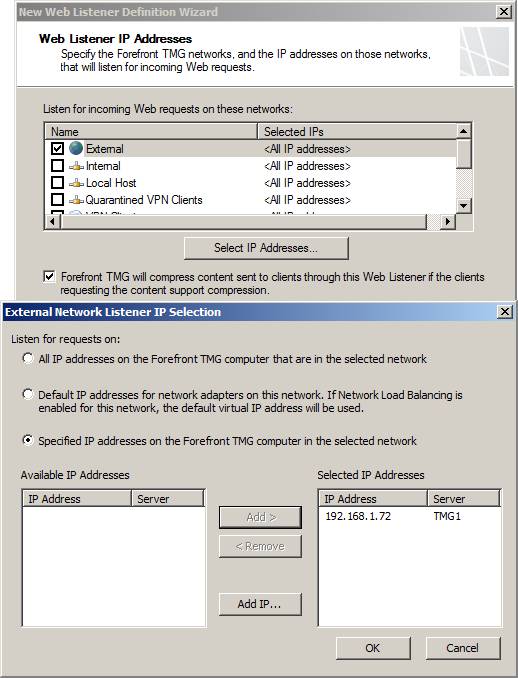
Figure 13
On the Authentication Settings page, Figure 4, select the type of information that will be used to connect to the TMG firewall to access the site. This type of authentication is often called pre-authentication because the user authenticates with the TMG firewall before authenticating with the web server. In this example, we do not require authentication, so select the No Authentication option and click Next .
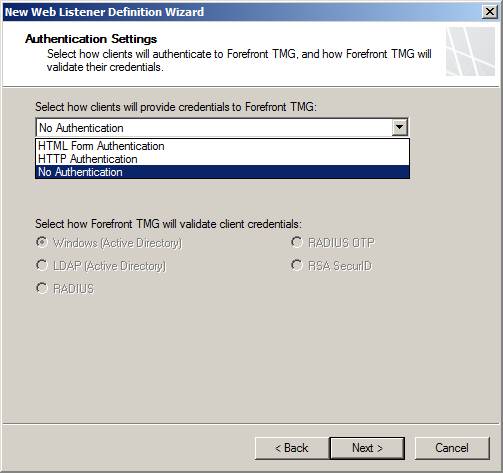
Figure 14
On the Single Sign On Settings page , Figure 15, you can configure the web listener to support single sign-on for all sites published through this listener. However, for a one-time login mechanism, users must log in. Since we do not require authentication in this example, the login mechanism is not necessary, so move on to the next section by clicking Next .
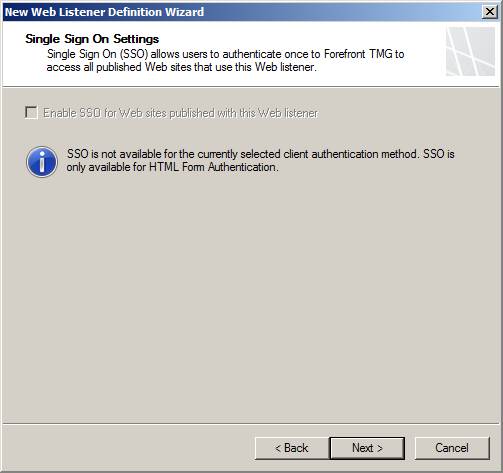
Figure 15
After clicking Next you will see the final list of the listener wizard, Figure 16. Here we will review the settings on the Completing the New Web Listener Wizard page and click Finish .
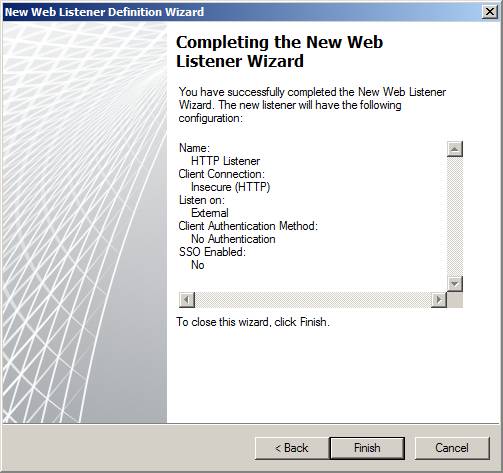
Figure 16
Now let's go back to the original wizard. The new web listener will now appear in the Select Web Listener page as shown in Figure 17, here you can see some details about the Web Listener. There are several additional options you can configure on the web listener. Alternatively, you can access them by clicking the Edit button. We will talk about this in the next section. For now, let's continue by clicking Next .
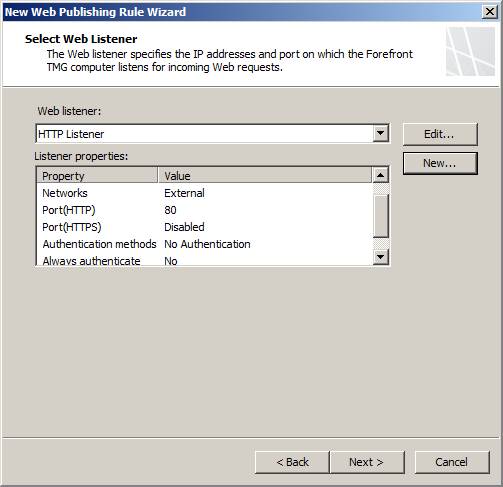
Figure 17
On the Authentication Delegation page, Figure 18, you configure how the TMG firewall delegates credentials to the published website. This means users will only need to authenticate once with the TMG firewall. In this example, we do not require authentication, so there is no reason to delegate standards, we will select the option No delegation, and client cannot authenticate directly and click Next .
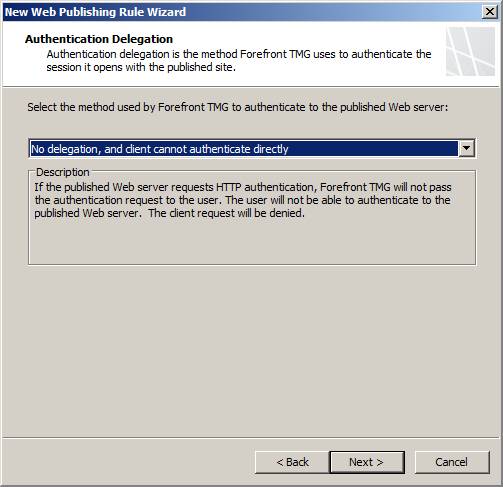
Figure 18
On the User Sets page, Figure 19, select the user or group of users who are allowed to access the published website. To enable this option, you must ask users to be authenticated so that they will be identified. Since we do not require authentication in this example, we will use the default group, which is All Users . In the context of the TMG firewall, 'all users' does not mean that all users have been authenticated; it means an anonymous user - so when allowing 'all users' access, you are allowing non-authenticated users to access the site.
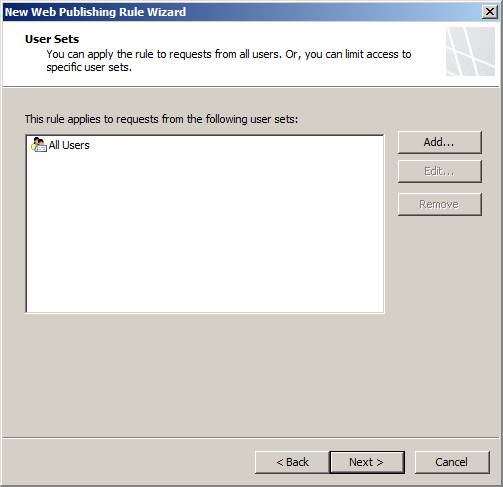
Figure 19
We will re-evaluate the settings in the Completing the New Web Publishing Rule Wizard page as shown in Figure 20, then click the Test Rule button.

Figure 20
The Test Rule button allows you to see whether the website is accessible from the TMG firewall. As you can see in Figure 21 below, when you click the Test Rule button, TMG will try to connect to the web server using an HTTP connection and it will perform the path pinging (PathPing) to the web server. As in the picture, the TMG firewall was able to connect to the web server and PathPing was successful.
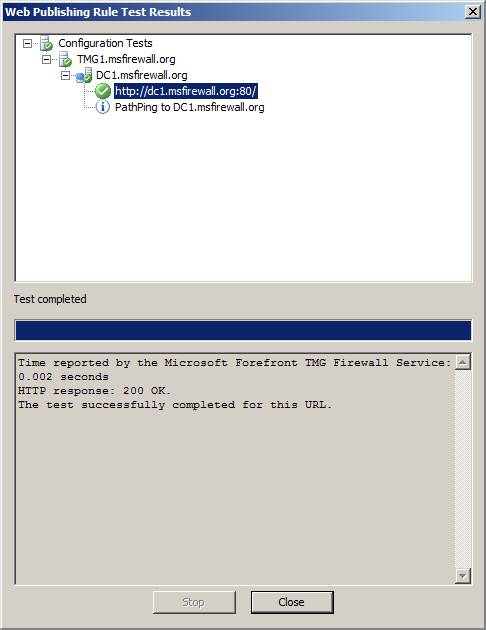
Figure 21
Now you can see the new rule in the list of firewall rules. To enable the rule, you must click the Apply button, as shown in Figure 22 below.
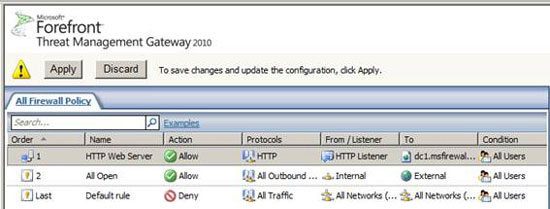
Figure 22
The Configuration Change Description dialog box, as shown in Figure 23, you can enter a comment about the change you made in the firewall policy. The TMG firewall will store this information so you can use it as part of the change management system, which is intended to assist in troubleshooting later. Using this dialog box, you can also export the firewall configuration to be able to restore the configuration to the point before making changes. Click Apply to save the changes.
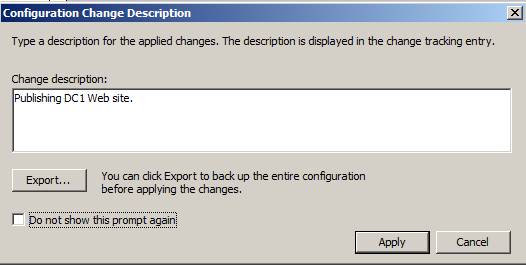
Figure 23
The configuration will now be saved and you can see the results in the Saving Configuration Changes dialog box, Figure 24. Note that existing client connections will be re-evaluated according to the new policy. This is new to the TMG firewall - with the ISA firewall, the firewall policy is only applied to new connections.
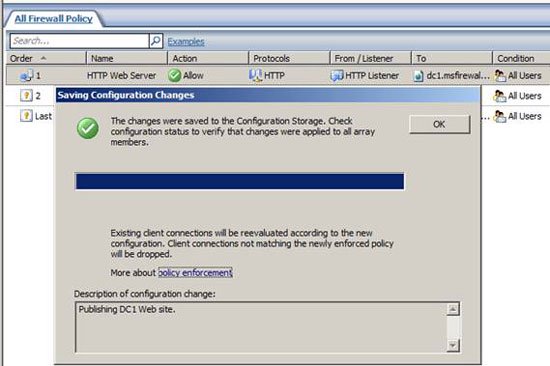
Figure 24
Conclude
In this section, we have introduced you to some of the basics of web publishing with TMG. In the section, we created a web publishing rule, a simple web listener HTTP listener. At the end of the rule creation section, we used the test button to determine if the website is reachable. In the next part of this series, we will create an SSL web site that requires authentication. In that section, you'll know some advanced options when creating web publishing rules.