Instructions to Root Android using TWRP Recovery
TWRP (Team Win Recovery Project) is a software recovery tool for Android. With this tool, you can easily install root, flash for Android devices quickly..
1. Download the necessary files to your computer
1.1. Download TWRP img for your phone
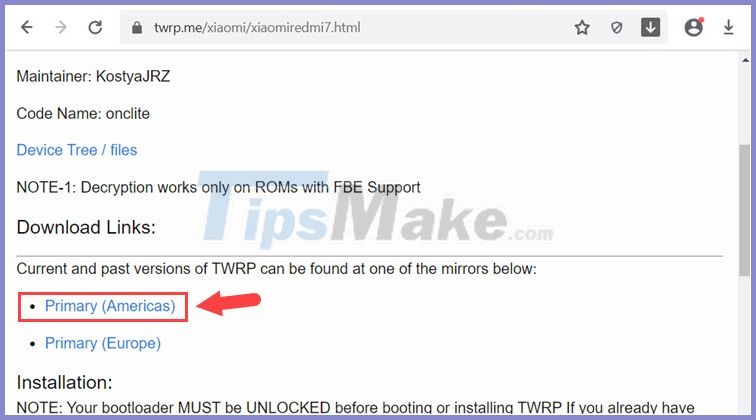
Step 1: Go to link here
Next, you find your device name and click on the download link to download it. In the article, I use the Xiaomi redmi 7 model .
After finding the device's name, click on the down Primary (Americas) link .
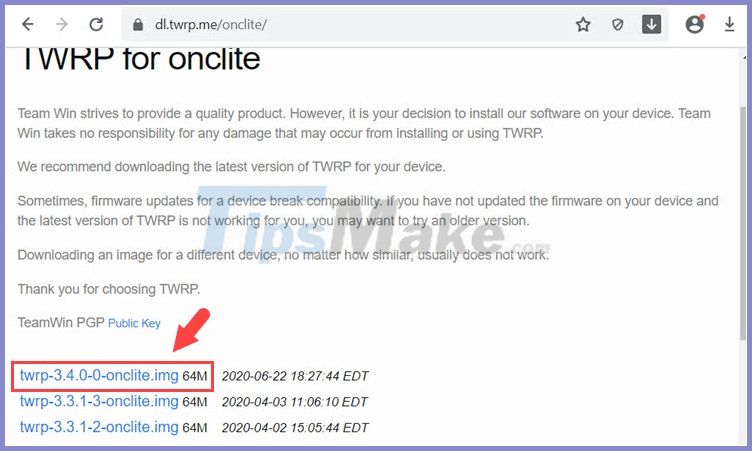
Step 2: You continue to click on the latest twrp file to download.
1.2. Download Android SDK
Step 1: You visit link here to download Android SDK .
Next, you click on the link Download SDK Platform for Windows .

Step 2: Check I have read and agree with the above terms and conditions (1) and click Download Android SDK PlatForm-Tools For Windows (2) .

1.3. Copy the TWRP file to the Android SDK's decompression directory
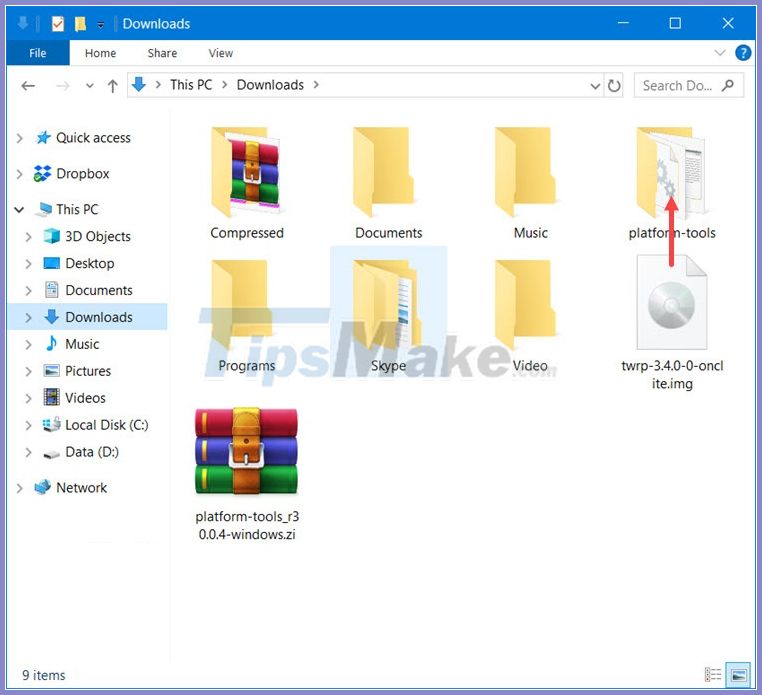
After downloading the Android SDK file to your computer, extract the file. Next, you drag and drop the twrp.img file into the Android SDK unzipped file .
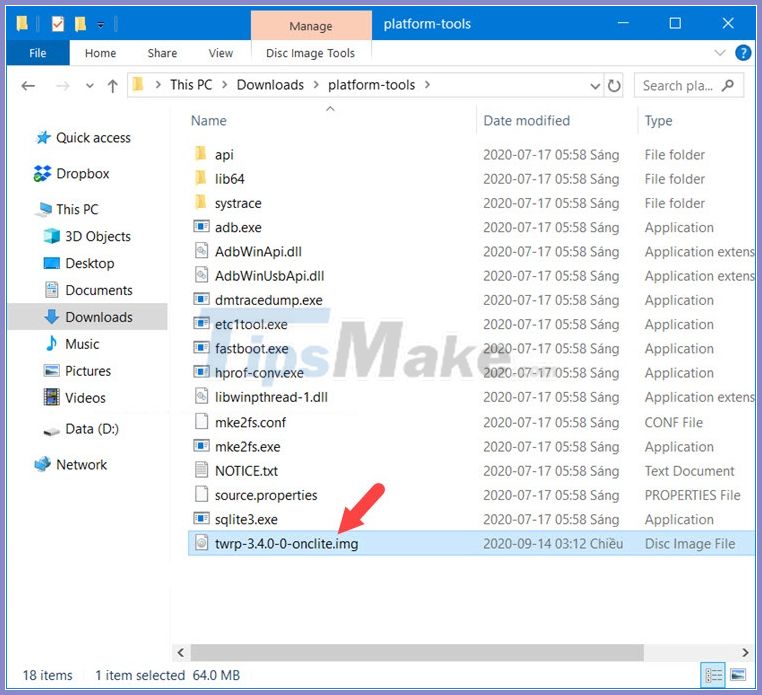
Then, we will have the twrp.img file in the decompression folder as shown below is successful!
2. Enable USB debugging mode (USB Debugging) on Android device
2.1. On Xiaomi phones
Step 1: Go to Settings => About phone (1) => continuously touch the MIUI version (2) .

Step 2: You touch 7 times continuously until the message You are now a developer! Show up is successful!

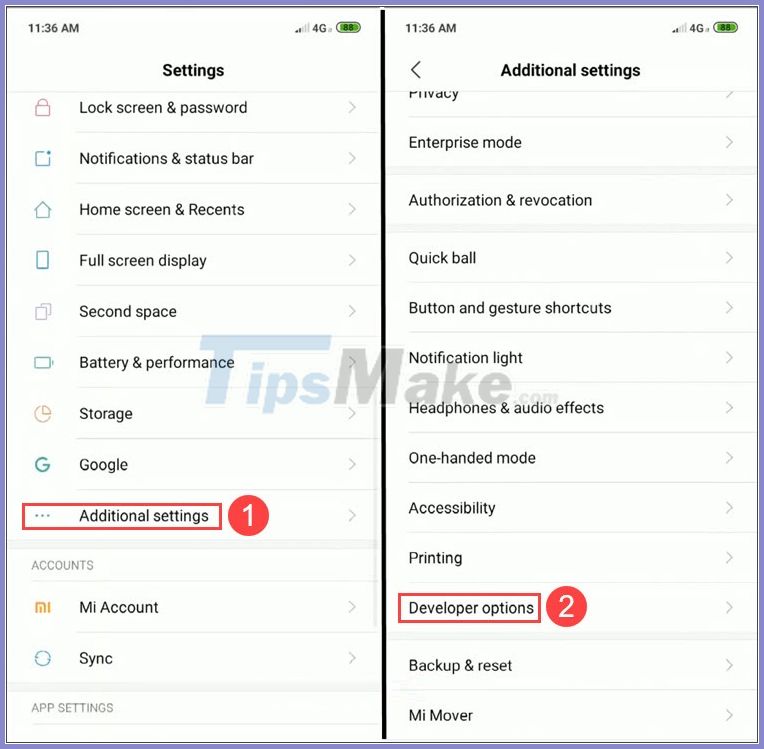
Step 3: Go back to Settings and select Addtional settings (1) => Developer options (2) .
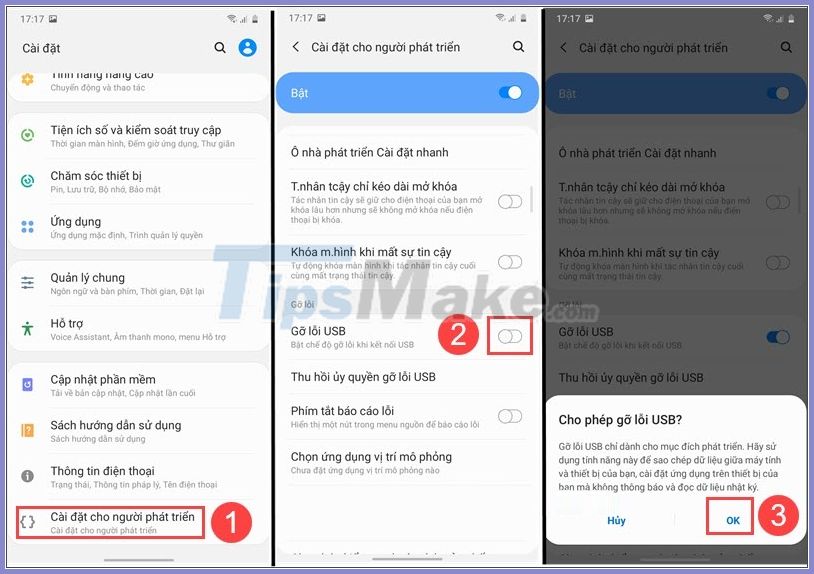
Step 4: You turn the USB debugging switch (1) to ON and select OK (2) .

If you are connecting your phone to USB, the message as shown below appears, click OK .

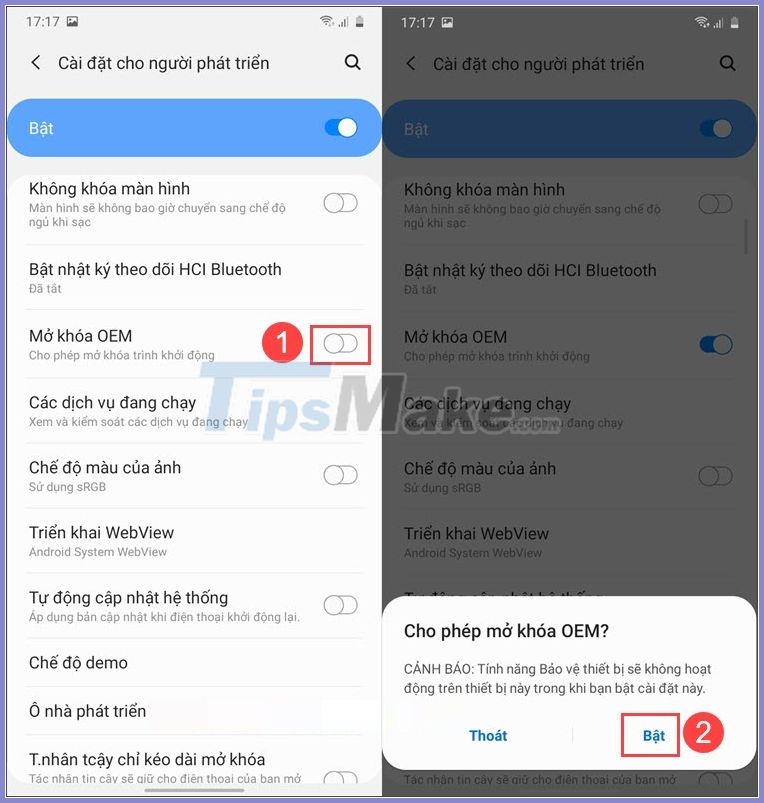
Step 5: Go back to Developer options and turn OEM unlocking switch (1) to ON => Enable (2) to finish.

2.2. On Samsung phones
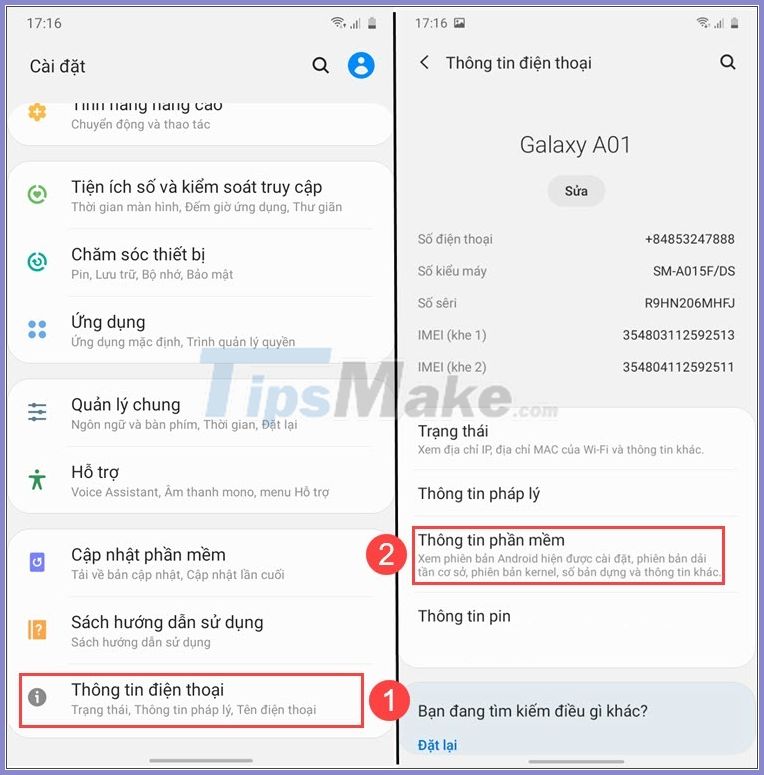
Step 1: Go to Settings => Phone information (1) => Software info (2) .
Step 2: You repeatedly click on the Serial Number created seven times to unlock Developer Mode .

Step 3: Go back to Settings => Developer Settings (1) => flip the USB Debugging switch (2) to ON => OK (3) .
Step 4: You navigate to OEM Unlock (1) and switch to ON => On (2) .
3. Run the command on the computer
You connect the phone to the computer and select USB debugging (USB debugging) on the phone screen. Then, do the following on your computer:
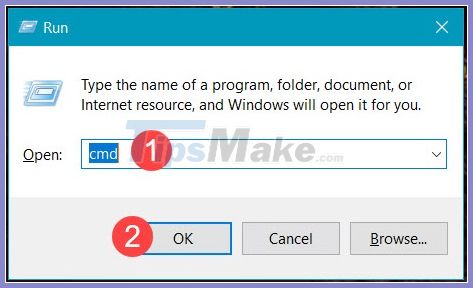
Step 1: Press the Windows + R key combination to open Run . Next, you enter cmd (1) => OK (2) .
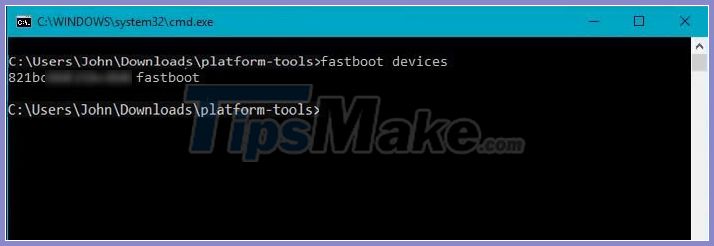
Step 2: Use the cd command as shown below to access the android SDK extract file. In the article, my android sdk folder is called platform-tools and is located in the Downloads folder .

Step 3: Enter the command.
fastboot devices
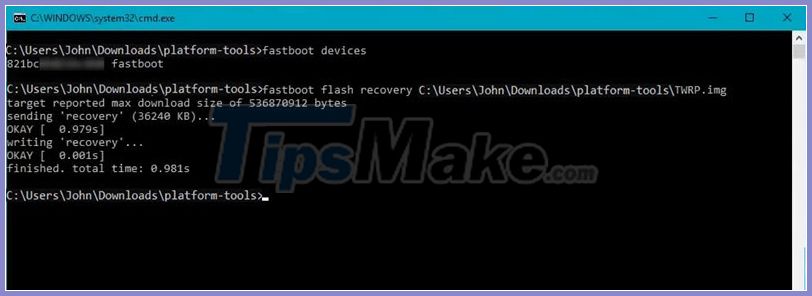
Step 4: You enter the next command.
fastboot flash recovery
After that, the command will run and the finished word finished .
Note: , you can drag and drop the file to the Command Prompt or copy the file path from the folder.
Step 5: You enter the command.
fastboot boot
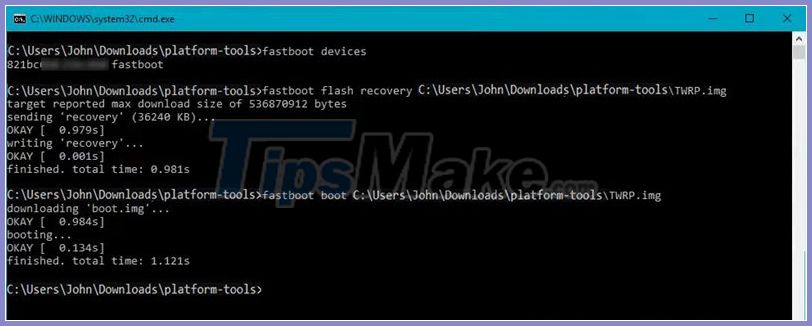
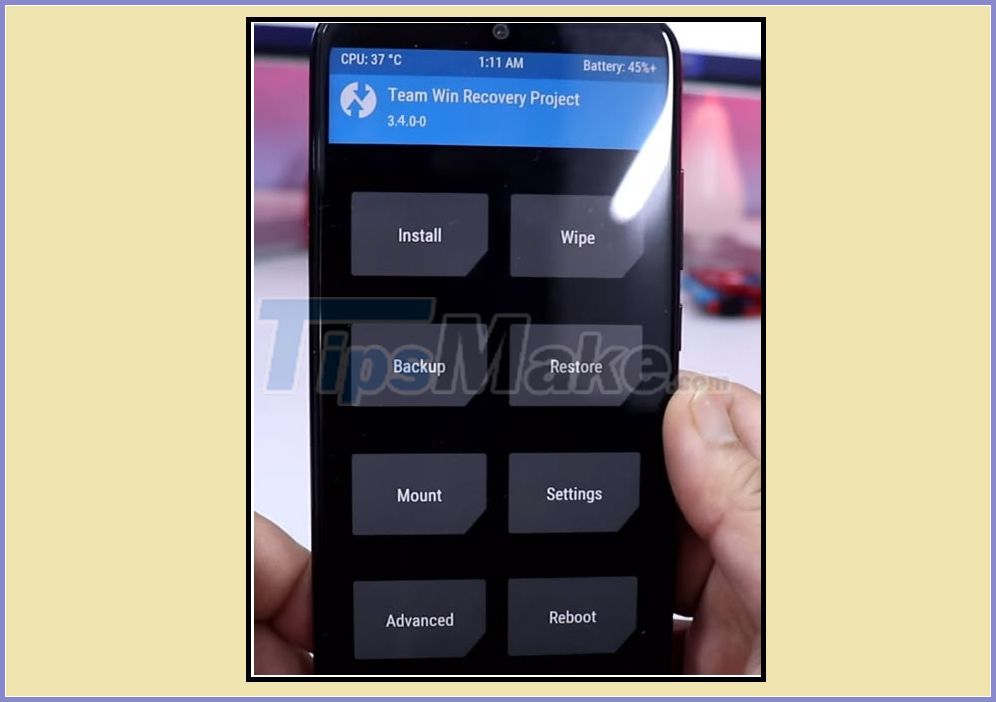
Step 6: The machine will then reboot and install TWRP. To access TWRP Recovery, you need to power off your phone, then press and hold the Power key + Volume Up / Down or the Power key + Volume Up + Volume Down (depending on the device) to enter the interface of TWRP Recovery. .
With the above method, you can easily install TWRP recovery on popular Android phone models. Good luck!