A comprehensive guide to root the Samsung Galaxy S7 or S7 Edge
You can use the method below to root Galaxy S7 or Galaxy S7 Edge. However, this method does not allow you to flash Custom Recovery or Custom ROMs like the root process on the Exynos version, but it allows you to manipulate some other interesting experiences such as Xposed installation to customize the stock ROM. and even run some scripts to optimize and remove bloatware from your Galaxy S7..
There are two versions of the Galaxy S7 and S7 Edge chipsets, the Exynos version and the Snapdragon version. The Exynos version was developed by Samsung and the Snapdragon version was developed by Qualcomm. In fact, the Exynos version is easier to root than the Snapdragon version. For users in the US, Galaxy S7 and S7 Edge versions are Snapdragon.
You can use the method below to root your Galaxy S7 or Galaxy S7 Edge. However, this method does not allow you to flash Custom Recovery or Custom ROMs like the root process on the Exynos version , but it allows you to manipulate some other interesting experiences such as Xposed installation to customize the stock ROM. and even run some scripts to optimize and remove bloatware from your Galaxy S7.
I. Before starting
1. This process will wipe all data in your device, so make a backup of the data you need before you proceed.
2. To perform this process you need to use the computer.
3. This gives you root permissions, not allowing you to flash Custom ROM or Flash Recovery.
4. You can use some tweaking and Xposed tools to customize the software on your phone.
5. Make sure that Secure Boot in Settings => Lock Screen has been disabled.
II. Set up ADB and USB Drivers
1. Download and install Samsung drivers here.

2. Go to Settings => About Phone and click Build Number until the message appears saying that you are a developer.
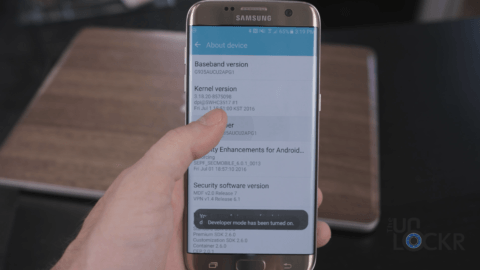
3. Click Back and click Developer Options , then enable USB Debugging .

4. Connect your phone to the computer with a USB cable, then install ADB (this process will take about 30 seconds).
- Download ADB to your device and install it here.

III. Flash Rooted Boot Image via Odin
1. Download Odin and save on Desktop screen.
- Download Odin to your device and install it here.
2. Download Rooted Boot Image for your device and save it on the Desktop (it is a .tar file, so you cannot extract it but keep it as .tar ).
- Download Rooted Boot Image for Galaxy S7 here.
- Download Rooted Boot Image for Galaxy S7 Edge here.
3. Unzip and open Odin.

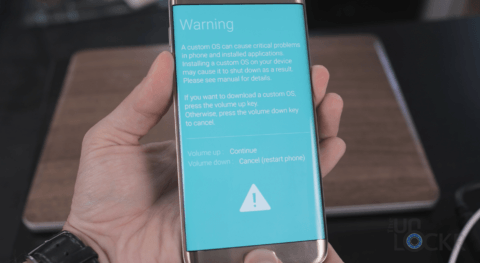
4. Turn off your phone, then turn on the power again by pressing and holding down the Volume Down button + Home button + Power button until you access the Download Mode mode.
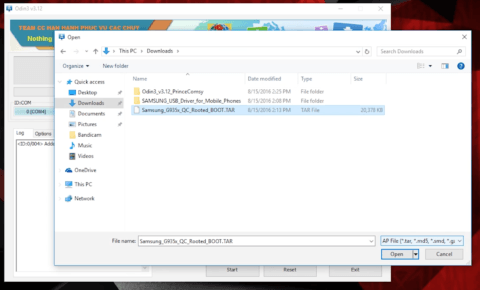
5. Click on the AP and select the .tar file you just downloaded for your phone.
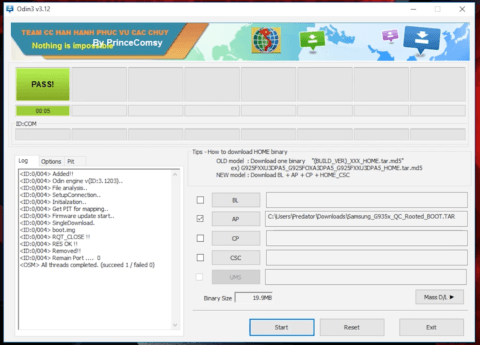
6. Click Start, then wait for the flash device and reboot.
IV. Install SuperSU
1. Download SuperSU installer to your computer and save it on the Desktop.
- Download SuperSU installer to your computer and install it here.
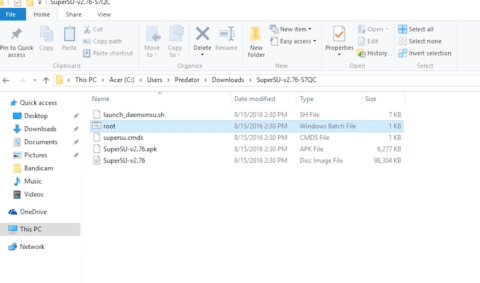
2. Extract SuperSU after the download process is complete.

3. Still connect your phone to the computer, double click on the .bat root file and wait for it to flash your phone.
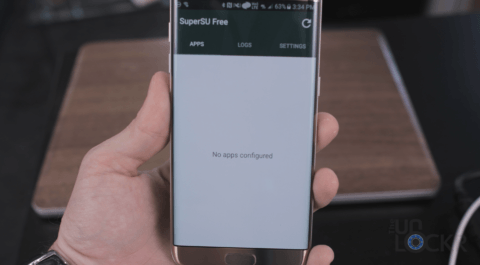
4. After the process is complete, open SuperSU on your phone and make sure that you have skipped the request to update the .binary file. SuperSU developers claim that updating the .binary file may be harmful to the phone.
So you have finished rooting your Samsung Galaxy S7 / S7 Edge phone and you can install Xposed to customize the software.
Refer to some of the following articles:
- Summary of some root ways of Android devices
- Instructions for backing up all data on Android device without root
- The difference between jailbreak, root and unlock
Good luck!