Table of Contents
This guide explains how to record on Windows 10 Without Installing Additional Software, with clear steps, practical tips, and important checks before you begin.
INSTRUCTIONS FOR USING SOUND RECORDING FUNCTIONS ON WINDOWS 10
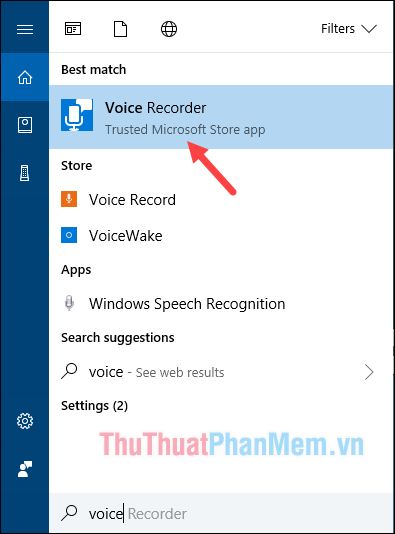
Step 1 : Open the search feature on windows 10 and enter the word Voice at this time on the results section will appear Voice Recorder tool . Open that tool.
Step 2 : When the application opens you just click on the icon Micro to start recording.

Step 3: After recording, click on the green icon to finish or you can pause and continue recording.

Step 4: After the recording is completed, we will be taken to the interface for managing audio recordings. Here you can listen to the recording, sharing, deleting, renaming, truncating.

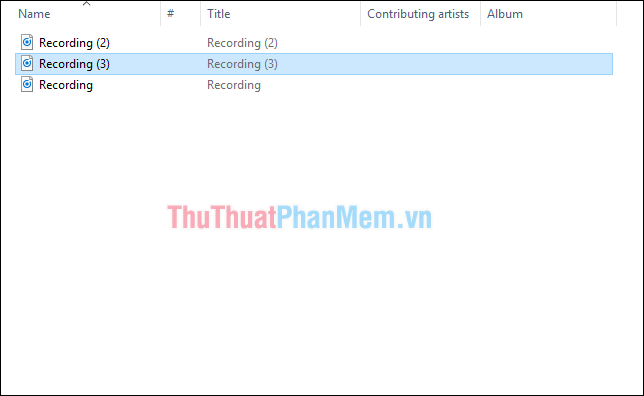
Step 5 : If you want to get the recording file to send to someone, then click on the 3-dot icon and select Open file location

Now the folder containing the recording file will appear and you can use these files depending on the purpose.
Above is a guide to recording on Windows 10 without software. Hope this article will help you. Good luck!
FAQ
What should I know about Record on Windows 10 Without Installing Additional Software?
Focus on the key features, requirements, limitations, and practical use cases explained in this guide.
How do I get the best results with Record on Windows 10 Without Installing Additional Software?
Follow the recommended steps, use current software or information, confirm compatibility, and review settings before major changes.
Are there any risks or limitations?
Potential limitations depend on compatibility, data quality, cost, privacy, support, and how the product or method is used.
Related Articles
 How to Compress and Decompress Files Without Installing Additional Software3 minutes read
 How to Use Vietnamese Percussion on Windows 10 Without Installing4 minutes read
 How to Record Audio on a Computer Without Installing5 minutes read
 How to Create a Virtual Drive (Virtual Hard Disk) on Windows 10 Without4 minutes read
 Share How to Record on Computer Without Installing Software5 minutes read
 Create Photo Slideshow: Complete Guide12 minutes read
Reader Comments 0
Sign in with email or Google to join the discussion.