Restore and Backup data on Mac using Time Machine
Back-up is a task that should be done regularly, to avoid "sudden" death when we don't save any data. On the Mac, Time Machine's built-in tool takes care of helping users back up all files, applications and settings in the device.
This program works with Macs and an external hard disk to regularly save important documents. In addition, this tool keeps the system status on specific days, helping you recover the system when the problem is encountered. Follow the backup steps, restore with Time Machine in the following article.
1. Prepare tools:
- The larger the external drive, the more storage capacity. You should choose a drive equal to or greater than the HDD / SDD capacity of your Mac.
- USB cable or ThunderBolt depending on the external drive interface port.
2. Connect external hard disk:
Step 1:
First, we need to connect HDD to Mac, the machine will automatically ask to use HDD to make backup. Select Encrypt Backup Disk to set the password for the backup file. Select Use as Backup Disk .

Step 2:
Time Machine will require the HDD format to be in Mac OS X Extended (Journaled) format . If the HDD contains data, you need to back up, or you can split the partition for the HDD to use Time Machine.
Note: when formatting the drive for the first time using Time Machine, the data on that drive / partition will be erased.
3. Automatic backup:
After the creation of the backup file for the first time, the machine will display a message:

Later, whenever plugging the HDD into the Mac, it automatically compares the difference between Mac and Backup file. If there is a change, Time Machine will automatically backup to the HDD. Time Machine will not delete the data, unless HDD is full of data, the oldest backup file will be deleted to save the latest files.
The Menu Bar icon will indicate the Time Machine operation status.

4. Restore file or folder:
This function will find the deleted file that is still in the Time Machine drive.
Step 1:
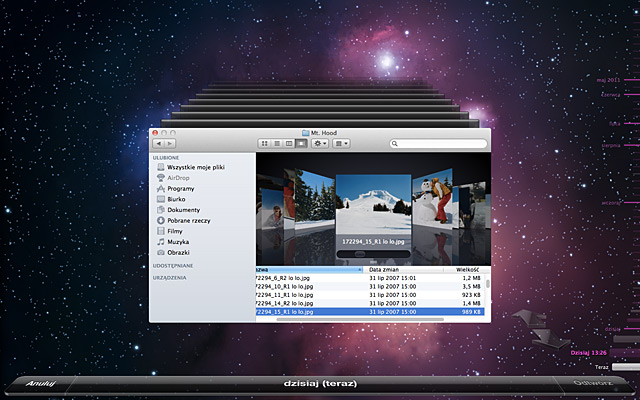
At Time Machine menu, select Enter Time Machine .
Step 2:
Use the timeline on the right corner of the screen to select the exact time. The timeline will show all backup times. If you do not remember which files have been deleted, you can use 2 arrow marks to find the missing files at the same time.

Step 3:
To restore deleted files, select the file and click Restore . The file will automatically copy to the screen, or any drive of your choice.
Step 4:
To preview the restored file with Quicklook can press the spacebar.
You can also use the Finder to search for files by selecting the HDD Time Machine drive, then browsing to the folder you want.
5. Restore the entire Mac:
If your computer fails to access the operating system, you can use this backup file to restore the operating system as if it was backed up.
Step 1:
Turn off the phone completely. Then, attach the HDD Time Machine to the computer.
Step 2:
Turn on the computer. If you hear a Mac crash, press the Options key.
Step 3:
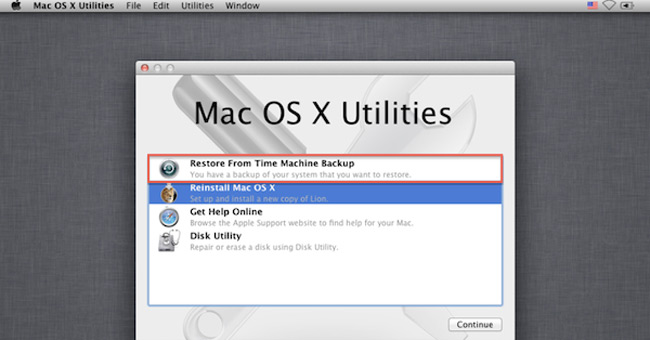
A new window appears, select Recovery to boot into the recovery partition.
Step 4:
If your computer is completely new, clean SDD / HD can boot right from the Time Machine drive.
Step 5:
Select Restore Form Time Machine Backup and follow the instructions of the machine to restore the original state to the backup included in HDD Time Machine.

Refer to the following articles:
- 220 shortcut keys on Excel for Windows and Mac OS
- 20 convenient shortcuts when using Mac OS X
- Find the router's IP address in Mac OS X
I wish you all success!