How to install and use IIS on Windows Server 2019
According to Microsoft, Web Server (IIS) in Windows Server 2019 provides a secure, easy to manage, modular, and scalable platform for reliably hosting websites, services, and applications. .
Microsoft's new release of Windows Server 2019 comes with IIS 10. This guide will show you how to install and use IIS on Windows Server 2019.
Install IIS on Windows Server 2019
Step 1. Run Powershell as admin and install IIS.
Windows PowerShell Copyright (C) Microsoft Corporation. All rights reserved. # install IIS with admin tools PS C:UsersAdministrator> Install-WindowsFeature Web-Server -IncludeManagementTools Success Restart Needed Exit Code Feature Result ------- -------------- --------- -------------- True No Success {Common HTTP Features, Default Document, D. # verify running to access to default web site PS C:UsersAdministrator> Invoke-WebRequest http://localhost StatusCode : 200 StatusDescription : OK Content : ; outerText=; tagName=A; href=http://go.microsoft.com/fwlink/?linkid=66138&clcid=0x409}} ParsedHtml : System.__ComObject RawContentLength : 703Step 2. Run Server Manager and click Add roles and features .

Step 3. Click the Next button .

Step 4. Select Role-based or feature-based installation .

Step 5. Select the host you want to add services to.

Step 6. Check the box for Web Server (IIS) .

Step 7. Additional features are required to add IIS Server. Click the Add Features button > Next .

Step 8. Click the Next button .

Step 9. Click the Next button .

Step 10. This is the selection of Web Server features. Select the features you want to add. In this example, the default options are preserved. Of course, you can add these features after you install IIS.

Step 11. Click the Install button .

Step 12. After finishing the installation, click the Close button .

Step 13. Run your web browser and go to localhost , then you can verify if IIS is running normally.

Using IIS on Windows Server 2019
Step 1. Run Powershell with admin rights and configure the following:
Windows PowerShell Copyright (C) Microsoft Corporation. All rights reserved. # show Sites list : [Default Web Site] is only set PS C:UsersAdministrator> Get-Website Name ID State Physical Path Bindings ---- -- ----- ------------- -------- Default Web Site 1 Started %SystemDrive%inetpubwwwroot http *:80: # [Physical Path] is the Document Root PS C:UsersAdministrator> Get-ChildItem C:inetpubwwwroot Directory: C:inetpubwwwroot Mode LastWriteTime Length Name ---- ------------- ------ ---- -a---- 8/27/2019 6:57 PM 703 iisstart.htm -a---- 8/27/2019 6:57 PM 99710 iisstart.png # verify accesses : [iisstart.htm] responds PS C:UsersAdministrator> Invoke-WebRequest localhost StatusCode : 200 StatusDescription : OK Content : Get-WebConfigurationProperty -Filter "//defaultDocument/files/add" -PSPath "IIS:SitesDefault Web Site" -Name "value" | select value Value ----- Default.htm Default.asp index.htm index.html iisstart.htm # create a test page under the Document Root and verify working # [Write-Output] generates with UTF-16, so specify encoding explicitly with [Out-File] PS C:UsersAdministrator> Write-Output "IIS Default Start Page" | Out-File C:inetpubwwwrootDefault.htm -Encoding Default # verify accesses # for [curl.exe], specify extension ⇒ if not specify extension, [curl] is an Alias from [Invoke-WebRequest] PS C:UsersAdministrator> curl.exe localhost IIS Default Start PageStep 2. Run Start> Server Manager and click Tools> Internet Information Services (IIS) Manager .

Step 3. Open items in the left panel, Default Web Site is configured.

Step 4. Select Default Web Site and click Advanced Settings . , then you can confirm settings such as Physical Path (Document Root) , etc.

Step 5. Open Default Document , then can confirm the default document.
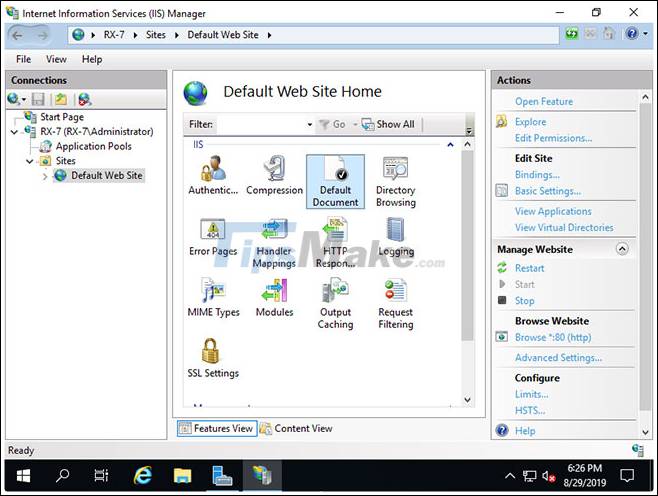
Step 6. You can see the default documents.

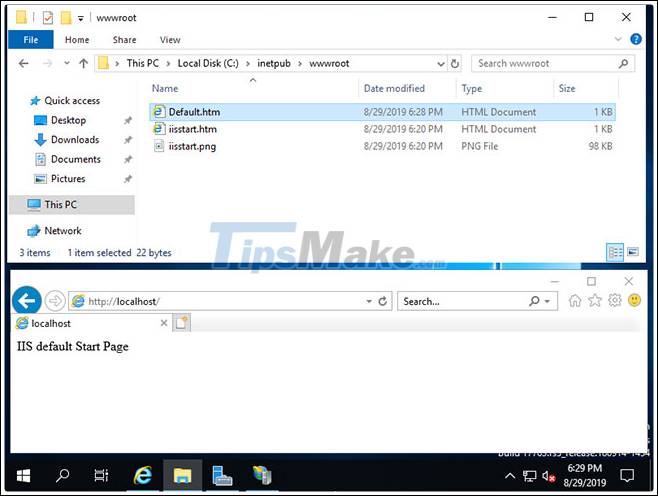
Step 7. Create a test page in Physical Path (Document Root) and verify permissions using a web browser.
Hope you are succesful.
- Instructions for installing Windows Server 2016 on Windows 10
- Instructions for installing Windows Server 2012 step by step
- How to install IIS in Windows Server 2012
- Steps to install Windows Server 2022 on a virtual machine
- How to install a VPN on Windows Server 2019
- How to install software for clients from Windows Server 2012 R2 using Group Policy
- Install Windows Server 2003 and create a backup server
- Steps to install Microsoft SQL Server on Windows 10
- How to install the Print Server in Windows Server 2012
- How to install Nextcloud server on Windows 10
- How to install Hyper-V on Windows Server 2019
- 5 CLEAR REASONS TO UPGRADE TO WINOWS SERVER 2019
- How to install iSCSI Target on Windows Server 2019
- How to install Active Directory on Windows Server 2019
- How to install DNS Server on Windows Server 2019
- Set up Remote Desktop on Windows Server 2019
- Configure SSH Server and SSH Client on Windows Server 2019
- How to configure NTP Server and NTP Client in Windows Server 2019
- How to initial setup Windows Server 2019
- How to install a VPN on Windows Server 2019
-
 Quickly fix WLAN AutoConfig errors on Windows 11
-
Add your Gmail account to Outlook with POP.
-
How to use Zperiod to automatically balance chemical equations.
-
How to center a table in Google Docs
-
How do I use the Learn Step by Step mode in Perplexity?
-
Instructions on connecting Gmail to n8n via Google Cloud Console
 Quickly fix WLAN AutoConfig errors on Windows 11
 Add your Gmail account to Outlook with POP.
 How to use Zperiod to automatically balance chemical equations.
 How to center a table in Google Docs
 How do I use the Learn Step by Step mode in Perplexity?
 Instructions on connecting Gmail to n8n via Google Cloud Console
-
 Free Tools
- CSS Minifier and Compressor
- HTML Minifier
- JavaScript Minifier
- Json Minifier
- SQL Queries Minifier
- XML Minifier
- Password Generator
- uuid Generator
- Hash Generator
- Lorem Ipsum Generator
- QR Code Generator
- QR Code Scanner
- Barcode Generator
- Meta Tag Generator
- Slug Generator
- Placeholder Image Generator
- HTML Table Generator
- Markdown Table Generator
-
System
-
Mac OS X
-
Hardware
-
Game
-
Tech info
-
Technology
-
Science
-
Life
-
Application
-
Electric
-
Program
-
Mobile