Configure POP3 Gmail on Outlook, Windows Mail, Thunderbird
When creating a new account, this account can use the program to retrieve mail such as Windows Live Mail, Microsoft Outlook, Thunderbird . then we have to enable POP to allow programs like Windows Live Mail, Microsoft Outlook, Thunderbird to retrieve mail. In this article, TipsMake.com will synthesize how to set up Gmail configuration on different readers
1- Instructions for configuring POP3 Gmail on Windows Live Mail
As you know, Gmail is an email account that supports POP3 for free. However to use this feature you need to enable it at the Gmail web interface.
How to enable POP3 in Gmail
Before starting, check whether your POP3 Gmail account is enabled. To do so, log in to your Gmail account and select Settings -> Forwarding and POP / IMAP

Select one of the following two options to activate POP3 service : Enable POP for all mail , or Enable POP for mail that arrives from now on .

How to configure Windows Mail
Start Window Mail on Tools and press the Accounts button as shown below.
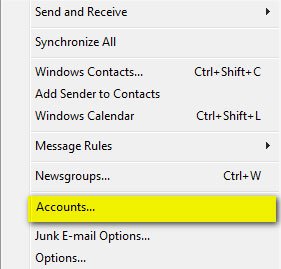
Then click the Add button.

Select the E-mail Account option and click Next.
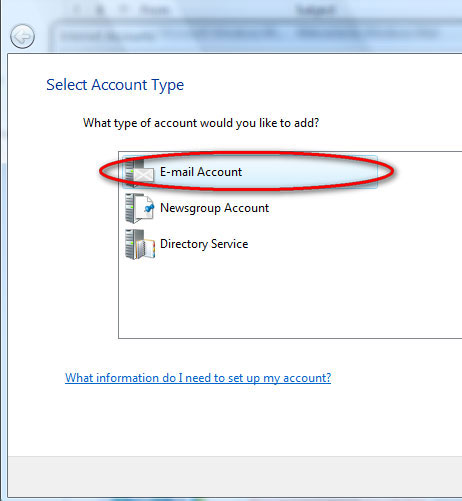
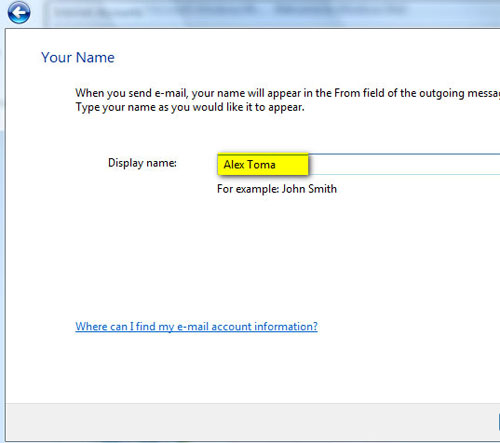
Select the name and enter the display name that will appear in the message you send and click Next to move to the next window.
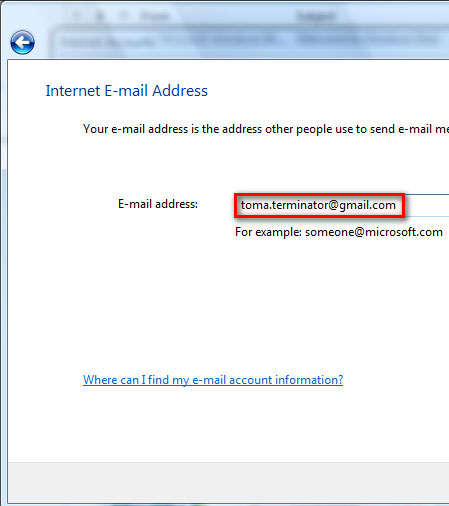
You are required to enter your e-mail address. Fill in and click Next.
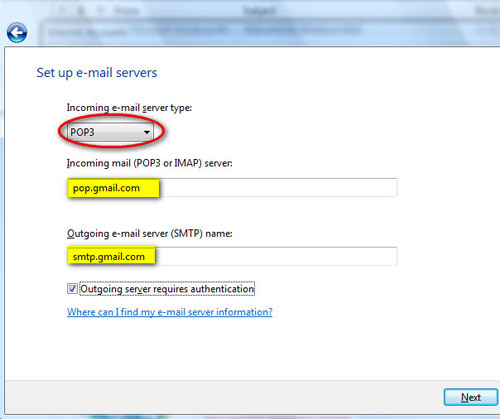
In the next window you will have to set up the e-mail server. At the Incoming e-mail server select POP3 and at the Incoming & Outgoing server enter the name as shown below and check the Outgoing server requires authentication option . When done, click Next.
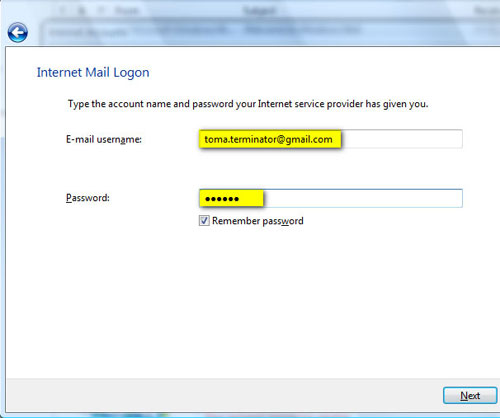
Enter your e-mail address and password at the Internet Mail Logon window. For ease of use, select the Remember password and click Next.
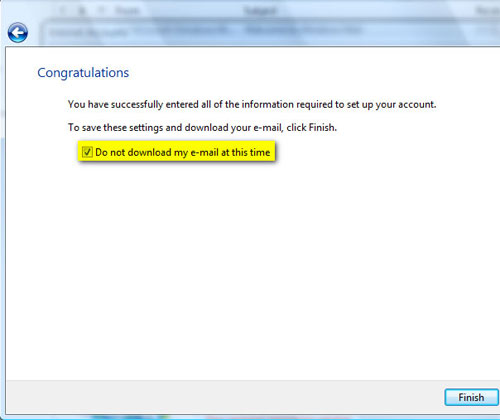
At this point your work is almost completed. Click Do not download my e-mail at this time and then click the Finish button.
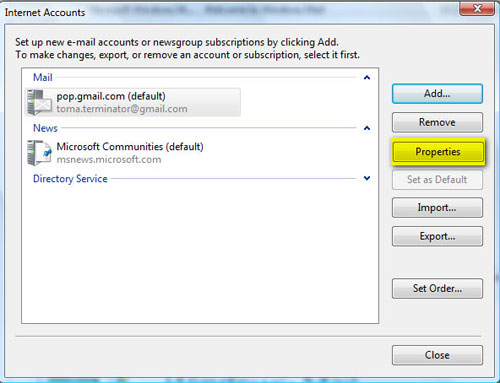
Internet Accounts window is opened. Choose your Gmail account and then click Properties.
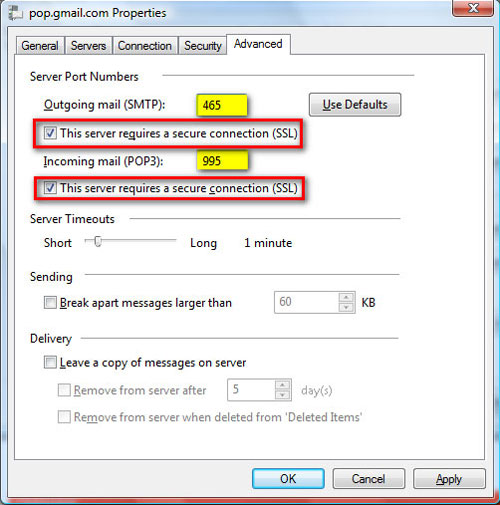
At Advance tab, enter port 465 for SMTP and port 995 for POP3. Please click " This server requires a secure connection (SSL) " for both POP3 and SMTP.
If you want your mail to be stored on the Gmail server, don't forget to click Leave a copy of messages on server . If you do not select this option, when your mail is downloaded it is automatically deleted from Gmail. Once completed, click OK.
Windows Mail is now configured to connect to your Gmail account. Click the Send / Receive button to start sending and receiving mail.
2- Instructions for configuring POP3 Gmail with Thunderbird
First, download and install the latest version of ThunderBird here . After starting, the main interface of the application will look like this:
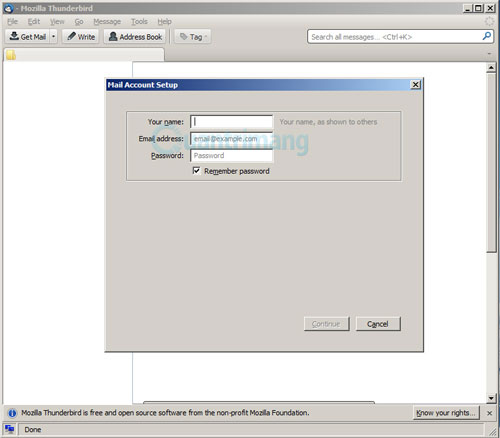
Our task here is to declare the username and email address, for example, here is Nguyen Van A and abc@gmail.com:
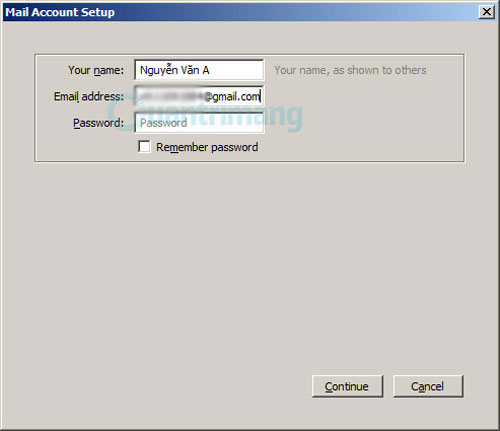
After clicking Continue, ThunderBird will automatically set the specifications to match the email address entered.

Click Create Account to create an account:
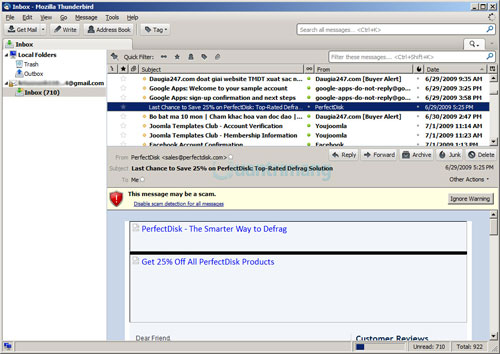
If you need to change the specifications, select Tools> Account Settings as shown below:
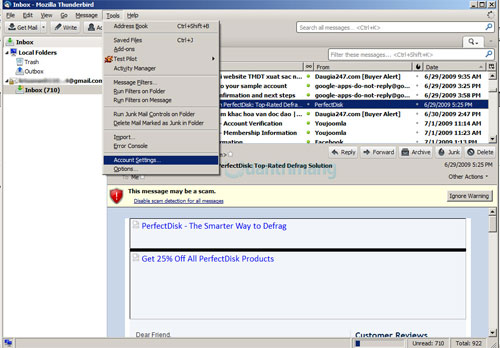
To know more about Google's email service, please refer directly here , in which the information to note is:
- POP3 mail server protocol requires SSL: pop.gmail.com with port 995.
- SMTP mail server protocol requires TLS3 or SSL: smtp.gmail.com and port TLS / STARTTLS is 587, and SSL port is 466.
- Email address is in the form of: abc@gmail.com
Click the Get Mails button to receive the email, then try sending an email to check the Sent feature. Good luck!
3- Instructions for configuring POP3 Gmail on Microsoft Outlook 2010
In the past, configuring a Gmail account in Outlook 2007 is very simple, because it automatically sets up the relevant parameters so you can simply enter your name, email address and password. But in Outlook 2010, you need to follow these steps:
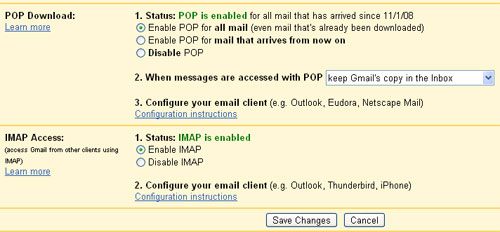
First go to http://mail.google.com / and log in with your Gmail account, click on the ' Settings ' link in the upper right corner, browse to the ' Forwarding and POP / IMAP ' tab. . Next, check the boxes for ' Enable POP for all mail ' and ' Enable IMAP ' in POP Download and IMAP Access items. Click the Save Changes button to save the setting.
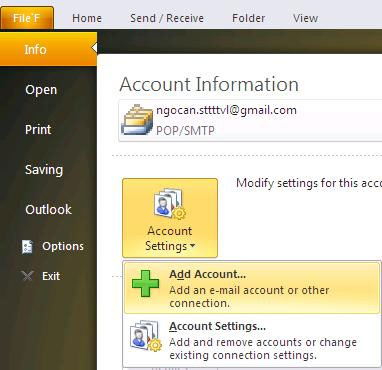
Activate Microsoft Outlook 2010, the first time you start, click 'Next', select Yes and Next, then check the box next to ' Manually configure server settings or additional server types ', click Next. Check ' Internet E-mail ', Next. In this step, if you have set up an account, in the main interface window, click on 'File'F', select Info, click on the Account Settings icon and select Add Account.
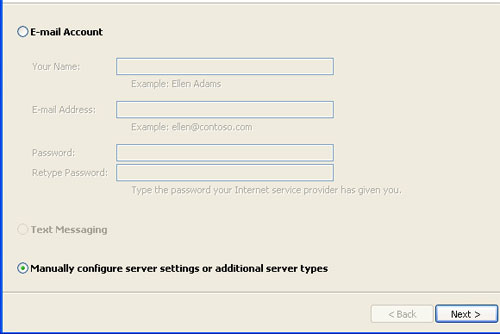
Enter the necessary information such as Your Name, Email Address, Account Type (select POP3), Incoming mail server (imap.gmail.com), Outgoing mail server (smtp.gmail.com), User Name, Password .
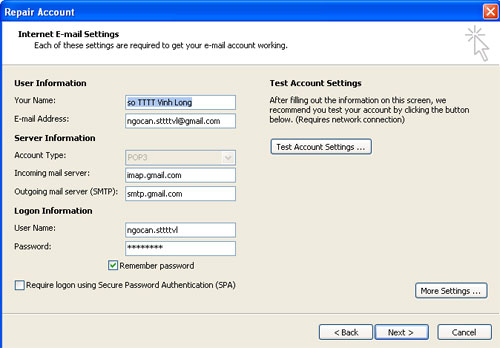
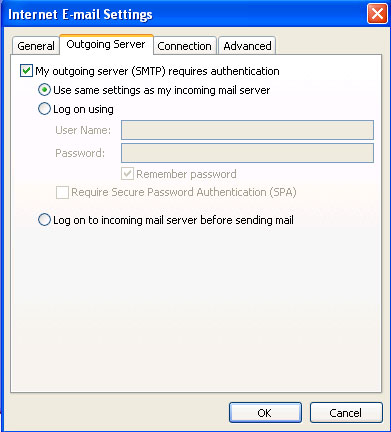
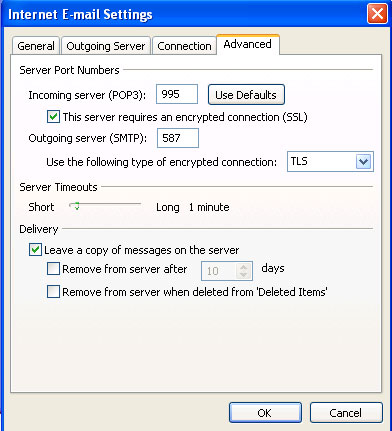
At this point, click the ' More Settings ' button to configure additional related parameters, browse through the Outgoing Server tab and check before the words' My outgoing server (SMTP) requires authentication ', then select ' Use same settings as my incoming mail server '. Next, select the Advanced tab, check the box next to ' This server requires an encrypted . ', enter 995 after POP3 and 587 after SMTP. After Use the following type of encrypted connection, select TLS from the drop-down list. Under Delivery below, check the ' Leave a copy of messages on the server ' checkbox, click OK to finish.
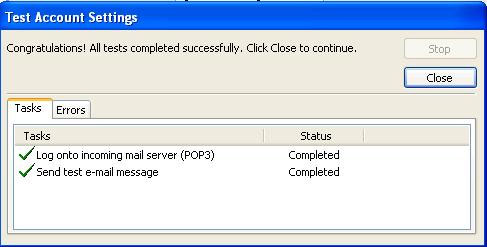
Now to check if the sending and receiving mail is successful, click the ' Test Account Settings ' button, if the result is Completed then it is considered that you have configured it correctly, and then click Finish to switch to the administration interface. Manage your mailbox.
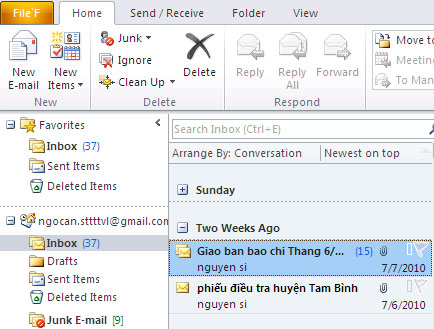
To download all incoming mail in Inbox from the network, go to Send / Receive tab, click on the ' Send / Receive All Folders ' icon, and to send a new message, on the Home tab, select the New E-mail icon. .
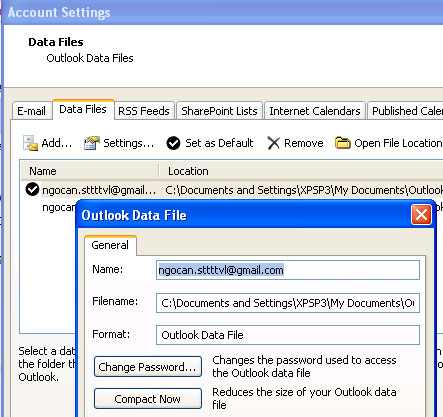
Another important thing that you need to do is to secure your mailbox by setting a password for it, to do so according to the File'FInfoAccount SettingsAccount Settings link . Select the account you want to set up, then browse to the Data files tab, click the Settings button below, select ' Change Password ', you just need to enter the password to protect the 2 New Password and Verify Password boxes if it is the first configuration Click OK to finish