Install and configure Windows Home Server
Today we will introduce you to Windows Home Server and show you how to install and configure it with other computers on your network..
Network Administration - Have you ever wanted to be able to access all your important files, music files, photos, etc. in all home computers from a central server? Today we will introduce you to Windows Home Server and show you how to install and configure it with other computers on your network.
Windows Home Server (WHS) is very meaningful for family needs or for small office use. It allows you to focus important documents and digital files on a central computer and allow easy access from other computers on your network. It has the ability to backup 10 computers and restore them if needed. Can be used as a media server, backup solution, data recovery, document manager and allows you to access what you need from anywhere with a web connection. Using a personal website address, it allows you to safely download and upload your data files.
You can buy servers that have WHS installed on it, or can create them separately (this way has more interesting points). The interesting point is that you can use an old desktop to run Windows Home Server. A computer with a minimum configuration of 1GHz Pentium III, 512MB RAM, 80GB Hard Drive will be able to work, but the minimum requirements and requirements are encouraged to have many different points. You can check the minimum requirements and incentive requirements of the system from Microsoft guidelines for WHS.
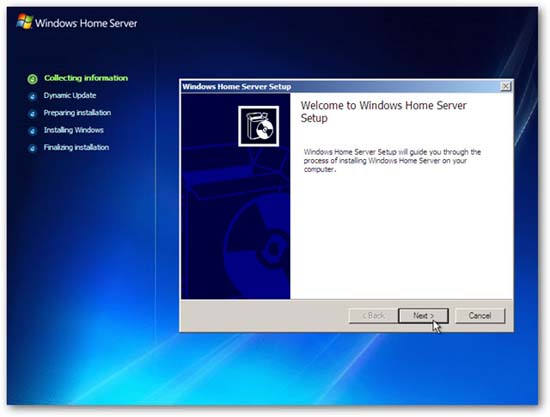
Start installation
The installation process is simple and easy to implement. Boot from the WHS installation disk and launch the program's setup wizard.
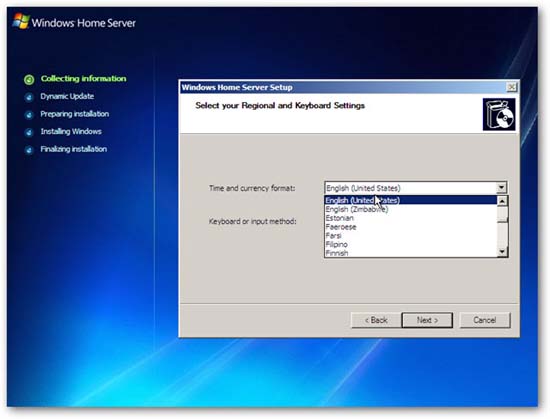
Choose your regional and keyboard settings .
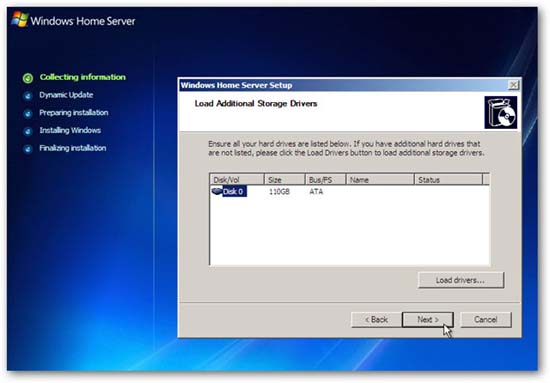
Select the drive in the machine. In the case of this example, there is only one drive, but if you have multiple drives, make sure they are listed. Adding other drives at a certain time is very simple and we will introduce you to another article.
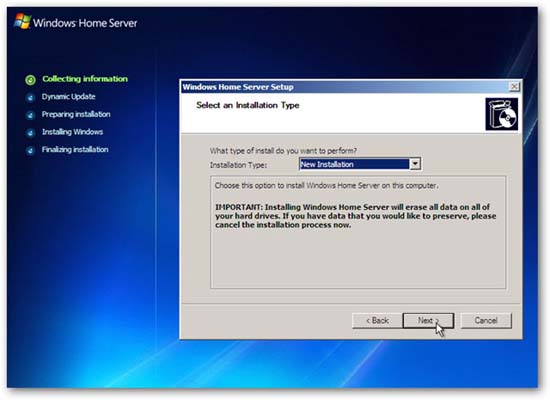
Select New Installation .
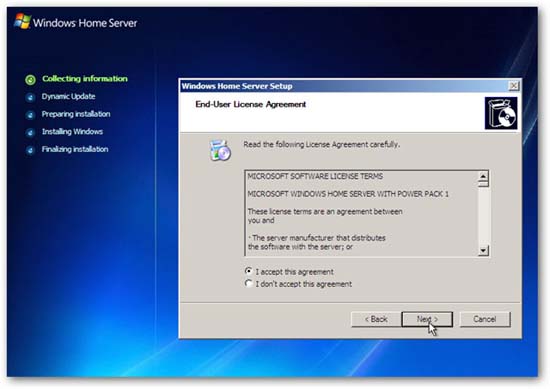
Accept Microsoft EULA .
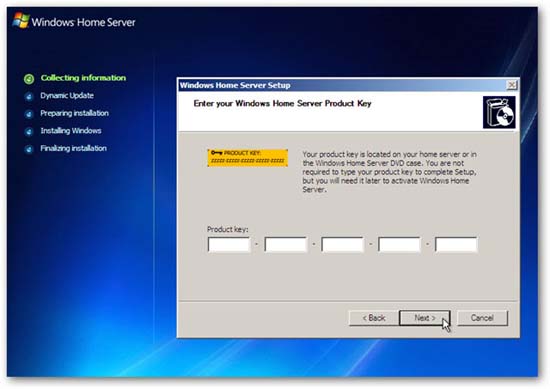
Enter your Windows Home Server product key.
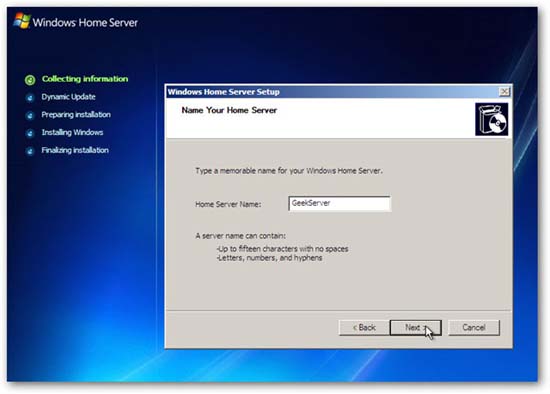
Name the Home Sever server.
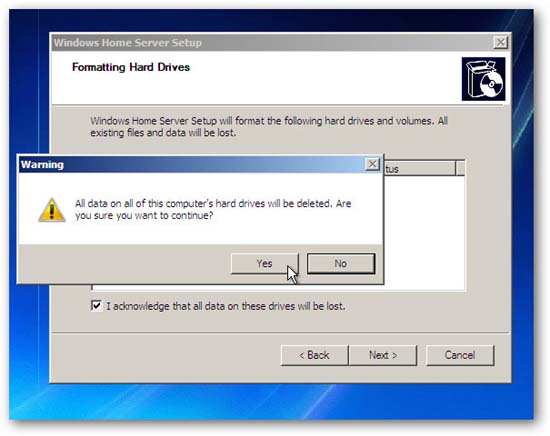
Verify the hard drives will be formatted.
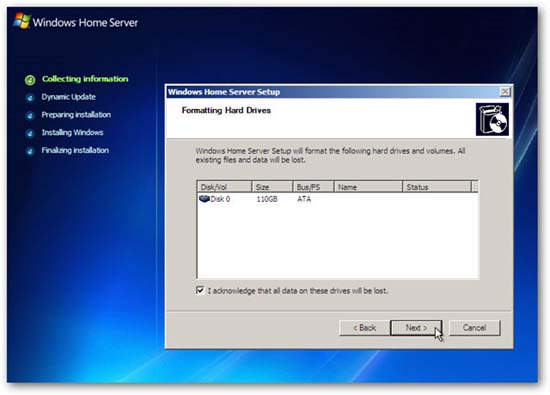
You will receive a reminder that all data will be erased from the hard drive.
Click Start to begin the installation process. The amount of time it takes to complete the process will depend on the systems.
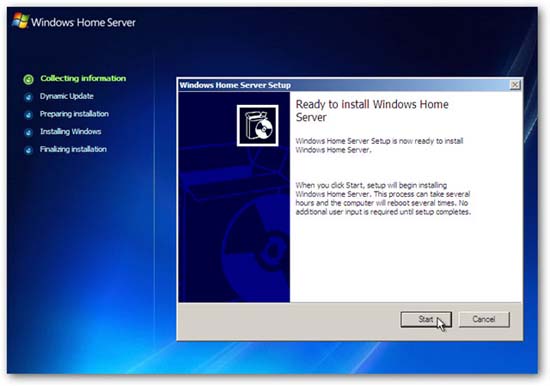
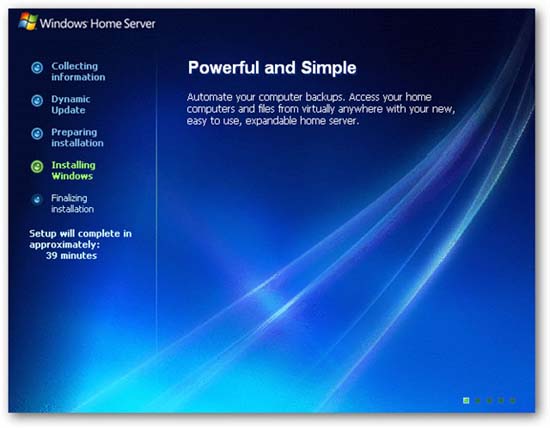
Nothing is required when the installation process takes place. The system will restart several times and you will see different display screens until the installation process is complete.
Finish installation
When you see the Welcome screen welcome screen, your installation is almost done.
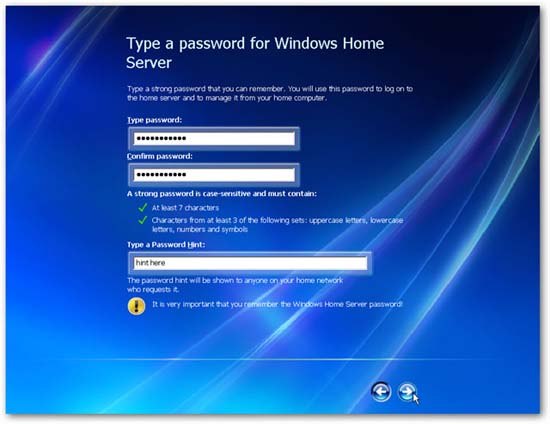
Type in the password and password hint for the server.
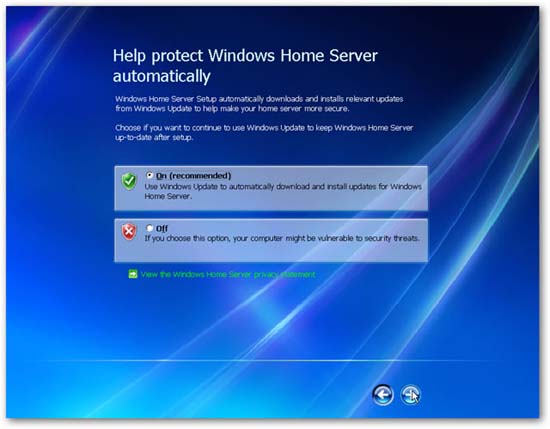
Decide if you want to set up automatic updates.
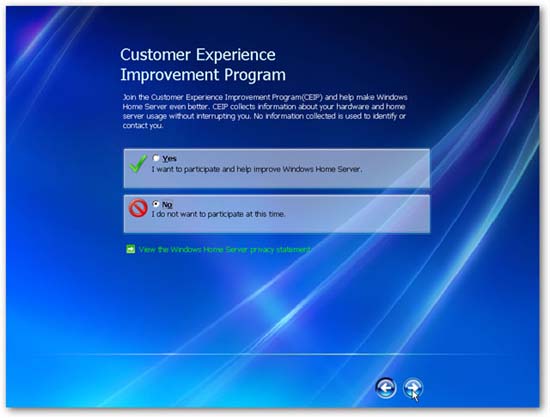
Select whether to join the Customer Experience Improvement Program or not.
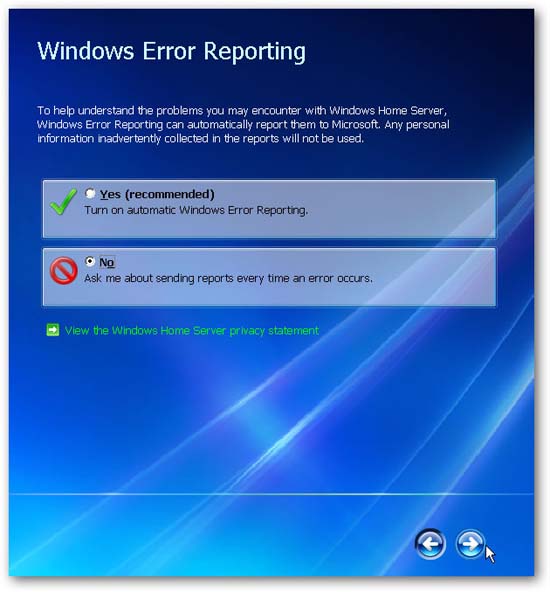
Choose whether you want to enable Windows Error Reporting automatically.
That's all you need to do for your installation. No need to leave your keyboard, monitor or mouse to the server. The only thing you need to be able to connect is to run Ethernet Cable to your router ( Wireless is not supported ). You can administer computers from any computer in your network after installing Windows Home Server Connector on other computers.

Windows Home Server administration interface
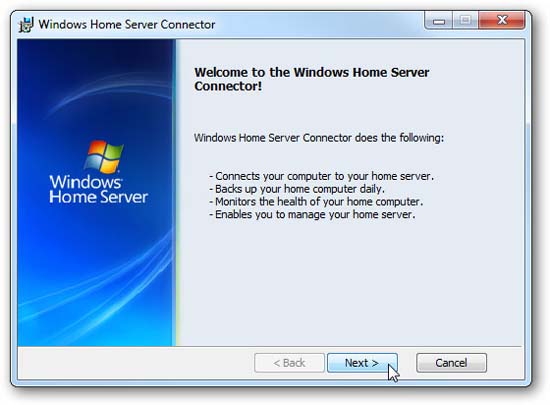
To connect the computers on your network to the server, you need to install Windows Home Server Connector, to get it, you need to download it. In addition, you can also install WHS Connector for computers on the network that you want to connect to the server. It connects your computers with WHS, allows nightly automatic backups, network health checks, and allows you to remotely administer the server from your computers.
If you don't want to take a CD to install it, you can use a free program like Virtual CloneDrive to mount an ISO file and transfer files to a USB.
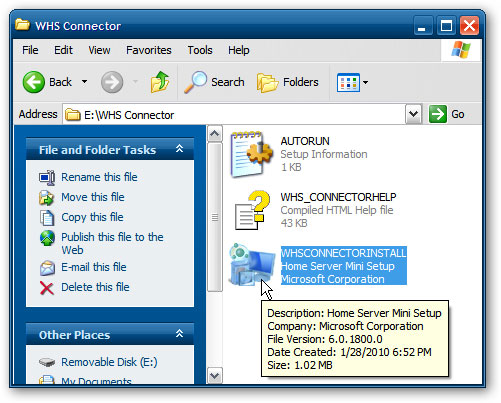
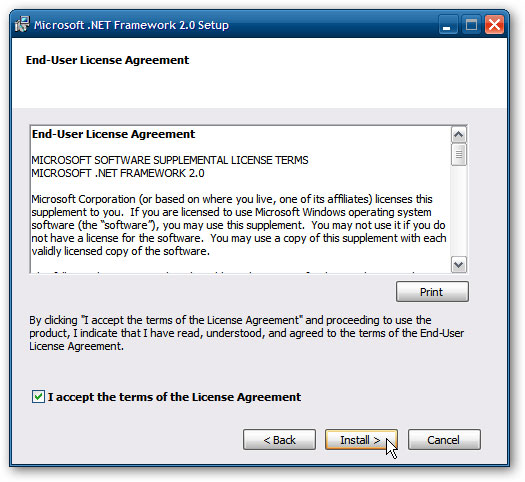
Before installing the connector in XP, you need to install Microsoft .NET Framework 2.0, which will guide you through the installation process if needed.
When you start WHS Connector Setup, the program will search for Home Server.

Then it's just a matter of working through the rest of the wizard.
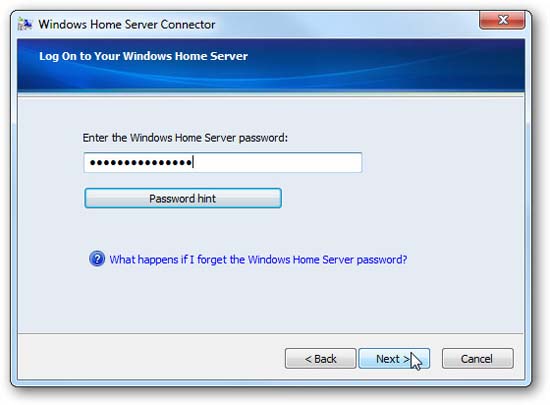
During this process, you need to enter the password you created for the server.
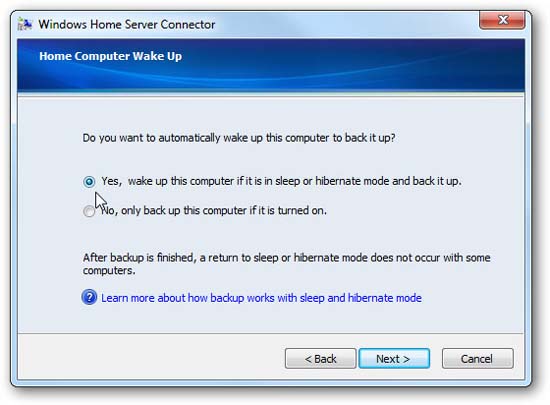
Decide if you want your computer to 'wake up' if it is in 'sleep' mode to back it up.
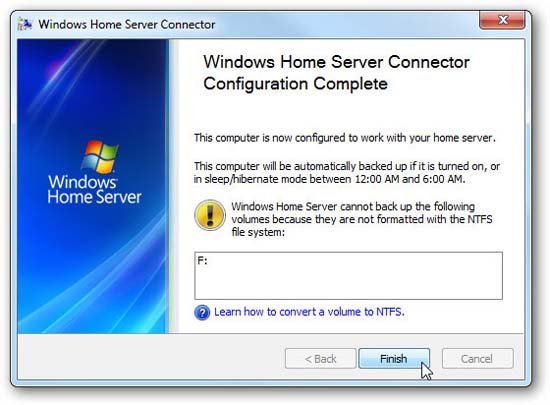
When the configuration is complete, we will see our settings - wake up the computer for backup between 12:00 am and 6:00 am. Also in this example, we will receive a message stating that one of the drives in the computer will not be backed up. This is because it is formatted with a FAT 32 partition and this is not supported because it only backs up drives with an NTFS partition.
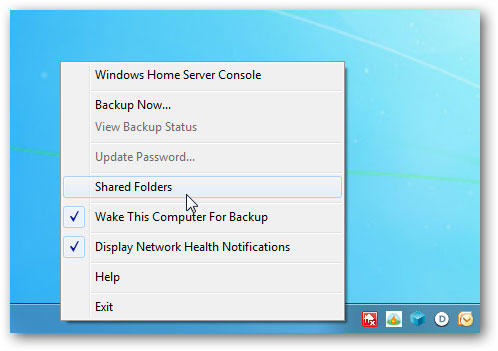
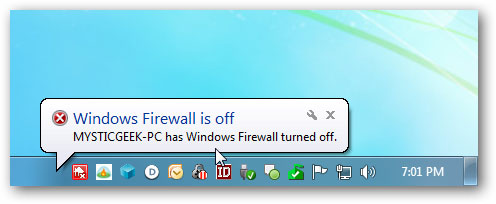
The Home Server Console icon is in the system tray and you can control some of its settings by right-clicking on the icon.
It displays your network health and displays security alerts (this feature can be easily turned off). In this example, we can see that a computer in the network has been turned off the firewall.
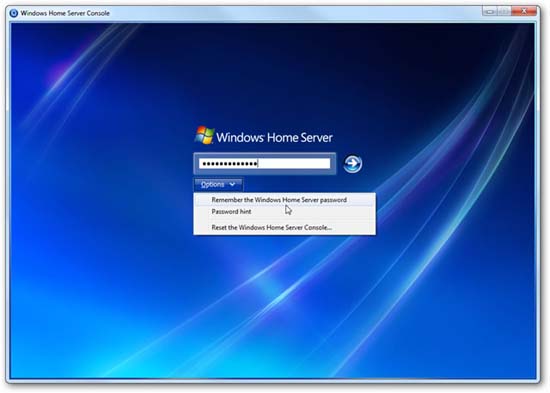
When you open WHS Console, you will be prompted to log in to the server. There are a few other features here like allowing you to remember the password, password hint and setting the interface.
Once logged in, you can configure and administer the server and its other functions.

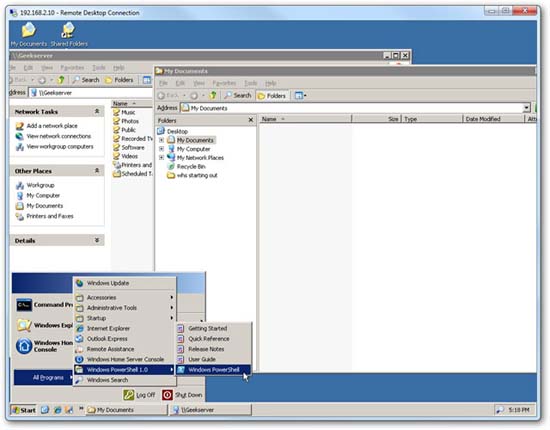
If you need to make some detailed changes to the server, another option is that you can use Remote Desktop, which is easy to use.
Download the upgrade
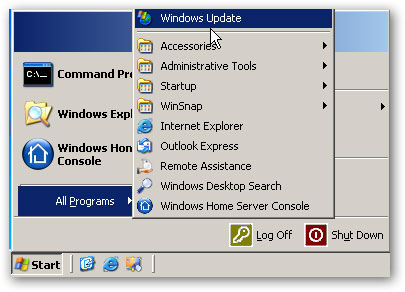
Now the installation is complete and we need to add all updates from Microsoft. Click Start All Programs and Windows Updates. You will then receive the latest security updates as well as Power Pack upgrades. Power Pack is an upgrade that adds new features and provides patches for known issues with Windows Home Server.
Conclude
This tutorial is just the beginning of using a new Home Server. Inside the Home Server there are many interesting ways if you want to focus on digital entertainment and access it from any computer using a Windows or newer version. Or if you have a small office or family and want to access your work from anywhere with a web connection. There are also some very useful reasons for having a home server. In a later article, I will show you more details about how to set up and use this Home Server.