Table of Contents
This updated guide examines Install DNS Server and Domain Controller in Windows Server 2003 and organizes the essential facts, background, and practical takeaways in clear American English.
In this tutorial we will show you how to create the first domain controller (DC) in your network or company that includes DNS server settings in windows server 2003. Do you have to install the DNS server for DC? With DNS, client computers will know which computers are DC. Besides, you can configure DNS on another server other than DC.
Before starting the DC installation process, you need to ensure the following:
- Basic windows server 2003 installed
- Make sure you have assigned a static IP address to the server
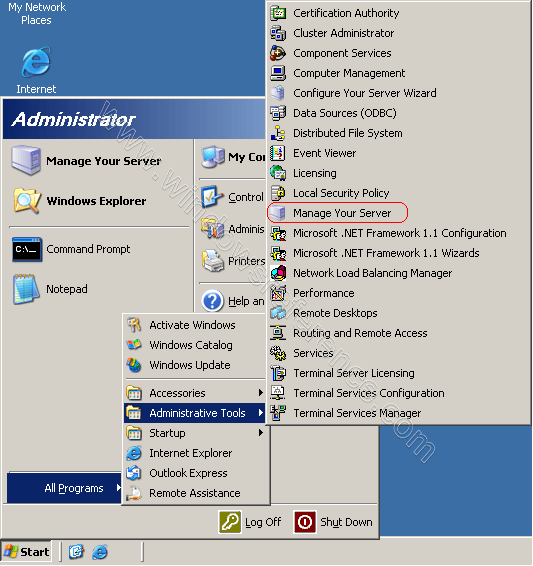
Now start the installation process of DNS and DC. First you need to go to Start-> All Programs–> Administrative Tools–> Manage Your Server
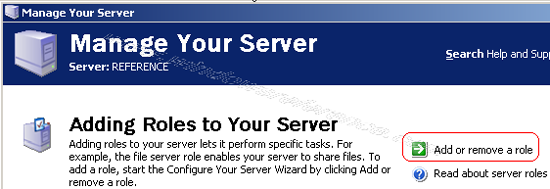
Here you need to select Add or remove a role
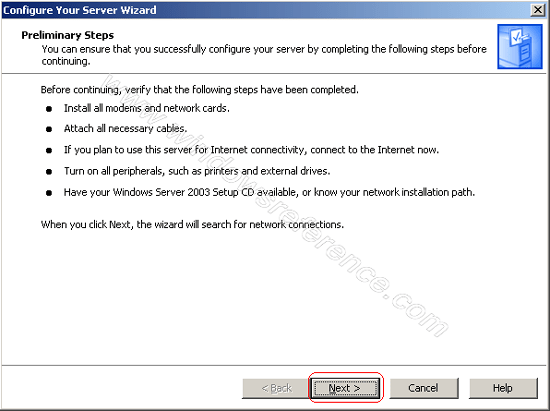
Verify the steps below and click Next
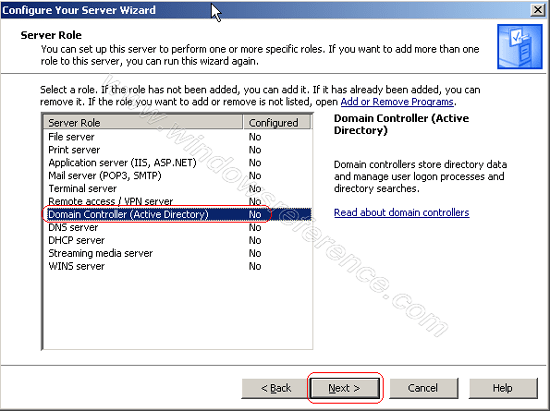
Select the Server Role as Domain Controller option and click Next
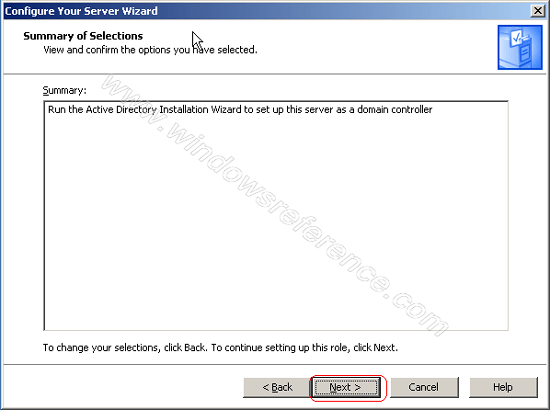
Summary of your options and click Next
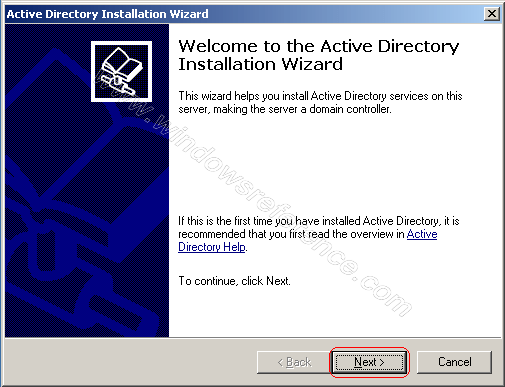
The Active Directory Installation Wizard appears, now click Next
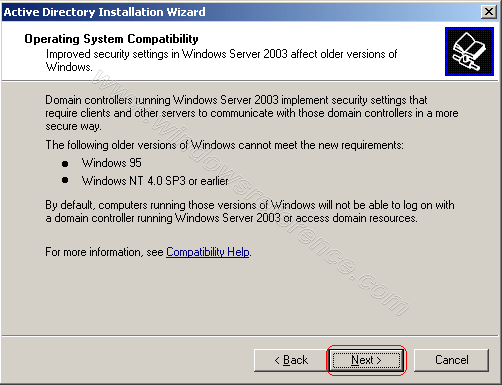
Click Next on the compatibility window
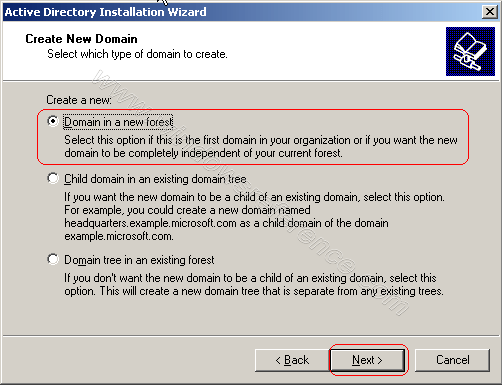
Chỉ cửa sổ chọn tùy chọn mặc định của 'Domain Controller cho một miền mới' and click 'Next' In the next window, select the default ' Domain Controller for a new domain ' option and click ' Next '.
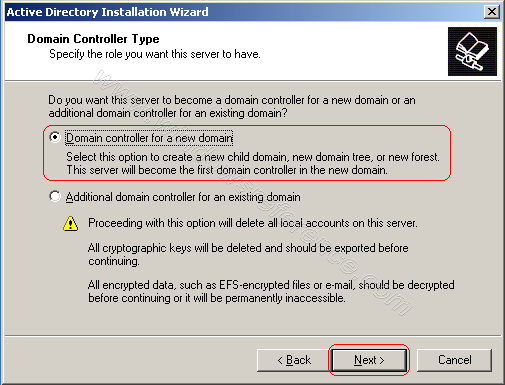
In this tutorial, we will create a domain in a new forest, since it is the first DC, you need to select this option.
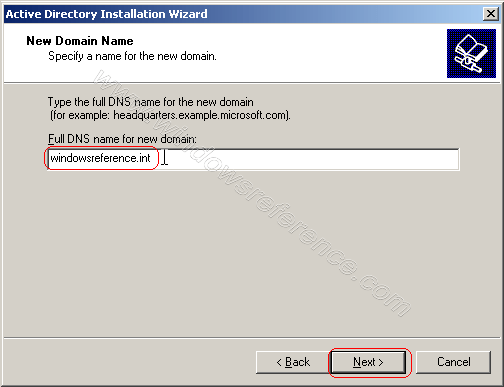
Now you have to mean the name for your domain. If you have a domain like windowsreference.com, you can use it, but it is not recommended because computers within your domain may not be able to access the company's website. Active directory domains do not need to be real domains like the domain above - they can be any name you want. So we will call it ' windowsreference.int '.
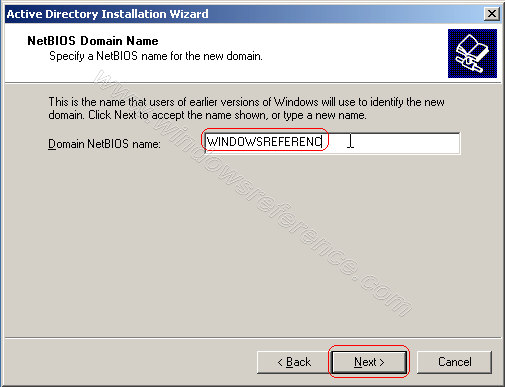
To make things simple, we will use 'windowsreferenc', this is a default option, like the NetBIOS name of the domain.
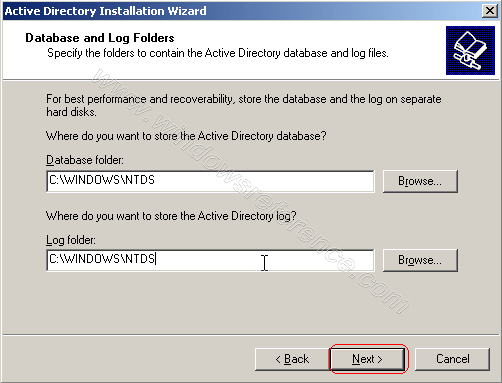
The next dialog box will suggest saving the AD database and logging the separate hard drives and you can leave the default settings.
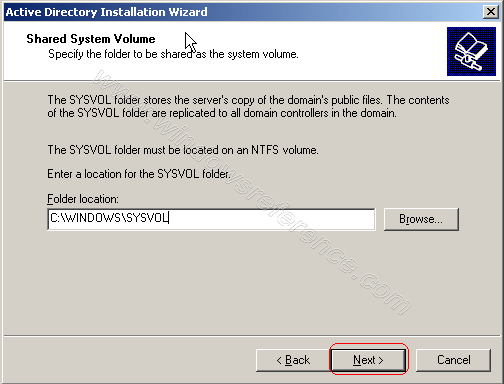
The SYSVOL folder is a public shared folder, where things like. MSI software packages are stored when distributing software packages and you can leave the default settings or change the path.
The next screen says you need a DNS server to get things working the way you want. We will install the DNS server on the computer or if you want, you can install it somewhere, select ' Install and Configure. ' and click Next .

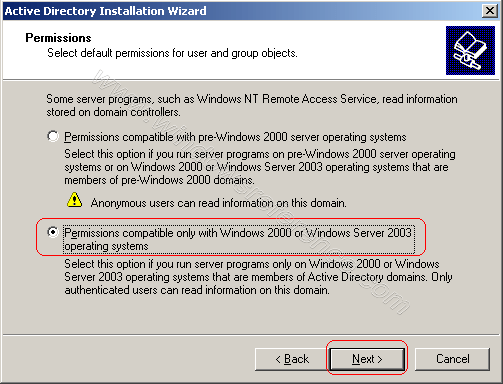
Here you need to select the terms for the server win 2000 or win 2003 if it is NT4, you select the first option by not selecting the second option and clicking Next .
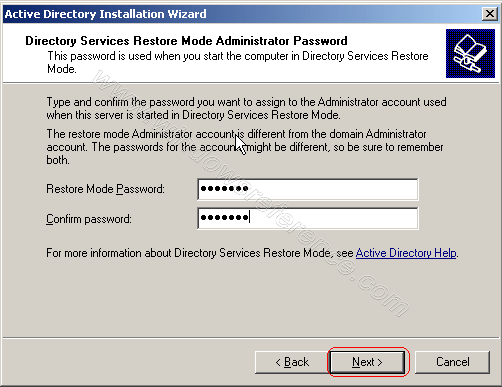
A recovery mode password is a password that all administrators should not use, though it should not be forgotten because this is a password that can save the server error. Click Next .
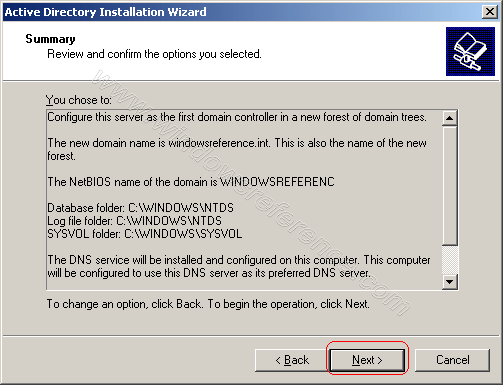
Now we will see a summary of what will happen, click Next .
Active directory installation process will take a few minutes. Sure, you'll be prompted for a Windows Server 2003 CD (for DNS), so be prepared for it in advance.
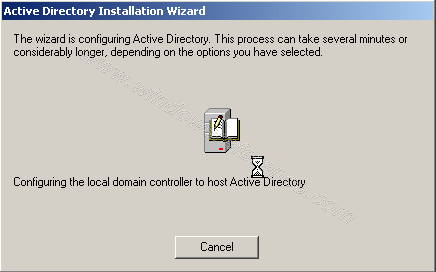
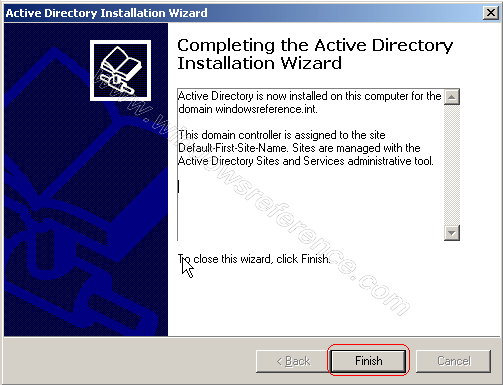
When the Active directory installation process finishes, click Finish .
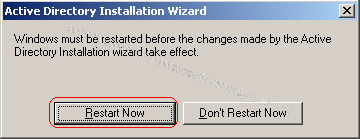
Now you need to select the ' Restart Now ' option to restart your server.
After restarting, you can see the login option.
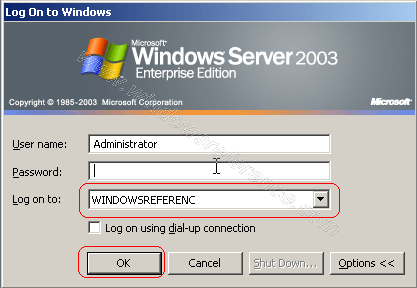
After logging in, you can see a screen similar to the one below, that your server is currently a domain controller.
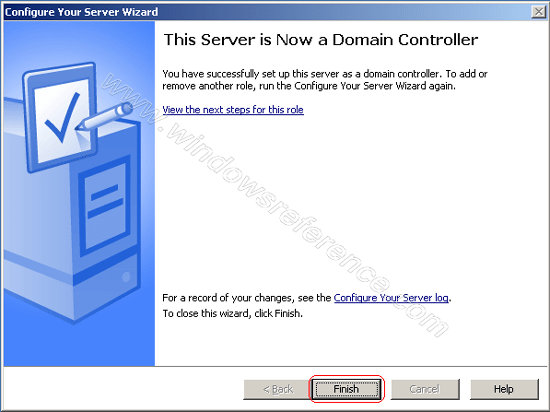
That is, your server is configured as a domain controller and DNS server.
FAQ
What is Install DNS Server and Domain Controller in Windows Server 2003 about?
It provides a structured overview of DNS, explains the main context, and highlights practical takeaways for readers.
Why does this topic matter?
Understanding the main concepts helps readers evaluate the issue, avoid common mistakes, and make better-informed decisions.
How should readers use this information?
Use the guidance as a practical starting point, confirm details that may have changed, and follow current product, safety, or security recommendations.
Related Articles
 How to Creating a Domain Controller -- Dc on Windows Server 20125 minutes read
 Fix the Problem When Removing Windows Server 2008 Server Core3 minutes read
 Run Windows Server 2008 R2 -- Install and Create a Lab Domain12 minutes read
 Working with the Domain Controller Diagnostic Utility - Part 610 minutes read
 Install Windows Server 2003 and Create a Backup Server1 minutes read
 Instructions: Use Ebox as Windows Primary Domain Controller13 minutes read
Reader Comments 0
Sign in with email or Google to join the discussion.