How to Watermark Your Images with Zoner Photo Studio Pro 16
Want to share your images, but would like to be sure people know who took them? If that's the case, watermarking is your solution. From the Manager tab, select the images that you want to watermark.
Table of Contents
Method 1 of 2:
Using a Textual Watermark
-
 From the Manager tab, select the images that you want to watermark.
 -
 Go to Edit >> Text Overlay.
 -
 Where it says Text, type in what you want it to say.
 -
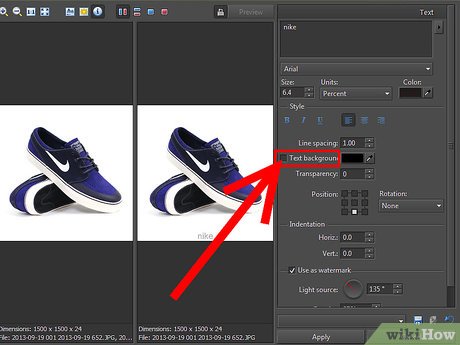 Depending on your watermark, check the tick box beside the Text background. This should make it easier to see while you are designing it. You can remove it when you are done, if you wish.
 -
 If you are going to do multiple lines for your text watermark, use the text alignment options that you see. Otherwise, you don't need to worry about them.
 -
 Change its position and rotation. Obviously, you don't want a pink box in the center of your photo, so move it where you want to be.
 -
 Fine tune your watermark's location. You can do this with the horizontal and vertical indentation options.
 -
 Finish the look by moving the 'sun' around (light source). This allows you to adjust the 3D appearance of your watermark.
 -
 Adjust the opacity. Click Apply to All or Apply.
Method 2 of 2:
Using an Image Watermark
-
 Be sure that you have an image (usually created, not a photograph) that you want to use for the watermark.
 -
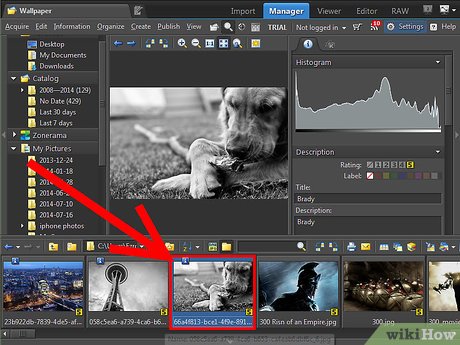 Select the image, or images, that you want to watermark.
 -
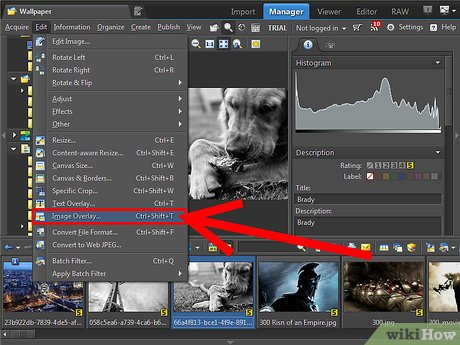 Go to Edit >> Image Overlay.
 -
 Go to Select Image... and then locate the image that you want to use for the watermark.
 -
 Select Use as Watermark.
 -
 Select Emboss. The result is close to the final 'look' of the watermark.
 -
 Resize it, if needed. Click on Resample and raise or lower the percentage as needed.
 -
 Fine tune the placement with the vertical and horizontal options, once you have it about right.
 -
 Disseminate your images.
Was this article helpful?
Your feedback helps us improve.
Related Articles
 How to Post Your Images to Flickr Using Zoner Photo Studio2 minutes read
 How to Organize Your Images Using Zoner Photo Studio X4 minutes read
 How to Rate Your Images with Stars in Zoner Photo Studio Pro 173 minutes read
 How to Use Selection Tools in Zoner Photo Studio X5 minutes read
 Instructions to stamp photos, add watermark to images on Android phones4 minutes read
 5 ways to remove watermark from photos10 minutes read
Reader Comments 0
Sign in with email or Google to join the discussion.