Table of Contents
This updated guide examines Tool: How to Create a Butterfly Clipart and organizes the essential facts, background, and practical takeaways in clear American English.
Part 1of 2:
Drawing the Outlines
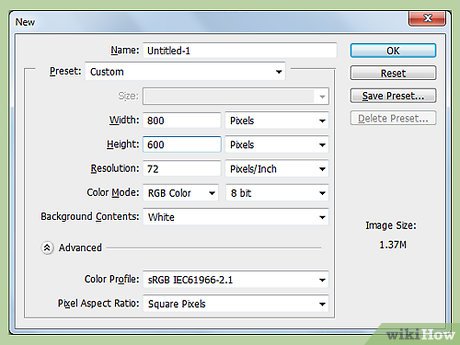 Start by opening your graphics program. Create a 'New Document' with a size of 800 pixels wide by 600 pixels tall.
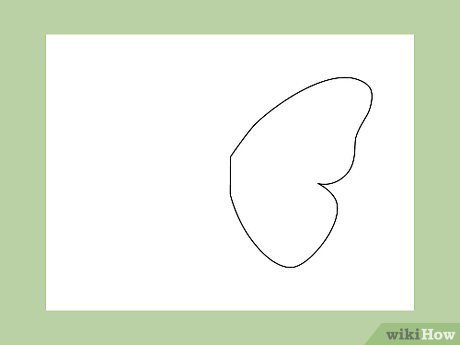 Using the "pen" tool, in your program of choice, is useful for creating more complex shapes. Start by creating one of the butterfly's wings with the pen tool. Set the stroke to "3 pixels," and don't worry about a fill at this point.
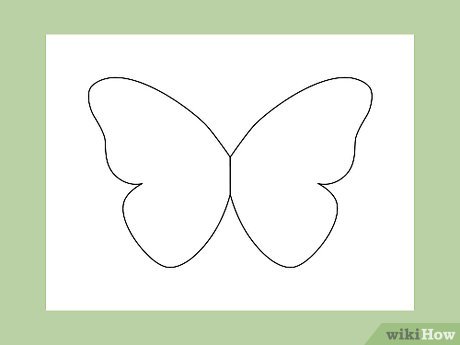 Make the other side. An easy way to create symmetry in an artwork is to copy and paste like shapes. First, select the original butterfly wing, select 'Copy' (generally located in the 'Edit' menu of a program's toolbar), select 'Paste', and then drag my duplicated wing into place. Now you have a set of wings!
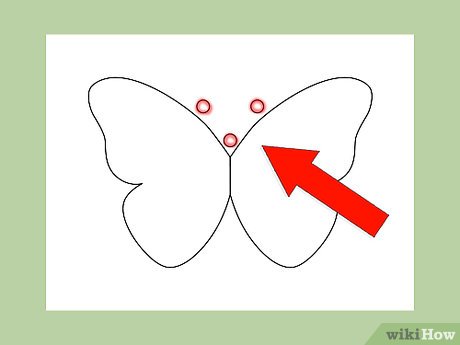 Utilize the 'Circle' or 'Ellipse' tool to add circles for the head and antennae. After selecting the tool, simply click anywhere on the artboard, click and drag to your desired size. Copy and pasting can also come in handy here.
 Use a few more overlapping ellipses to easily form the butterfly's body!
 Connect the antennae to the butterfly's head, using either the 'Line' tool or the 'Pen' tool. With 2 clicks of the Pen Tool, you can create one antennae connection. After that, copy and paste to apply the same line to the opposing antennae.
Part 2of 2:
Cleaning Up and Filling In
 Review what you have so far. The graphic looks a but basic and cluttered with all of the overlapping lines, don't you think? That can be fixed by adding 'Fill' colors to the shapes and removing/recoloring the outlines or 'Stroke'.
 Select each of the segments that made up the butterfly and add fills of color. You might use brown with a slight red tint, as pictured here (RGB value: #6B4411). You can also change the outline (stroke) color from black to the new brown. In the case of the antennae connections, only the stroke needs to be modified.
 Do the wings, too. After applying the same treatment to the wings (this time using a dark red color: #B54B1D), you have a fully colorized digital butterfly!
 Use gradient, if desired. This more advanced technique can be applied to fills to create a more natural or interesting colorization. For each wing, you can apply a 'Radial Gradient' combining two colors (a yellow: #D3D400 with a red: #B54B1D) to produce a more naturally colored pair of wings. Check out the final product!
FAQ
What is Tool: How to Create a Butterfly Clipart about?
It provides a structured overview of tool, explains the main context, and highlights practical takeaways for readers.
Why does this topic matter?
Understanding the main concepts helps readers evaluate the issue, avoid common mistakes, and make better-informed decisions.
How should readers use this information?
Use the guidance as a practical starting point, confirm details that may have changed, and follow current product, safety, or security recommendations.
Related Articles
 Beautiful Butterfly: The Most Beautiful Butterflies in the World4 minutes read
 The New Butterfly Was First Found in Israel After 109 Years3 minutes read
 What Is the Difference Between the Scissor Keyboard and the4 minutes read
 Why Is Apple's Butterfly Keyboard So Bad?5 minutes read
 Watch the Speaker TV Open Like a Butterfly, Costing $$ 20,1003 minutes read
 How to Get Free Butterfly Phuong Cuu Thien Lien Quan Mobile Skin3 minutes read
Reader Comments 0
Sign in with email or Google to join the discussion.