Steps to remove Watermark in Photoshop so that you have the image you want
This article will show you how to remove Watermark in Photoshop very simply and effectively, helping you to have the beautiful images you want...
Table of Contents
Some of the watermark of the photography application will not be needed, you can remove it with Adobe Photoshop software. Here, I will guide everyone in 3 simple ways to remove Watermark in Photoshop on your computer , helping you to have the image you want.
1. Remove Watermark in Photoshop with Patch Tool
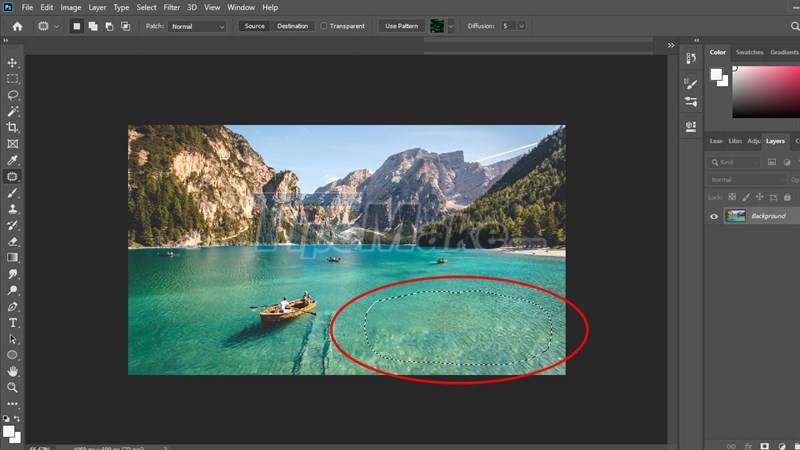
Step 1: Go to File> Open to select the image you want to edit, then click the Patch Tool on the toolbar and borders around Watermark Watermark to zoning.

Step 2: Next, click on the area you have circled, while holding the mouse, move the selection up and down or left to right to hide the Watermark.

Please perform the operation of moving the selection continuously so that this selection looks exactly like the surrounding background.
Once done, press Ctrl + D to delete the selection border.
That's it, it's that simple, isn't it! Let's take a look at the results:

2. Remove Watermark in Photoshop with Spot Healing Brush Tool
Step 1: At the location of the Patch Tool you selected in method 1, click the small arrow in the lower corner to display the toolkit, then select the Spot Healing Brush Tool .

Step 2: Next, to proceed to delete the Watermark, please click on the location of the Watermark to remove it.

You apply it little by little and continuously until the Watermark disappears completely.

Result:

3. Remove Watermark in Photoshop with Content - Aware Fill
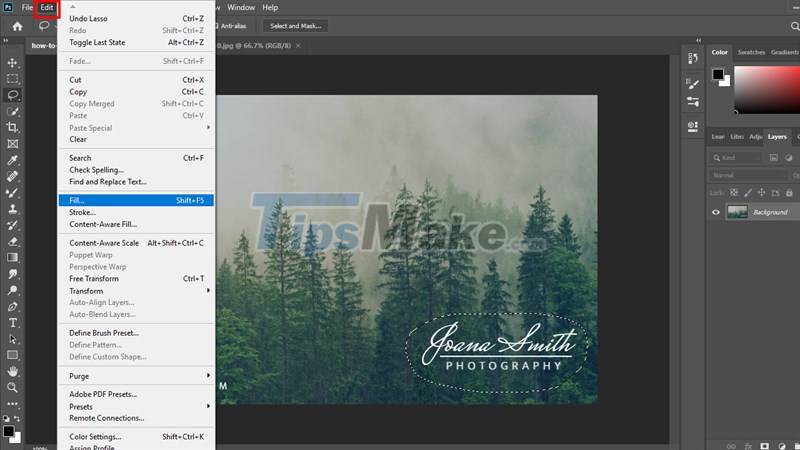
Step 1: After you have selected the image to remove the Watermark, click the Lasso Tool on the toolbar and draw around the Watermark to select the area (It is recommended to draw a lot of excess so that Photoshop makes automatic editing easier. ).

Step 2: Then, go to Edit > Fill or press Shift + F5 on the keyboard to open the Fill window .
Step 3: After the Fill window is displayed, adjust the parameters as below, then click OK to complete.

Step 4: After that, Photoshop will automatically remove the Watermark from the image. To complete the editing operation, press Ctrl + D to remove the selection border.

Let's have a look at the results:

Above are 3 simple but extremely effective ways to remove Watermark in Photoshop that you can apply in necessary cases. Thank you for reading the article and good luck to you.
Was this article helpful?
Your feedback helps us improve.
Related Articles
 How to delete Watermark, delete stamps from photos in Photoshop9 minutes read
 How to remove the Gemini watermark from photos5 minutes read
 5 ways to remove watermark from photos10 minutes read
 How to insert, delete watermark in Word documents5 minutes read
 Remove objects in photos with Photoshop's new AI-powered Remove Tool4 minutes read
 How to remove watermark copyright mark, delete Watermark on PDF files3 minutes read
Reader Comments 0
Sign in with email or Google to join the discussion.