How to Convert JPG to Vector
Vector graphics are the ideal format for use in logos, images, or simple illustrations because they have clear lines and contours. Because they are created using equations instead of pixels, they can be rescaled to any size without losing....
Method 1 of 2:
Using Adobe Illustrator
-
 Open Adobe Illustrator. Adobe Illustrator is a professional image creation program, and is the easiest way to create vector images from JPG files. If you don't have access to Illustrator, see the next section for instructions on using the free GIMP and Inkscape utilities.
 -
 Switch to the "Tracing" workspace. You can do this by clicking the menu in the upper-right corner and selecting "Tracing." You'll see the "Image Trace" panel appear.
 -
 Add the JPG image that you want to convert to your artboard. You can do this from the File menu or by dragging and dropping the file.
 -
 Select the image on your artboard. The tracing options in the Image Trace panel will become active.
 -
 Check the "Preview" box in the Image Trace panel. This will allow you to see what the different settings will do before applying them, but it will increase the time between making changes.
 -
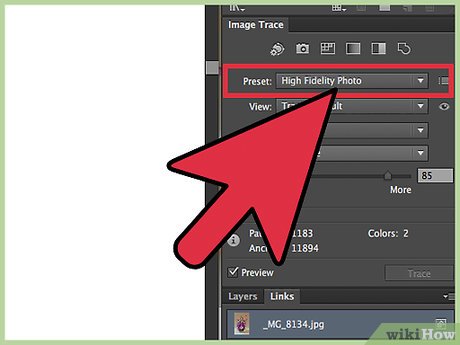 Try one of the presets in the Image Trace panel. There are five preset buttons along the top of the panel, and more presets available in the drop-down menu. The top row of buttons include the following presets:
- Auto Color - Creates a stylized set of colors based on the original colors.
- High Color - Attempts to recreate all of the original colors.
- Low Color - Creates a simplified version of the original colors.
- Grayscale - Replaces colors with shades of gray.
- Black and White - Reduces colors to black and white.
-
 Use the color slider to adjust color complexity. Images converted to vectors don't usually show well with all of their natural colors, so you'll get a better result by reducing the number of colors used. This will lead to a "flatter" look for the image.
 -
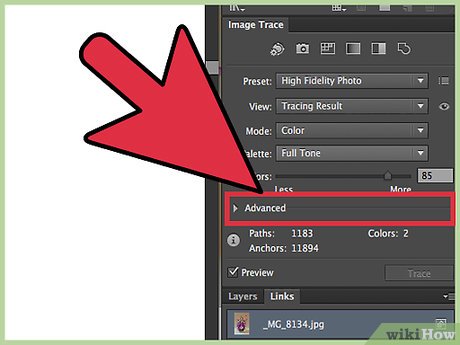 Expand the "Advanced" section of the Image Trace panel. This will reveal more detailed controls for the trace.
 -
 Use the "Paths" slider to adjust how close the path follows the pixels. Moving the slider to the left makes the paths looser, while sliding it to the right makes the paths tighter. A looser path will lead to smoother edges.
 -
 Use the "Corners" slider to adjust how rounded your corners will be. Moving the slider to the left will make the corners rounder, which will lead to a smoother image.
 -
 Use the "Noise" slider to reduce bleeds. The Noise slider determines what groupings of pixels are considered "noise" and not included in the trace. This can help straighten lines and smooth out rough spots.
 -
 Click "Trace" when you're satisfied. Illustrator will then perform the tracing action, which may take a few moments to complete.
 -
 Click the "Expand" button. This will convert your tracing object into actual vector paths, and will replace your JPG image with the vector.
 -
 Export the image as a vector file. Once you're finished with the tracing, you can export the finished image as a vector file.
- Click the File or Illustrator menu and select "Save As."
- Save a copy as an .ai file. This will let you easily re-open the file in Illustrator and make more edits.
- Select a vector format from the "Save As Type" menu. These include SVG (webpage) and PDF (print).
- Do not save the file as PNG or JPG, as these are not vector formats.
Method 2 of 2:
Using GIMP and Inkscape
-
 Download and install GIMP and Inkscape. These are free, open-source programs that you can use to create vector images from JPG files. GIMP is an image editor similar to Photoshop, and Inkscape is a vector graphics editor like Illustrator. Both are available for all operating systems.
- You can download GIMP from gimp.org. Run the installer for your operating system and leave the settings at their defaults.
- You can download Inkscape from inkscape.org. Run the installer for your operating system and leave the settings at their defaults.
- This method is only suitable for simple images with basic colors, like logos and emblems. Converting high-detail images will take a lot of work smoothing rough edges and getting good colors.
-
 Open GIMP and use the Rectangle Select tool to select the part of the image that you want to convert to vector. Use the selection tool to create a rough border for your image. This will make recoloring it easier.
 -
 Click the "Image" menu and select "Crop to Selection." This will remove everything except what you've selected.
 -
 Click the "Image" menu again and select "Autocrop." This will tighten up your selection.
 -
 Export the file. Once you've finished cropping the file, you can export it. Click the File menu and select "Export As." Leave the settings at their default and give the file a name so that you know it's the cropped version.
 -
 Load the file in Inkscape. After exporting the file, open it in Inkscape. You'll see it appear in your Inkscape workspace.
 -
 Click the image to select it. You'll need to select the image before you can trace it in Inkscape.
 -
 Click "Path" and select "Trace Bitmap." This will open the Trace Bitmap window.
 -
 Select the different methods and click the "Update" button. This will display a preview of what the vector image will look like with that vectorization method.
- The "Colors" option will give you the closest approximation of the original image.
-
 Adjust the settings for the preset methods. You can adjust some settings for most of the presets. Click "Update" after each settings change to see the results.
 -
 Click "OK" when you're satisfied with the results. The original image will be traced and replaced with the vector image.
 -
 Use the "Edit paths by nodes" tool to make fine adjustments. This tool will allow you to select areas of the vector image and then drag nodes to adjust the size and shade. Click a part of your images and you'll see a bunch of small boxes appear. Drag these boxes to change the shapes for your selection.[1]
 -
 Use the "Break Path" tool to separate nodes that shouldn't be connected. During the trace, some parts of the image may have been connected when they shouldn't have been. The Break Paths tool allows you to separate these parts by removing connecting nodes.
 -
 Save your image as a vector file when you're finished. Once you're satisfied with your vector image, you can save it as a vector format.
- Click the File menu and select "Save As."
- Select a vector format from the "Save as type" menu. Common formats include SVG (for websites) and PDF (for print).
- Save a copy as an Inkscape SVG to be able to go back and make easy edits.