How to use USB to create NAS
Before investing in dedicated NAS hardware, try this method to see if network storage is right for your needs.
You don't need fancy hardware or complicated setup to create a NAS at home. Most routers come with the features you need, so with a spare SSD or hard drive, you can easily set up simple, secure shared storage for all the devices in your home.
Most modern routers have a USB port , which you can use to share files over your home network. This USB port allows your router to perform additional tasks. To take advantage of this, you can connect an external SSD to your Wi-Fi router, creating a cheap and easy-to-use network-attached storage (NAS) that works for streaming, backing up, and sharing files between devices.
This approach is quick and cost-effective. You use existing hardware and the setup process is simple. Before investing in dedicated NAS hardware, try this method to see if network storage is right for your needs.
How to use router and SSD to create NAS
Start by connecting your SSD or USB drive to your router 's USB port . Some routers have an LED light that indicates when a USB device is properly connected. If the light doesn't come on, try unplugging and reconnecting the drive, or testing with a different USB cable.
Access Router Settings
The next step is to log in to your router's admin panel. Open a web browser and type your router's IP address into the address bar. For most routers, this is either 192.168.1.1 or 192.168.0.1. If you're not sure, check the sticker on your router or look it up in your manual. In our example setup, the address is 192.168.100.1. Once the login page loads, log in with your admin username and password. Typically, both are either "admin" or "root." Again, check the sticker on the back of your router.

Find the USB storage management option
Once you're logged in, look for USB or storage management options. You'll usually find these options under Advanced Settings, but the menu names will vary depending on the brand. Look for a section that says Advanced , USB Settings , or Storage . In this section, you'll see options for features like DLNA (Digital Living Network Alliance) media sharing, SMB (Server Message Block) file sharing, or FTP (File Transfer Protocol) server options.
DLNA media sharing is typically limited to media files, including images, music, and videos. For true network storage, you should use SMB or FTP. You can enable SMB file sharing by enabling the Network Neighborhood option or the SMB sharing option. If you are using a cheap router that came with your ISP, you may not have the SMB sharing option. In this case, you will need to access the FTP configuration panel.
Here, select Enable FTP Server , then set a username and password. You should create a username and password to access the shared hard drive, even if you only use it at home.

Specify the folder path for the USB drive
Whether using SMB or FTP, you must specify the path to the folder you want to share by clicking an option like Browse or Search . This will open a directory tree with all the folders on the connected USB device. In the image below, the example has selected the shared storage partition of the SSD.

Configure access permissions based on your specific needs. You can set read-only access for some users or folders, and give full read-write access to others. If you're sharing media files that everyone can access, you may want to bypass authentication for those specific folders.
You'll then want to save your configuration by hitting Apply , then wait a few seconds for the FTP or SMB server to launch. You can then access your files in the file browser on your computer, whether it's Windows, Linux, macOS, or another operating system. Click Network in the navigation pane, select your SSD, and log in with the username and password you added to the server.
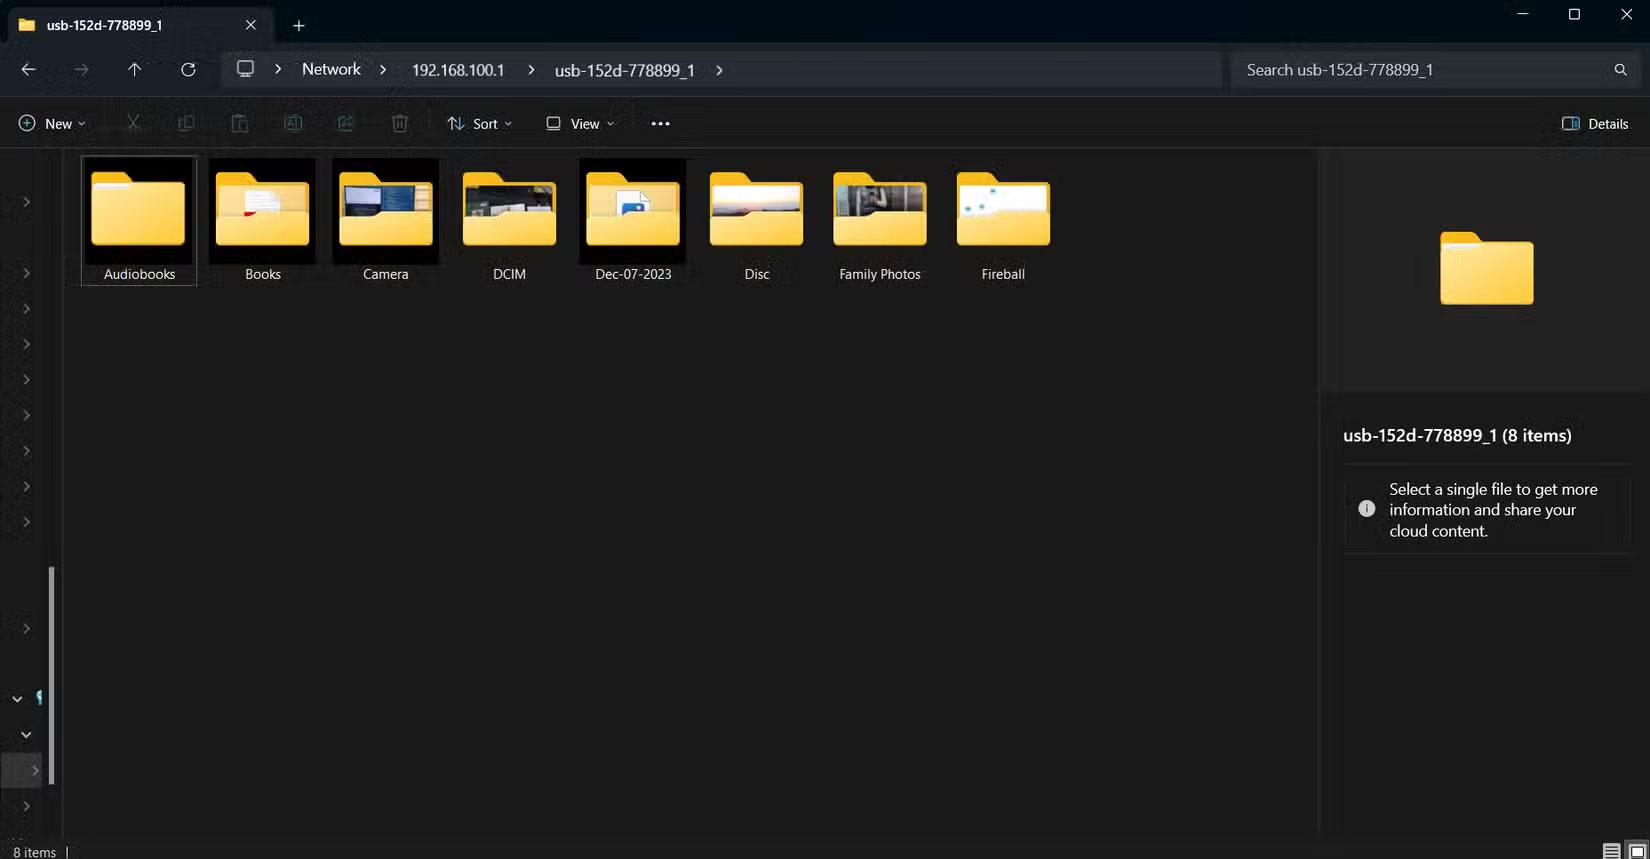
Or you can use a web browser to access the file. In the URL field , type "ftp://" followed by your router's port (e.g. 192.168.1.1), then press Enter and enter your login information to connect to the server. You should now have access to your file. Once connected, you can copy files in and out of the drive like any other folder on your computer.
- How to create a sitemap for websites
- Use CMD to create an 'undeleted' folder on Windows
- Anyone can create a small and simple website with these 10 websites
- 20 best USB boot software
- How to create an EXE installation file
- Make fire letters, fire letters on the website
- How to create a beautiful online signature
- How to create Bookmark for PDF file?
- A simple, detailed, and safe guide to installing Windows on a laptop, perfect for beginners.
- 5 Best NAS Devices for Home Media Servers in 2026
- Is Gigabit Ethernet still sufficient for the needs of modern home networks?
- 5 Best NAS for Plex in 2024
- Warning campaign of large-scale ransomware attack, misuse of 7zip to encrypt QNAP devices
- QNAP provides an emergency warning about NAS device attack trends, showing how to secure NAS devices
- What is a NAS network hard drive? Features, benefits and considerations when buying a NAS
- How to turn a Raspberry Pi into a NAS with OpenMediaVault
- Create NAS network storage with Raspberry Pi and Samba
- Best NAS (Network Attached Storage) devices in 2019


-
 The most detailed guide on how to reset a TP-Link WiFi modem to its default settings.
-
How to fix a malfunctioning Wireless Router or Wi-Fi transmitter.
-
10 tips to speed up your home WiFi.
-
3 best WiFi routers of 2026
-
The difference between a Bridge and a Router
-
3 reasons why you shouldn't use your router's USB port to back up data.
 The most detailed guide on how to reset a TP-Link WiFi modem to its default settings.
 How to fix a malfunctioning Wireless Router or Wi-Fi transmitter.
 10 tips to speed up your home WiFi.
 3 best WiFi routers of 2026
 The difference between a Bridge and a Router
 3 reasons why you shouldn't use your router's USB port to back up data.