How to Use the Touch Bar on a Mac
This wikiHow will teach how to use the OLED Touch Bar on the 2016 and newer MacBook Pro laptops. Find the system functions. The system functions on the Touch Bar will almost always be present on the right side, in a section referred to as...
Table of Contents
Part 1 of 7:
Performing System Functions
-
 Find the system functions. The system functions on the Touch Bar will almost always be present on the right side, in a section referred to as the Control Strip.
 -
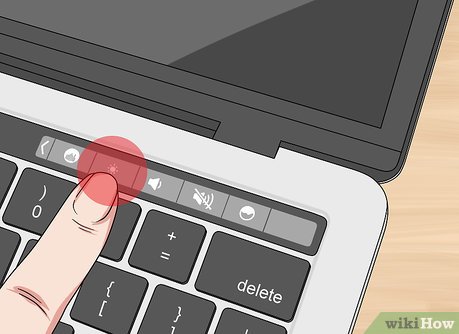 Tap the Brightness button.
 -
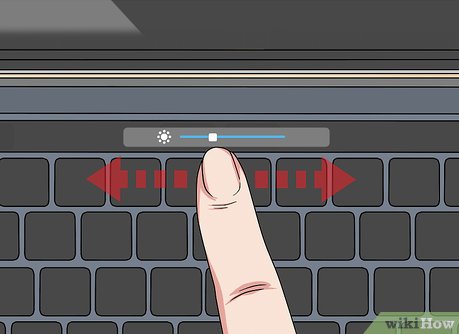 Drag your finger left and right to adjust the brightness.
 -
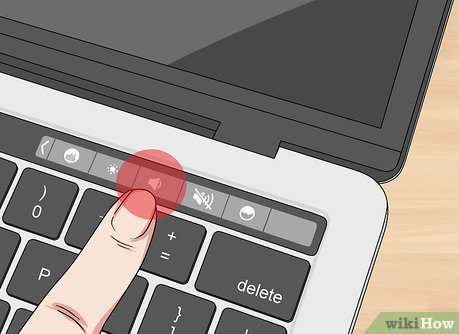 Tap(volume button).
-
 Drag your finger left and right to adjust the volume.
 -
 Tap the Mute button to mute your Mac. Tap it again to unmute it.
 -
 Tap(Siri button) to start Siri. This will launch Siri and allow you to use voice commands.
-
 Tap the < button to expand the system functions. You'll see other commonly-used system functions appear, such as keyboard brightness and playback controls.
Part 2 of 7:
Using the Touch Bar with Finder
-
 Tap the < and > buttons to move back and forth. This will take you to the previous location or the location you just came from.
 -
 Tap the Sort button to change the sorting. This will display a new set of options in the Touch Bar. You can tap how you want icons displayed, as well as the sorting order.
 -
 Tap the Eye button to open Quick Look. This will display the items in your Quick Look folder.
 -
 Tap(share button) to share your selected files. This button looks like a square with an arrow coming out of the top. You'll see all of the different sharing options appear, including Mail, Messages, AirDrop, Notes, and any other app that supports file sharing. Swipe left and right to see more options.
- Tapping a sharing option will open that app with the selected files added for sharing.
- The Share button is not available unless files are selected.
-
 Tap the Tag button to add tags to files and folders. This allows you to color code your files and folders for easy identification.
 -
 Tap the X to close. This will close any open submenu in the Touch Bar and return to the Finder navigation menu.
Part 3 of 7:
Using the Touch Bar with Safari
-
 Tap a favorite website to load it. This bar appears whenever a new tab is opened. Tap the "X" to close the list of favorites.
 -
 Tap the < and > to go back and forth. This will take you to your previous page or the page that you just came back from.
 -
 Tap(magnifying glass icon) to enter a search or website address. This will perform the search using Safari's default search engine.
-
 Tap the New Tab button to open another tab.
Part 4 of 7:
Adding Emoji to Messages
-
 Tap the Smiley button. This button appears in apps that support emoji characters, notably Mail and Messages.
 -
 Tap the Category button. You'll see this on the left side of the Touch Bar.
 -
 Tap the category of emoji that you want to browse.
 -
 Swipe left and right to view the available characters.
 -
 Tap an emoji to add it to whatever you're typing.
Part 5 of 7:
Customizing an App's Touch Bar
-
 Open the app that you want to customize the Touch Bar for. Most apps that support the Touch Bar will also allow you to customize which buttons appear on it. This goes for Apple apps as well as third-party apps.
 -
 Click the View menu.
 -
 Click Customize Touch Bar.
 -
 Click and hold an item you want to add.
 -
 Drag the held item to the bottom of the screen.
 -
 Drag the item left and right in the Touch Bar.
 -
 Place the item on the Touch Bar in the desired location.
 -
 Click and drag an item out of the Touch Bar to remove it.
 -
 Tap Done in the Touch Bar when you're finished customizing.[1]
Part 6 of 7:
Customizing System Functions
- Click the Apple menu. You'll find this in the upper-left corner of the screen.
- Click System Preferences.
- Click Keyboard.
- Click the Keyboard tab.
- Click Customize Control Strip.
- Click and hold an item that you want to add.
-
 Drag the item to the bottom of the screen.
 -
 Continue dragging until it appears in the Touch Bar.
 -
 Release the mouse when it is in the desired position.
 -
 Move your cursor to the Touch Bar to remove items. You'll see your cursor appear in the Touch Bar when you move it to the bottom of the screen.
 -
 Click and hold an item in the Touch Bar you want to remove.
 -
 Drag the item to the trash. You'll see this on the left side of the Touch Bar.[2]
Part 7 of 7:
Setting Up Touch ID
- Click the Apple menu. You'll find this in the upper-left corner of the screen.
- Click System Preferences.
- Click Touch ID. If you don't see this option, click the Show All button at the top of the window. The icon is a grid with 12 dots.
- Click Add a fingerprint.
-
 Type your account password.
 -
 Place your finger on the Touch ID sensor when prompted.
 -
 Lift and place again in a slightly different position.
 -
 Repeat placing your finger until the scan is complete. Make sure you move your finger slightly each time so that the scanner can read all angles.
 -
 Click the checkboxes for the services you want to use. You can use your fingerprint to unlock your Mac, enable Apple Pay in Safari, and authorize purchases in the iTunes and App Stores.
 -
 Unlock your Mac with your fingerprint. Once enabled, you can unlock your Mac from the login screen by simply placing your finger on the Touch ID sensor.[3]
Was this article helpful?
Your feedback helps us improve.
Related Articles
 Did you know the tricks to use 3D Touch on iPhone?9 minutes read
 How to customize Touch Bar on Macbook Pro3 minutes read
 How to change Touch Bar into traditional key row on Macbook Pro3 minutes read
 Touch Eee PC Touch Netbook2 minutes read
 Why the touch screen does not work and how to fix it11 minutes read
 4 tips to make the Touch Bar on MacBook Pro more useful5 minutes read
Reader Comments 0
Sign in with email or Google to join the discussion.