How to use the AutoText format of Microsoft Word
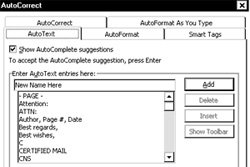
AutoText automatic input function of Microsoft Word and Outlook saves you a lot of time if you need to type a paragraph repeatedly..
AutoText automatic input function of Microsoft Word and Outlook saves you a lot of time if you need to type a paragraph repeatedly. You will find it even more useful to convert this entire format to the computers you need to use.
You cannot "force" two software to automatically share this function. However, you can completely copy the entire contents of AutoText from one program to another.
Simply close both Word and Outlook applications, then search for files called Normal.dotm and NormalEmail.dotm .
They are by default stored in the C: Documents and SettingsyourusernameApplication DataMicrosoftTemplates folder .
 If AutoText format content is stored in Word's form, you should backup NormalEmail.old data file for safety, then copy Normal.dotm file and rename to NormalEmail.dotm to perform overwriting on the message Original item of Outlook.
In contrast, the AutoText format is in Outlook, you reverse the above procedure to have a data file for the Word function to operate.
Note, when copying AutoText content, the default font format on the source application is also automatically attached to the destination application.
With the above steps, you can also share AutoText format for many people who want to use with different versions of Word and Outlook.