Table of Contents
This updated guide examines How to Capture a Screenshot and organizes the essential facts, background, and practical takeaways in clear American English.
Method 1of 5:
Windows Print Screen
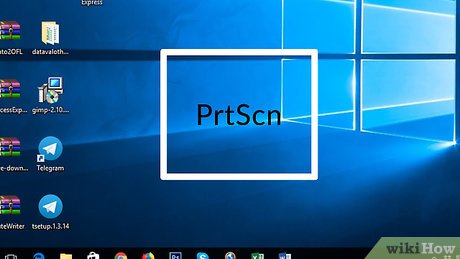 Use Prt Sc. "prt sc" stands for Print Screen. All Windows operating systems will have this functionality built in already. This will copy whatever is on your screen to the clipboard. You can then paste it into a program such as Paint, Word, PowerPoint, etc.
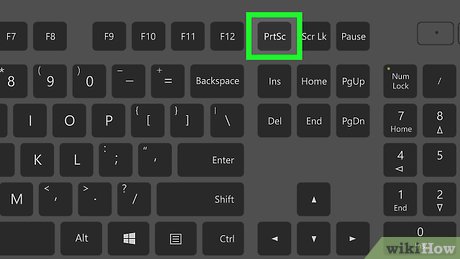 Find and press on the "prt sc" button on your keyboard. Depending on your keyboard, "prt sc" may be its own button. On other keyboards, though, it may share with another button. It is usually located in the upper right of the keyboard, near the number pad if you have one. This will copy to the clipboard whatever is on your screen.
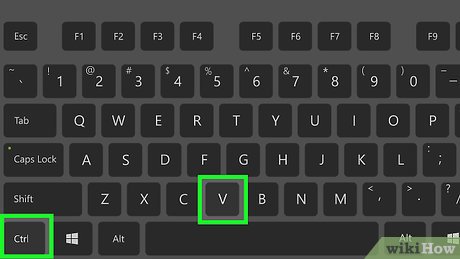 Paste the screen capture to a program. Many programs will accept pasted images, including Word, PowerPoint, Paint, PhotoShop, etc. While in the program, either press CTRL + V or right-click and select "Paste" from the dropdown menu to paste the screenshot.
Method 2of 5:
Windows Snipping Tool
 Open Snipping Tool. In addition to "prt sc," Windows lets you capture certain parts of your screen using a program called Snipping Tool. Compared to the print screen function, the Snipping Tool allows you to save the image to your computer directly.
- Press the Windows key (left of Alt key), type "Snipping Tool," then press↵Enter.
 Select "New. " In the Snipping Tool window, press the New button. This will allow you to start capturing certain sections of your screen. By pressing the upside down triangle button next to New, you can also select different ways to capture sections of your screen. You can select:
- Free-form Snip: You can draw your selection in any form. Enclose your drawing to select that area of the screen.
- Rectangular Snip: Select a rectangular area of the screen. You can choose the size.
- Window Snip: You can select a window for the snipping tool to capture.
- Full-Screen Snip: The snipping tool will capture the entire screen.
 Capture the screen. Depending on which of the four selection types you are using, the process will be slightly different.
- Free-form Snip: Click and hold your left mouse button, then draw the area you wish to capture. You must enclose the drawing to capture the selection.
- Rectangular Snip: Click and hold your left mouse button, then expand the rectangle to cover the sections of the screen you wish to capture. It is recommended to start at the corner of your desired selection.
- Window Snip: Select the window you wish to capture.
- Full-Screen Snip: Do nothing. The full-screen will have been captured already by pressing "New"
 Save the snip. Press the floppy card icon in the upper left corner of the window to save the snip. Save it anywhere in your computer.
 Copy the snip. Press the icon that looks like two sheets of paper to copy the icon to your clipboard, much like the Print Screen function would do.
 E-mail your snip. Press the envelope icon to send your snip over e-mail using Microsoft Outlook. You will need an Outlook account for this function.
- If you do not have an Outlook account, it may be better to just save your snip and then send it as an attachment using your current e-mail service.
 Edit the snip.
- Draw: Use the pen icon to draw on your snip. Select the upside down triangle to choose different colors. This is useful if you want to make quick notes on the screen capture before saving.
- Highlight: Use the highlighter icon to draw focus to certain parts of your screen capture.
- Erase: Erase your drawings. If you need to undo any drawings you made on the screen capture, select the eraser icon in the top right of the window.
Method 3of 5:
On a Mac
 Capture the whole screen. Press Command (⌘)-Shift-3 to capture the entire screen. Everything you see on your screen will be captured through this method.
- The screenshot will automatically be saved as a.png file on your desktop. Look there to find it.
 Capture part of the screen. Mac OS also lets you capture part of the screen with a rectangle. Press Command (⌘)-Shift-4, then move your cursor to where you want to start capturing the screen. Click and drag with the left mouse button to expand the rectangle.
- Hold Space, Shift, or Option while dragging to adjust the dimensions of the rectangle.
- The screenshot will automatically be saved as a.png file on your desktop.
 Capture a window. Again, by using Command (⌘)-Shift-4, you can capture a window. You should be able to capture any application window using this method.
- Press Command (⌘)-Shift-4.
- Press Space.
- Move your cursor over a window to highlight it, then click the left mouse button.
- The screenshot will automatically be saved as a.png file on your desktop.
Method 4of 5:
On an Android
 Hold volume down and the power button. Hold both of these buttons in combination for about 4 seconds to capture the entire screen. A notification should pop up in the top of your screen telling you that the screen has been captured.
- This will only work if you are running Ice Cream Sandwich (Android OS 4.0) or above. If you are unsure of which operating system you are using, go to Settings->About->Software Information. You should see you Android OS version.
 Check your device's manual online. If you have an older Android phone and OS, your specific device might still be able to capture screenshots. The majority of Samsung phones do include built-in screenshot functions. Try holding down the Home button and the Power button in combination for a few seconds.
- Check the internet to see if your specific device has built-in screenshot capabilities, if you are not running Android OS 4.0.
 Download a screen capture app. Go to the Play Store and search for "screenshot" or "screencapture." There are a few apps which will allow you to capture your screen.
- One recommendation is No Root Screenshot It , which can be downloaded here: https://play.google.com/store/apps/details?id=com.edwardkim.android.screenshotitfullnoroot.
Troubleshooting
 Check your Android operating system. If you are having trouble capturing a screenshot, it is likely that your OS doesn't support screenshot capturing.
 Find your picture. On an Android device, you may need to hunt down your captured screenshot. Try checking the Documents App or your Recent Photos app. Certain devices store captured screenshots in different places, so you may need to look around for it.
Method 5of 5:
On an iPhone or iPad
 Hold the Power button. The button should be located on either the top or side of your iPhone, depending on your iPhone version.
 Press and release the Home or Volume Up button. Immediately after holding the Power button, press and release the Home or Volume Up button. The Home button is the circular button located on the bottom border of your iPhone.
 Find the screenshot. The screenshot should be located in your Photos app. It may be under a certain folder.
FAQ
What is How to Capture a Screenshot about?
It provides a structured overview of screen, explains the main context, and highlights practical takeaways for readers.
Why does this topic matter?
Understanding the main concepts helps readers evaluate the issue, avoid common mistakes, and make better-informed decisions.
How should readers use this information?
Use the guidance as a practical starting point, confirm details that may have changed, and follow current product, safety, or security recommendations.
Related Articles
 26 Useful Screen Capture Apps for macOS17 minutes read
 How to Take a Screenshot of the Website5 minutes read
 The Fastest Ways to Take Screenshots on a Computer or Laptop9 minutes read
 How to Take a Screenshot on Windows 118 minutes read
 How to Take a Screenshot of Only the Dock on a Mac4 minutes read
 How to Edit a Screenshot20 minutes read
Reader Comments 0
Sign in with email or Google to join the discussion.