Table of Contents
This practical guide explains how to Turn Off Siri Suggestions on iPhone through clear, ordered steps. It also covers useful settings, common mistakes, and checks that can improve the final result.
Siri Suggestions appear on your iPhone by default, offering suggestions based on your activity and the apps you use. However, if you find them unhelpful or want to limit Siri's access to your data, you should turn off Siri Suggestions on your iPhone. Here's how to turn off Siri Suggestions on your iPhone.
How to Turn Off Siri Suggestions on iPhone
Step 1:
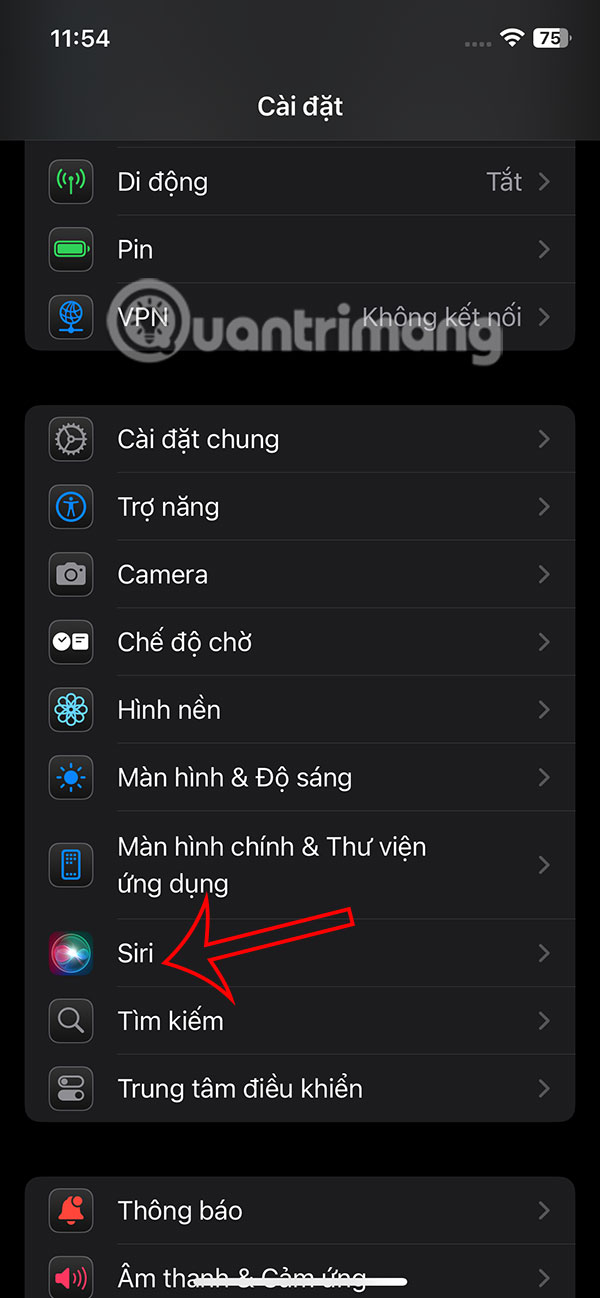
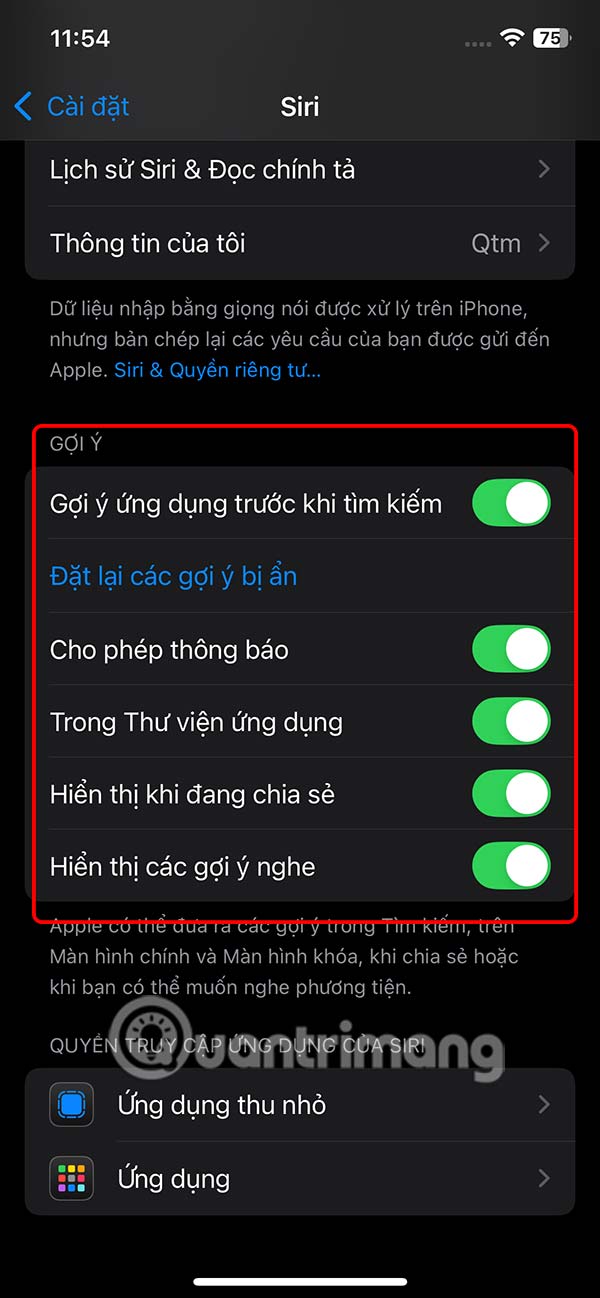
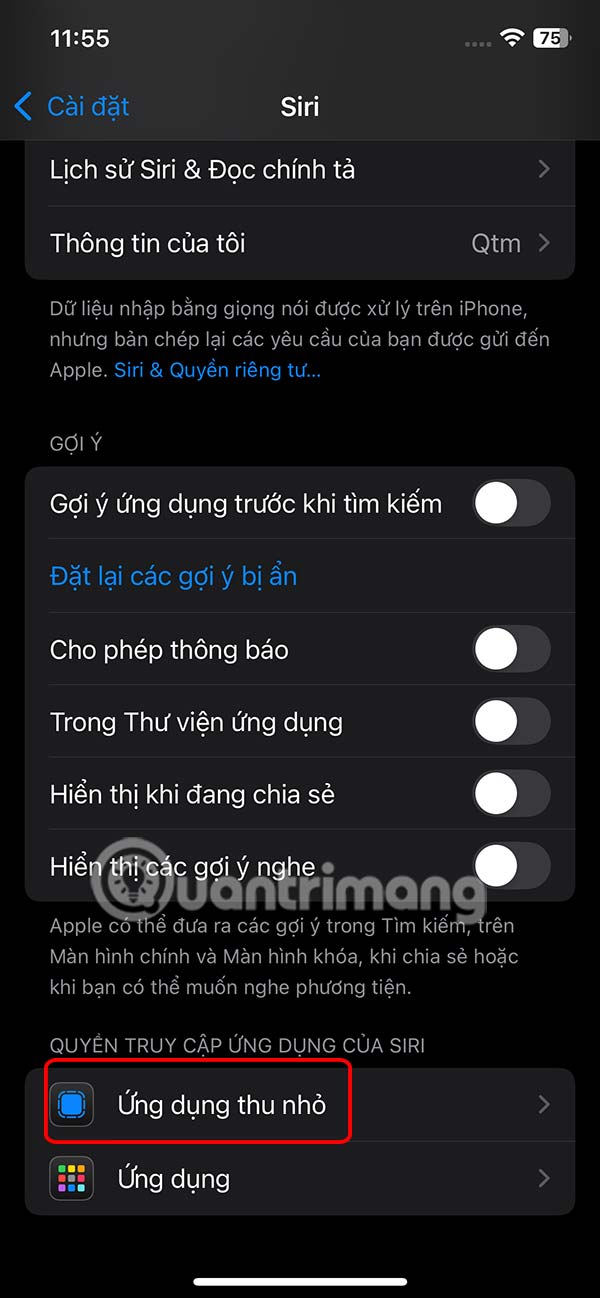
First, users Click on Settings And then Access Siri To customize. Next, you scroll down to The Suggestions section To see all the content suggestions of Siri on iPhone as shown.
Step 2:
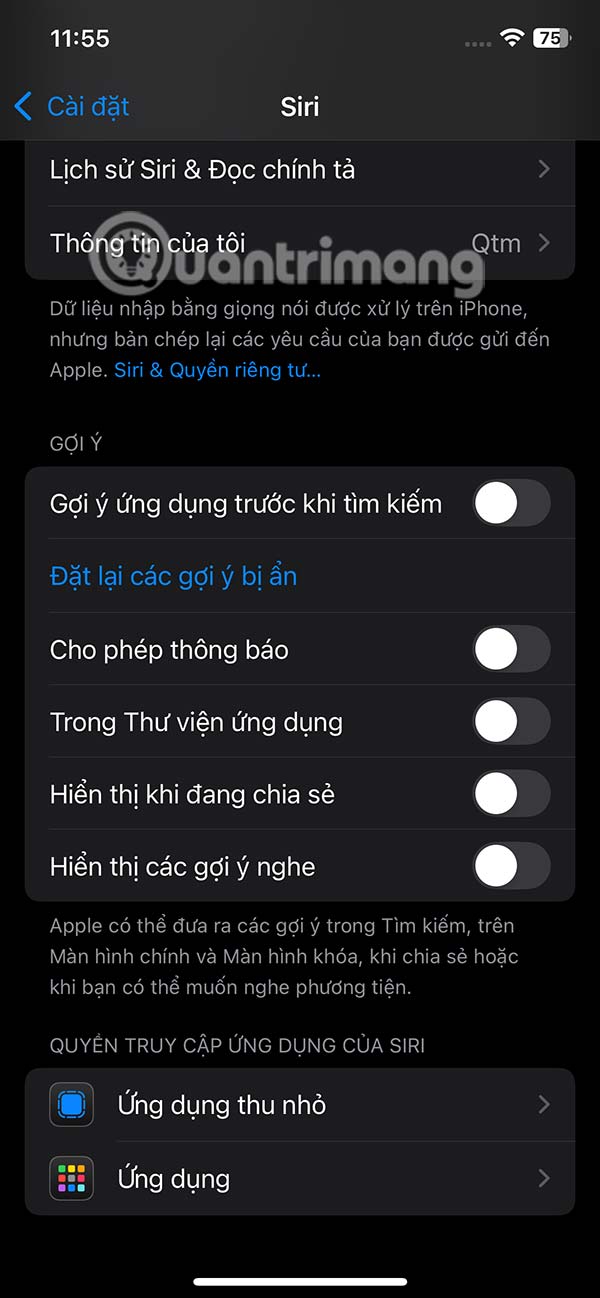
At this stage, the user will Turn off all Siri content suggestions By sliding the white circle button to the left to turn off Siri suggestions on the iPhone.
Step 3:
Next, we click on The Apps section Below to turn off Siri suggestions for specific applications. At this stage, the user will see a list of applications currently on the iPhone. We will delete Siri suggestions for a specific application on the iPhone, you click on that application. Then you will see the option to turn off application suggestions in Siri.
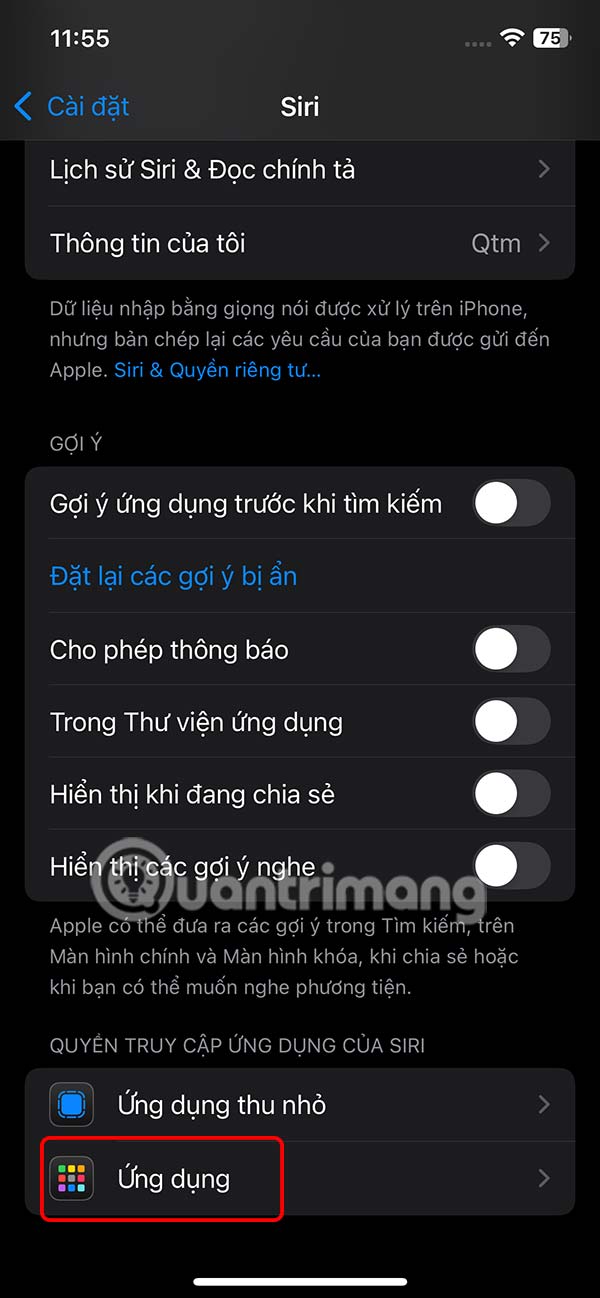
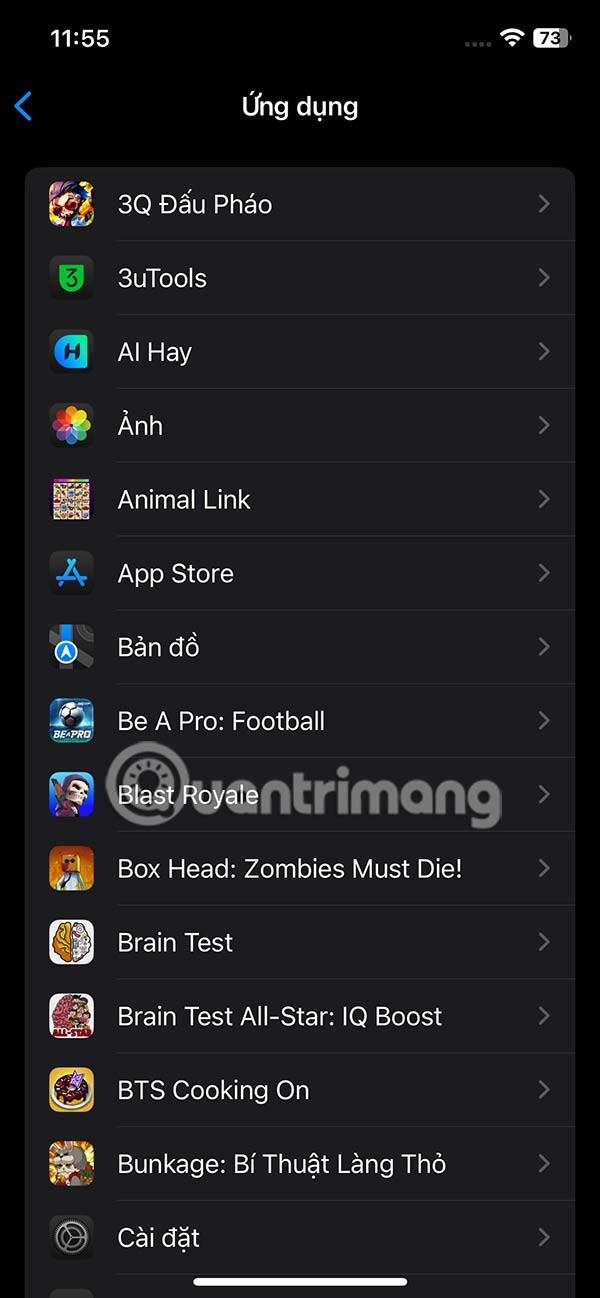
We also Swipe the white circular app buttons To the left to remove specific app suggestions for Siri on iPhone.


Step 4:
Next, we Tap on Minimized Apps To turn off Siri suggestions for the minimized app. Now Simply Turn off all Siri suggestions For the minimized app.


FAQ
How do I Turn Off Siri Suggestions on iPhone?
Follow the steps in this guide in order, verify each setting before continuing, and check the result after every major change.
What should I prepare before I Turn Off Siri Suggestions on iPhone?
Confirm compatibility, install current updates, save important work, and back up data before changing system or application settings.
What can I do if turn Off Siri Suggestions on iPhone does not work?
Review permissions and requirements, restart the relevant device or app, repeat the steps carefully, and use official support resources when the issue continues.
Related Articles
 How to Block Siri from Showing App Suggestions on iPhone6 minutes read
 How to Turn Off Siri on iPhone, iPad, Mac, and Apple Watch5 minutes read
 How to Reset Hidden Siri Suggestions on iPhone2 minutes read
 How to Turn Off Siri on iPhone, iPad6 minutes read
 How to Pin the App to the Siri iPhone Suggest Utility5 minutes read
 How to Open Siri, Enable Siri, and Useful Vietnamese Siri Commands on iPhone13 minutes read
Reader Comments 0
Sign in with email or Google to join the discussion.