How to Transfer Video to DVD
Transferring video from VHS tapes to DVD will allow you to salvage the content on the tape before it degrades too much. You can also save physical space around the home by getting rid of your tapes once you copy them to DVD. There are....
Method 1 of 3:
Transferring Video to DVD Through Video Editing Software
-
 Hook up your VCR directly to your computer using an "analog-to-digital" cable. The cables come in different forms, including USB, PCI and DV. USB connections hook into USB ports, PCI connections hook into serial ports, and DV connections hook into Firewire ports.
 -
 Run your video editing software. Use the "transfer" or "capture" feature to copy the video into the software.
 -
 Convert the video into an MPEG-2 file. This compresses the video information down to a size that can fit on to most commercial burnable DVDs.
 -
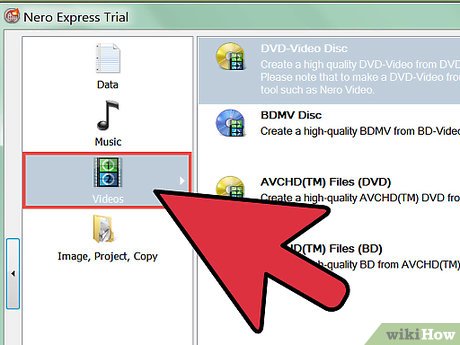
 Burn the captured video to a DVD. You may be able to use the editing software to directly burn a DVD, but if it doesn't have that capability, you can use stand-alone DVD burning software.
- Using video editing software to transfer video lets you modify the video's setup and structure. You can edit the video and add transitions, effects, and music.
Method 2 of 3:
Transferring Video to DVD Using an External Hardware Device
-
 Hook up your VCR to an external hardware device specially designed for analog outputs. Make sure the external device is connected to your computer.
 -
 Allow the device to convert the video to an MPEG-2 format. The data will typically transfer to your computer automatically.
 -
 Burn the file to a DVD. Use DVD-burning software for this.
Method 3 of 3:
Transferring Video to DVD Using An External DVD Burner
-
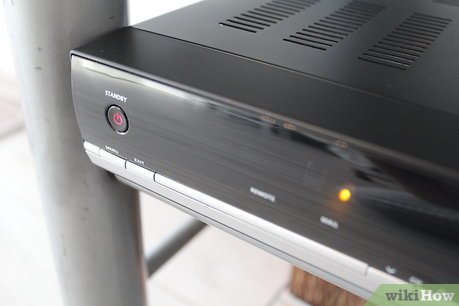
 Hook up your VCR to an external DVD burner. There are specially designed DVD recorders that accept analog connections.
 -
 Activate the video transfer process on the recorder. The video will be captured to a DVD in real-time.