How to Rip a DVD
The movie industry has every right to its intellectual property. However, when you purchase a DVD, you should be able to do whatever you want with what you've purchased, as long as you don't redistribute the material in an unauthorized....
Method 1 of 2:
Rip a DVD on a PC
-
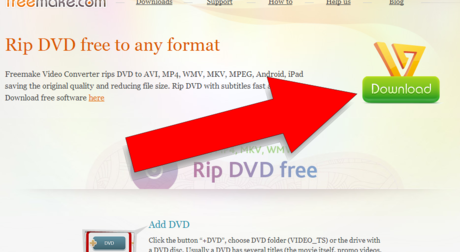 Download a program to defeat DVD copy protection.
- Compare different products, read any disclosures carefully and look for non-biased consumer reviews so that you can pick the best product.
- Choose a product that has a free trial period so that you can try it out before you commit.
-
 Insert the DVD that you want to rip into your computer's DVD drive. If you have multiple drives, select the drive that contains the DVD that you want to rip on your computer screen.
 -
 Copy the DVD's content onto your hard drive or media server.
- Open the Start menu, click on Computer, right-click the disk and select Explore.
- Find the file folder that says VIDEO_TS. Drag the folder to whatever location you want to copy your DVD. This is the end of a basic rip to watch on your computer. You don't need transcoding unless you want to shrink the file or view the DVD on a mobile device.
-
 Download transcoding software. You can find many free options online when you do a Google search, but Handbrake is the best option. Check to see that the program has presets for a variety of platforms including iOS and gaming consoles.
 -
 Open the source for the DVD that you want to rip within Handbrake or other transcoding software. The software will scan for chapter titles and markers. If the program doesn't pick up the titles, then you can manually click on the transcoder's Chapters tab and type in chapter titles as you go. Some programs are even unable to choose the correct main title. And then you need to record title from DVD and check title manually.
 -
 Decide where you want your movie to go. Many programs have a Destination tab. Click Browse on the tab and choose the location where you want to save your file.
- To save the file as a shared file on a media server or network attached storage box, map the share as a network drive.
- Navigate to the appropriate folder, right-click and choose Map Network Drive from the menu.
-
 Tweak the soundtrack. For instance, you can preserve the movie's original Dolby Digital (AC3) soundtrack and create a backup soundtrack for devices that aren't AC3-equipped.
- Click the Audio & Subtitles tab on your transcoding software.
- Choose the soundtrack that you want. Under the Audio Codec menu, choose AAC.
- In the "mixdown" column, choose Dolby Digital II. Leave any bitrate, sample rate and DRC settings at their default values.
- Move down to the second audio track. Pick the same soundtrack from the source heading.
- Select AC3 from the list of audio codecs.
- Look for a box that says Forced Subtitles Only. If you choose a language that's different from the language that the actors are speaking, checking this box will help you to avoid forced subtitles.
-
 Click the Start button in your transcoding software to rip the DVD.
 -
 Play the ripped movie in your media player to make sure that you got the quality that you wanted.[1]
Method 2 of 2:
Rip a DVD on a Mac
-
 Download Handbrake transcoding software. If your Mac has a Core 2 Duo or later processor, get the 64-bit version for faster ripping.
 -
 Download VLC media player. If you've chosen a 64-bit version of Handbrake, then you'll need the 64-bit version of the VLC player. It contains libdvdcss, a DVD decryption library designed to break the DVD's copy protection when you play it back on your Mac.
 -
 Launch Handbrake on your Mac. Handbrake will open a dialog box on your screen. Pick the DVD that you want to rip and click Open.
 -
 Wait for Handbrake to scan your DVD. When the scan finishes, click on the box next to Title. Pick the longest Title from the pop-up menu.
- You may see 99 titles with almost the same length. That means that the DVD is copyright protected. Open your Apple DVD Player application. Pick Go --> Title from the menu bar and pick the title that has the check mark next to it. In Handbrake, choose that title.

- If you want to rip multiple titles (as in a DVD with multiple TV episodes), select 1 title, give it a unique name in the File Area and click Add to Queue. Repeat the process until you've added all desired titles to your encoding queue.

- You may see 99 titles with almost the same length. That means that the DVD is copyright protected. Open your Apple DVD Player application. Pick Go --> Title from the menu bar and pick the title that has the check mark next to it. In Handbrake, choose that title.
-
 Click on the Toggle Presets button at the top of the Handbrake window. You can also press command-T. Pick the preset for your ripped DVD based on the type of device you want to use when you watch it. You can also choose Universal to play it on any Apple device.
 -
 Click the gear icon. Choose Make Default from the drop-down menu.
 -
 Check to see if your DVD has interlaced video. Click the Preview Window in Handbrake and scroll through your DVD frames. If you see jagged images, then your DVD has interlaced video.
- Click the Settings button. This will open a new window called Picture Settings.

- Choose Filters. Slide the slider between Decomb and Deinterlace all the way to the right.
- Click the drop-down menu next to Deinterlace. Choose Fast and preview the movie to see if this fixed the jagged frames.
- Click the Settings button. This will open a new window called Picture Settings.
-
 Alter your Audio to reduce your file size. Start by clicking the Audio tab.
- Eliminate audio tracks that you don't need, including language tracks.

- If you're not connected to surround sound, you can remove a 5.1 channel audio track or mix it to stereo to save space.
- Eliminate audio tracks that you don't need, including language tracks.
-
 Burn subtitles in by clicking on Handbrake Subtitles tab. Choose the subtitles or captioning that you want to include in your finished file.
 -
 Click Start and wait for Handbrake to transcode the video. This process may take quite a bit of time.
 -
 Add Metadata like cover art, cast and summaries. You can download programs like MetaX, iFlicks or Video Monkey to assist with this process. Handbrake will also send completed rips directly to MetaX.
 -
 Drag the movie into your iTunes library and watch it.[2]