Table of Contents
This updated guide examines How to Transfer Files Between Two iOS Devices with Airdisk Pro and organizes the essential facts, background, and practical takeaways in clear American English.
Part 1
Downloading AirDisk Pro
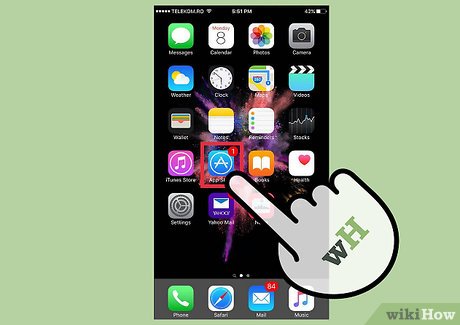 Launch the App Store. Tap the App Store on both of your iOS devices to launch it.
 Search for AirDisk Pro. Type in AirDisk Pro on the search field and tap the magnifying glass icon to begin the search.
 Download AirDisk Pro. Select the correct app and tap the 'Free' button beside the app. Enter your Apple ID if requested then tap the 'Install' button to download the app onto your device.
- Do this on both iOS devices.
Part 2
Connecting Both iOS Devices
 Make sure both iOS devices are connected to the same Wi-Fi network. If they are not, they won't be able to see each other.
 Run AirDisk Pro on both iOS devices. Locate the app on the iOS devices, and tap on it to launch it.
 Enable the File Sharing option on both iOS devices. Tap the gear icon on the bottom toolbar to go to Settings. Make sure that the File Sharing option is turned On. If it is not, tap on the File Sharing option and tap the toggle button to On.
- File Sharing needs to be enabled so that the device can share files with other devices.
- Tap the 'Done' button to exit the Settings menu.
 Tap the cycle or refresh icon on the primary, or source, iOS device. You can find the refresh icon on the bottom toolbar. Tapping it will direct you to the sharing options: transfer, sharing, or syncing.
 Tap the second option or box for iOS to iOS File Sharing. This is the option for sharing files between two iOS devices.
- A list of iOS devices nearby connected under the same Wi-Fi network and running AirDisk Pro will be listed.
 Tap on your secondary, or destination, iOS device. The primary iOS device will try to connect to the secondary iOS device. A message will appear on your screen while it's waiting for the secondary device to accept.
- Confirm the connection. Go to your secondary iOS device and tap the 'Yes' button on the confirmation message to accept the connection. Once this is done, the two devices are now connected.

Part 3
Transferring Files
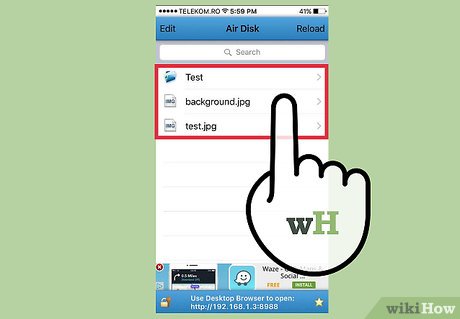
 Select files to transfer. On your source iOS device, navigate through the folders in AirDisk Pro and select the files you want to transfer to the secondary iOS device. Tap on the files to select them. A red checkmark will appear beside the selected files.
- The secondary or destination iOS device will display an orange status box while it's waiting for the or source iOS device to send the files. Let it be.
 Tap on the 'Send' button to start transferring the files. A 'Success' confirmation message will appear when the transfer is complete.
- Since you're doing a transfer over a local network, it will just be really quick.
- Tap the 'Done' button when the transfer is finished. The connection between the two devices will be disabled.

Part 4
Receiving Files
 Swipe down on the Root folder of the second device to refresh the view. This is because you may not see the received files right away on your secondary iOS device. Once you swipe down, you should see a Sharing folder appear.
 Tap open the Sharing folder. All the received files done over iOS to iOS File Sharing will be stored under this Sharing folder.
- View files. You should be able to see the files sent from your primary device. Tap on one to open it.
FAQ
What is How to Transfer Files Between Two iOS Devices with Airdisk Pro about?
It provides a structured overview of ios, explains the main context, and highlights practical takeaways for readers.
Why does this topic matter?
Understanding the main concepts helps readers evaluate the issue, avoid common mistakes, and make better-informed decisions.
How should readers use this information?
Use the guidance as a practical starting point, confirm details that may have changed, and follow current product, safety, or security recommendations.
Related Articles
 How to Transfer Files Between Your Computer and Phone with3 minutes read
 How to Transfer Files from Computer to Phone on Coc Coc5 minutes read
 How to Transfer Files from Mac to Android Without Android File Transfer7 minutes read
 6 Apps to 'Airdrop' Files Between Android and iPhone: Top Picks and Buying Guide9 minutes read
 How to Transfer Files from Computer to iPad: Complete Guide10 minutes read
 How to Create Network Drive with AirDisk in OS X5 minutes read
Reader Comments 0
Sign in with email or Google to join the discussion.