How to Swap Faces in Photoshop
This is an article showing how to swap faces by taking lines on one face and integrating them into another face in Photoshop. For this tutorial, you'll need photos of two people with faces similar in size and looking in the same direction. Additionally, you also need to use Photoshop CS6 or a newer version.
Table of Contents
Choose facial contours
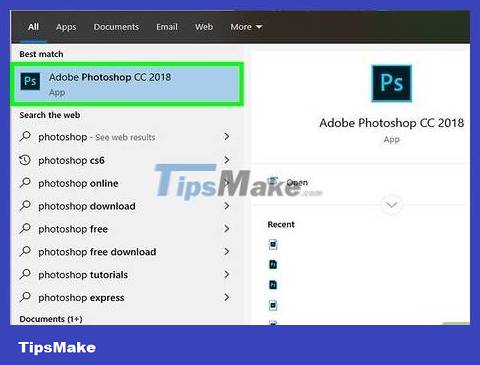
Open Photoshop. It's the app with the letter "Ps" in blue on a dark background.
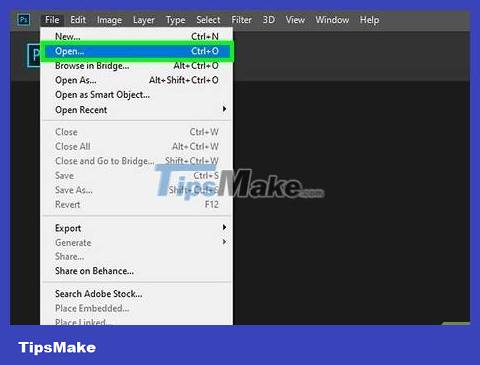
Open two images. Open the photos of the two faces you want to swap in the following way:
Click File _
Click Open _
Hold key Ctrl(on Windows) or command(on Mac)
Click on both photos.
Click Open .
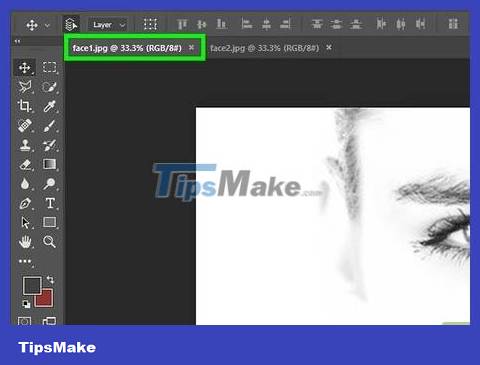
Select the first photo. Click the tab at the top to select the photo you want to pre-process. This will be the photo of the person whose facial features you want to 'borrow'.
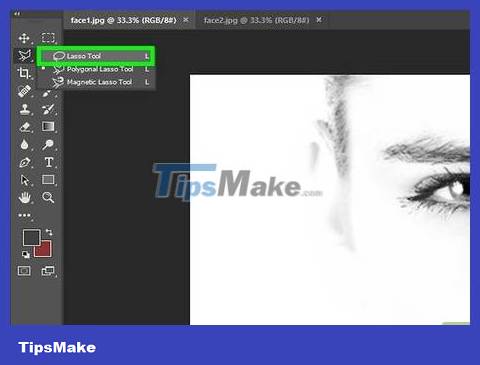
Select Lasso Tool. Click the lasso icon at the top of the toolbar on the left side of the screen. If you don't see the Lasso Tool, you need to first click and hold the Polygonal Lasso Tool, then select the Lasso Tool.
You can also press the key Lto quickly switch to the Lasso Tool you need to use.
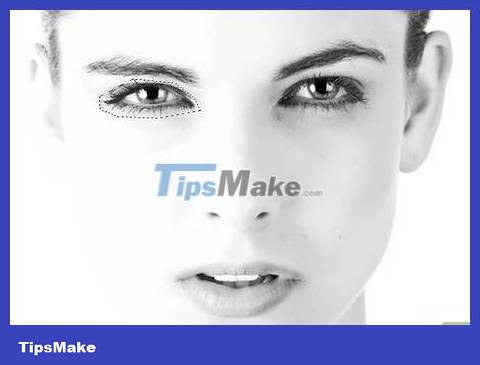
Draw along the contours of the face. Click and drag the Lasso Tool around the eyebrows and eyes, nose, mouth, and wrinkles associated with those lines. Make sure the end of the lasso selection is in line with where you started. The selected part will be highlighted with a flashing dotted line.
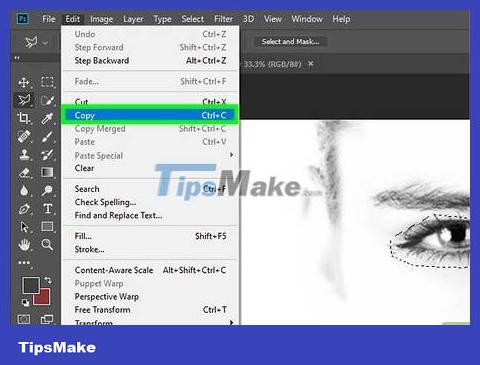
Copy selected part. You can do this in several ways:
Click Edit , then select Copy .
Press Ctrl+ C(on Windows) or command+ C(on Mac).
Combine two faces
Select the second photo. Click on the card above to select the second photo as the face you want to combine with the first face.
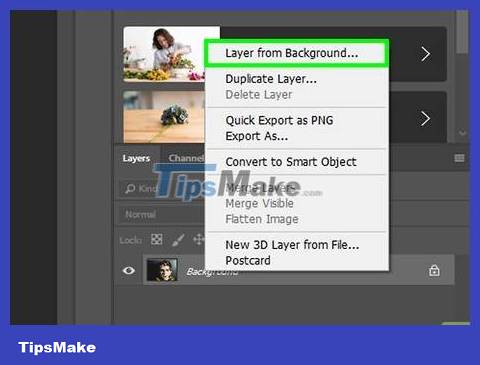
Unlock the background layer. The operation is as follows:
Click the padlock icon .
Right-click on the layer and select Layer from background .
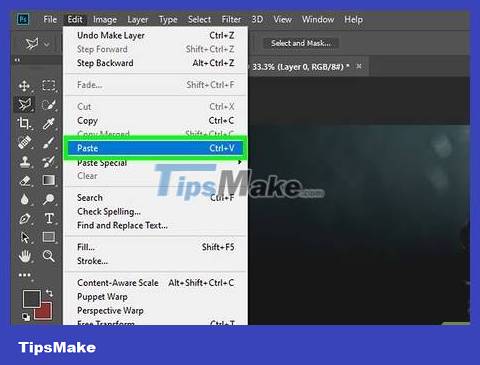
Paste the selected part. This will paste the line copied from the first image into a new layer on the second image. Paste operations are as follows:
Click Edit , then select Paste .
Press Ctrl+ V(on Windows) or command+ V(on Mac).
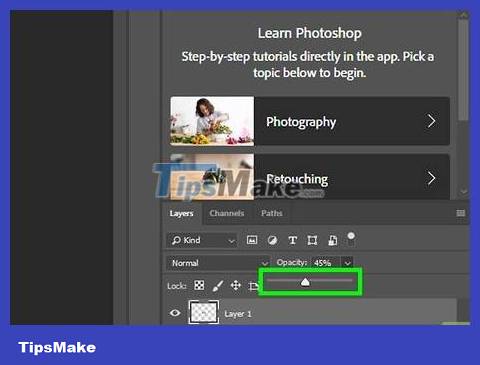
Lower the density. Click next to the Opacity ratio (default is 100%) displayed in the Layers window in the lower right corner of the screen. Drag the slider left until you see the face and photo below.
A ratio of 60% is ideal.
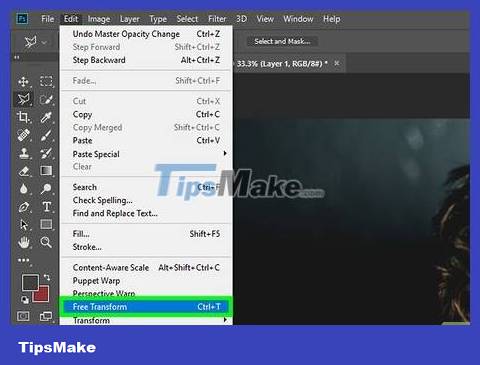
Click Edit , then select Free Transform . This will place the face layer in free transform mode and allow you to perform additional operations.
You can also press Ctrl+ T(on Windows) or the command+ key T.

Convert the face to match the background face. Squeezing or stretching the image to align the eyes and mouth according to the facial contours of the background image. You can:
Zoom in or out on the photo by dragging the corners.
Stretch or squeeze the photo by dragging the image edges.
Rotate the image by holding the mouse outside the corners and dragging.
Move the image by clicking inside the box and dragging the mouse.
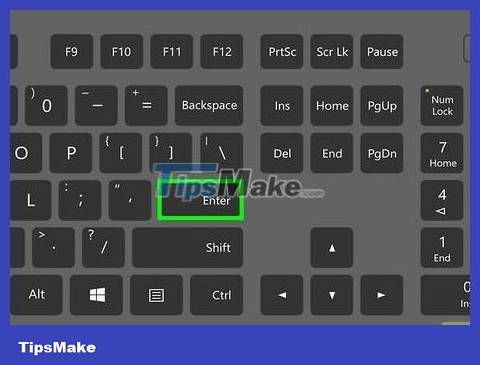
Click ↵ Enterto apply changes to the image. Once you have aligned the photo as desired, pressing the key Enterwill save and apply the changes to the photo.

Bring the density to 100%. Click next to the Opacity ratio and drag the slider back to 100%.
Hold down Ctrl(Windows) or ⌘ Command(Mac) and click the face layer thumbnail. This is the operation of selecting visible pixels in the layer.
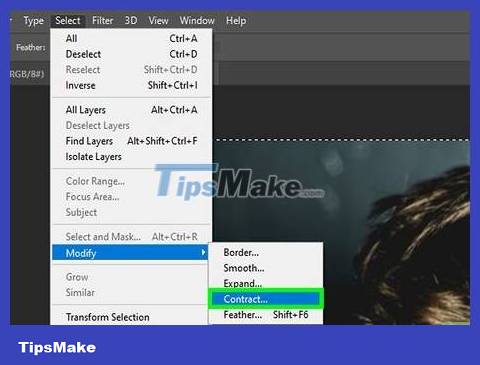
Click Select , then Modify and click Contract . This opens a new window.

Enter 6 in the box next to pixels and click OK . Thus, the selected area will be adjusted to coincide with the facial contours.
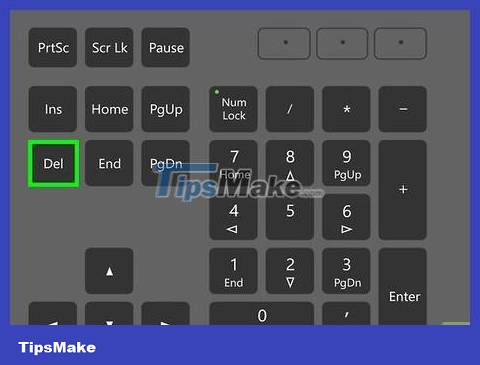
Select the layer below and press Delete(Delete). Click the layer name below to select it, then press Delete. This is the operation to delete the face on the layer below, leaving only a 6 pixel overlap.
Face integration

Select both layers. Hold down Ctrl(on Windows) or Command(on Mac) and click the names of both layers.
The layer is gray once selected.

Click Edit , then select Auto-Blend Layers . This opens a new setup window.
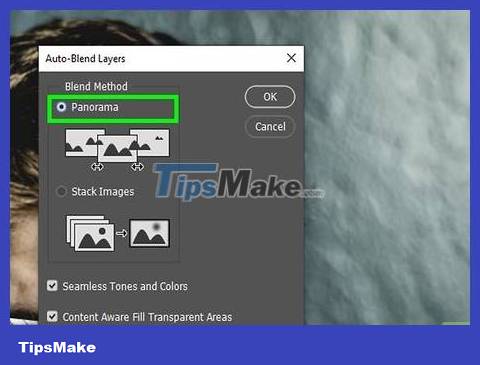
Select Panorama and make sure the "Seamless Tones and Colors" box is checked.
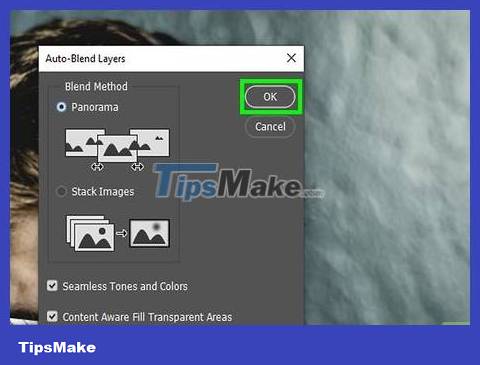
Click OK . Now the two faces have been integrated together!
Was this article helpful?
Your feedback helps us improve.
Related Articles
 How to cut and join faces in Photoshop quickly and simply2 minutes read
 Face transplant, face swap on iPhone4 minutes read
 Microsoft Face Swap: Very funny face transplant application for smartphones3 minutes read
 What is Hot Swap? Benefits of Hot Swap on mechanical keyboards9 minutes read
 What is Hot Swap? Advantages and disadvantages of Hot Swap Keyboard5 minutes read
 How to mask your face in Photoshop2 minutes read
Reader Comments 0
Sign in with email or Google to join the discussion.