Table of Contents
A Mac cannot exceed the speed supplied by the internet plan, and changing random system settings rarely helps. First compare Wi-Fi, Ethernet, other devices, and different services. That reveals whether the bottleneck is the Mac, wireless link, router, provider, or one application.

1. Measure a baseline
Pause downloads, cloud synchronization, backups, VPNs, and streaming on the network. Run several tests and record download speed, upload speed, latency, and time of day. Compare:
- the Mac next to the router and in the problem room;
- the same Mac over Wi-Fi and Ethernet;
- another device in the same location;
- multiple reputable sites or services.

A high latency result is measured in milliseconds, not seconds. Consistently high latency or packet loss can disrupt games and calls even when download speed looks adequate. TipsMake's network utility collection includes an internet speed test.
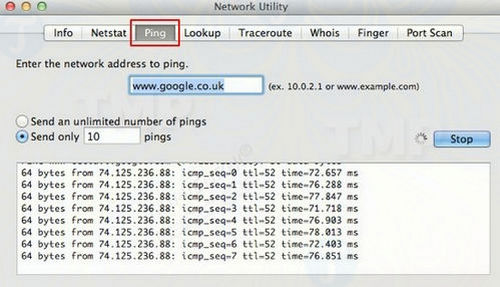
The old Network Utility app shown above is not present in current macOS. Use Applications > Utilities > Terminal and run ping hostname, or use Wireless Diagnostics. Stop Terminal's continuous ping with Control + C.
2. Compare Wi-Fi with Ethernet
Connect the Mac to a router LAN port with Ethernet. A Mac without a built-in port needs a compatible USB-C or Thunderbolt adapter. If Ethernet is fast while Wi-Fi is slow, focus on signal, interference, router placement, and the wireless adapter—not the internet plan.
Ethernet often provides steadier latency and is a good choice for a desktop setup, large transfers, video calls, and network backups. TipsMake's Ethernet setup guide explains the basic wiring.
3. Improve Wi-Fi placement and band choice
Place the router in an open, elevated, central position rather than a floor-level corner or closed cabinet. Reduce walls and metal obstructions between it and the Mac.

- Use 2.4GHz when range and legacy compatibility matter.
- Use 5GHz or 6GHz for compatible devices closer to the access point.
- Attach all router antennas and follow the manufacturer's placement advice.
- Measure nearby channel use before changing it manually; modern routers can often select a channel automatically.
- Do not replace a router merely because it lacks the old 802.11n label. Current choices include Wi-Fi 6, 6E, and 7, but the router, Mac, band, and backhaul all need compatible capabilities to benefit.
A Wi-Fi analyzer can help identify a congested environment.
4. Use Wireless Diagnostics
- Join the affected Wi-Fi network.
- Hold Option and click the Wi-Fi status menu.
- Choose Open Wireless Diagnostics.
- Follow the analysis and inspect each information item in the summary.
Apple's Wireless Diagnostics guide documents the current process. The tool can identify local wireless conditions but cannot repair a provider outage.
5. Find apps using the network
Open Activity Monitor and select the Network tab. Sort by Sent Bytes, Rcvd Bytes, Sent Packets, or Rcvd Packets. Pause a large transfer only when it is actually competing with the activity you care about.
Common sources include iCloud Drive or Photos synchronization, game and app updates, browser downloads, video calls, and cloud backups. Many open tabs use little traffic when idle, while one video or web app can use a great deal; measure rather than closing everything indiscriminately. Apple explains how to view network activity in Activity Monitor.
6. Check Time Machine and network backups
A large Time Machine backup to network storage can compete for Wi-Fi airtime. Check the Time Machine menu for an active backup and compare performance after it completes. For a consistently slow network backup, Apple recommends checking large frequently updated files and, where practical, connecting the backup disk directly to the Mac.
Do not edit protected system launch-daemon files with an old Terminal command to change the backup interval. Current macOS manages Time Machine through System Settings > General > Time Machine, and unsupported scheduler tools may stop working after system updates. See Apple's Time Machine performance guidance.
7. Check current network settings
Open Apple menu > System Settings > Network, select Wi-Fi or Ethernet, and choose Details. The TCP/IP, DNS, proxy, and hardware options should normally remain automatic unless the network administrator supplied specific values.
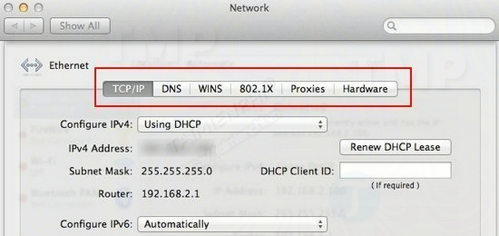
- TCP/IP: use DHCP on a typical home network. To renew the address, choose Renew DHCP Lease.
- DNS: change servers only when testing identifies a resolver problem. DNS can affect lookup time, not the bandwidth of an established download.
- Proxies: turn off an unknown manual proxy. A managed work network may require one.
- Hardware: leave speed, duplex, and MTU automatic unless a network administrator has diagnosed a negotiation or path-MTU issue.
Apple's DHCP renewal instructions show the current System Settings path.
8. Check VPN, Private Relay, and security software
Disconnect a VPN temporarily and compare the same test. A VPN normally adds another route and can be limited by its server. Software that filters traffic, adds a network extension, or inspects encrypted connections can also affect performance. Use the product's documented troubleshooting steps and re-enable protection after testing.
If iCloud Private Relay is enabled, compare Safari behavior with other apps before changing it. Private Relay is not a general explanation for slow local Wi-Fi, and settings may be controlled by the network or organization.
9. Secure the Wi-Fi network
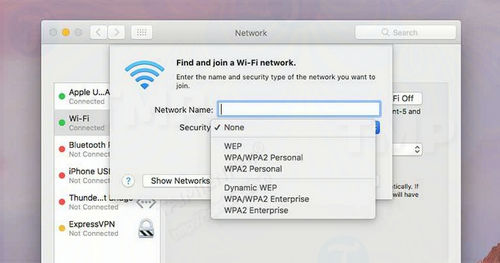
Open or weakly protected Wi-Fi can allow unauthorized use. Choose WPA2-Personal or WPA3-Personal, use a long unique password, update router firmware, and review the connected-device list. WEP and original WPA are obsolete. TipsMake explains additional ways to prevent unauthorized Wi-Fi access.
10. Troubleshoot Safari separately
If speed tests and other apps are normal but one site is slow in Safari, the internet connection may not be the problem. Test a Private Window, disable extensions one at a time, and compare another browser.

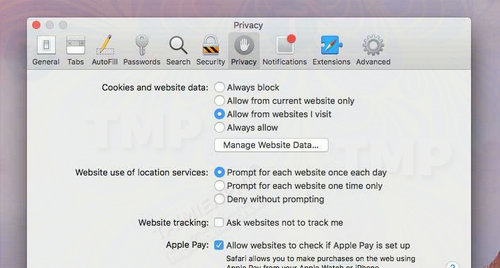
To remove data for a problem site, open Safari > Settings > Privacy > Manage Website Data, select that site, and choose Remove. Clearing all history and website data signs you out of sites and removes useful local state; it is not routine internet optimization. Do not delete Safari preference files manually. Apple's Safari website-data guide explains the effects.

Chrome or Firefox can be a useful comparison, but no browser universally makes the underlying connection faster. If only one browser is affected, update it, inspect extensions, and create a clean profile before reinstalling.
11. Avoid “optimizer” and cleaner claims
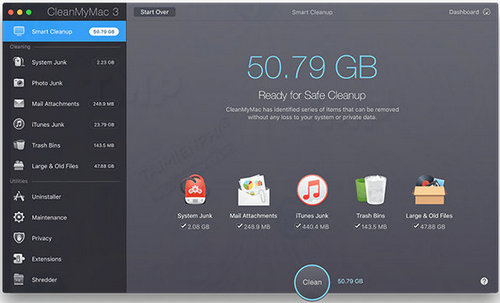
A cleaner that removes caches or frees storage does not increase internet bandwidth. Some network “optimizers” change DNS, proxy, MTU, or TCP settings without explaining the tradeoff. Use macOS tools and the diagnosed fix first, and install third-party utilities only from a trusted source after reviewing their permissions and support status.
12. Restart, update, and escalate with evidence
Restart the Mac and router without factory-resetting either one. Install the latest macOS version supported by the Mac, update the router with official firmware, and test again. Apple also provides a current checklist for a Mac that cannot reach the internet over Wi-Fi.
If Ethernet on multiple devices remains below the expected service or every device disconnects together, contact the provider with test results, timestamps, and modem/router light states. If only the Mac fails on several known-good networks, run Apple Diagnostics or contact Apple support for a possible hardware issue.
Related Articles
 How to Speed up Internet Win 10 Thoroughly4 minutes read
 How to Check If Your ISP Is Throttling Your Internet Speed9 minutes read
 How to Double Your Internet Speed10 minutes read
 Measure Your Internet Speed Online, No Software Required19 minutes read
 How Fast Should Your Internet Connection Be?9 minutes read
 Install Hidden VPN to Speed up Your Internet Connection: Step-by-Step Guide7 minutes read
Reader Comments 0
Sign in with email or Google to join the discussion.