How to use the Raspberry Pi as a webcam
Want to take advantage of your Raspberry Pi camera, but don't know how to use it as a webcam? Turning a Raspberry Pi into a webcam is easy and today's article will show you how to do that.
Table of Contents
You may not have a webcam at home but need to make a video call now? Want to take advantage of your Raspberry Pi camera, but don't know how to use it as a webcam?
Turning a Raspberry Pi into a webcam is easy and today's article will show you how to do that.
How to use the Raspberry Pi camera module as a webcam
In fact, the Raspberry Pi camera module cannot be plugged into the computer. The solution proposed by the article is to stream the network camera image (IP camera), capture it on a computer, and send it to your favorite video call application (eg Skype).
In this article, TipsMake.com will explain step by step how to do this.
With just the right software on your computer and on the Raspberry Pi, you can do this quickly.
Prepare the Raspberry Pi
Get started now with the preparation of the Raspberry Pi.
Install Raspbian
This tutorial is for the Raspbian distribution, so if you haven't already, install it now. Refer to the article: How to install an operating system for the Raspberry Pi for detailed instructions.
Raspbian version is not important. The author has made this tutorial on Raspbian Lite, so all versions will be fine.
Before going any further, you need to:
- Install Raspbian by following the instructions if needed.
- Update Raspbian packages to the latest version.
sudo apt update && sudo apt upgrade && sudo reboot- Connect the Raspberry Pi to the network (Ethernet or WiFi).
- Activate SSH.
sudo raspi-config- Then go to Interfacing options, SSH and answer Yes.
You can now use SSH to proceed to the next section of this tutorial. Are you ready to start.
Plug in the camera
You probably know how to do this if you have a camera, but don't forget to plug it properly into your Raspberry Pi.
Remove the slot protection and plug the cable as shown in this picture:
Activate the camera
By default, the camera interface of the Raspberry Pi is not enabled
To enable it, you need to use raspi-config:
sudo raspi-configThen go to Interfacing options , select Camera item . Answer Yes and exit raspi-config.
The tool will ask you to reboot, accept and do this.
After reboot, the camera will be activated and now you can install the software.
Motion settings
Motion is a powerful software to do everything with the camera. We will use it to stream cameras on the network (IP cameras), but Motion can do more.
To use Motion, follow this procedure:
- Install Motion and necessary dependencies.
sudo apt install motion libavcodec-dev libavformat-dev libavutil-dev libjpeg-dev libjpeg62-turbo-dev libpq-dev libswresample-dev- Answer Yes to install them.
- Activate the camera driver:
sudo modprobe bcm2835-v4l2- Use this command to check if the camera is visible and show its settings
v4l2-ctl -VYou will get results similar to the following:
Format Video Capture: Width/Height : 1024/768 Pixel Format : 'JPEG' Field : None Bytes per Line : 0 Size Image : 786432 Colorspace : JPEG Transfer Function : Default YCbCr/HSV Encoding: Default Quantization : Default FlagsThen you need to configure Motion. The best way is to directly download the configuration you need.
wget https://www.dropbox.com/s/6ruqgv1h65zufr6/motion-mmal-lowflyerUK-20151114.tar.gz- Extract file:
tar -zxvf motion-mmal-lowflyerUK-20151114.tar.gz- Start Motion:
sudo motion -c motion-mmalcam-both.confPlease adjust the settings in this file to match the camera configuration (for example, image height and width).
To complete the Motion settings, you just need to check the video stream before moving on to the computer configuration
Check out the video stream
Livestream is available in HTTP, using the Raspberry Pi IP address and port 8081.
Open the web browser and access:
http://:8081Check if you can see exactly livestream with enough quality.
Now you will see the livestream and can adjust the Motion configuration.
The goal of this tutorial is not to explain how to configure Motion, but you can find all the resources you need on the GitHub page:
https://motion-project.github.io/motion_config.htmlInstall computer software
Now the livestream is working and you need to use another software on your computer to forward the camera image during the video call.
Introducing SplitCam
SplitCam is the article software that will be used to turn IP cameras into webcams for computers. SplitCam allows you to create a virtual camera on your computer and send an IP camera stream to it.
This article will use this software to have a camera on Skype (or other video calling software), even if there is no real camera on the computer.
Download and install
SplitCam is a free software for Windows, you can download here.
Setting
To install SplitCam on a computer, follow this procedure:
- Double click on the file you have just downloaded.
- Keep the default values ( Next, Agree, Install ).
- When the installation is finished, click Next and choose where you want the shortcut to be, then leave the default options as they are.
- Choose whatever you want. In the case of the example, the author holds the Start menu shortcut.
- Then click Finish to start SplitCam. You may be required to reboot to install the camera. This is required.
Configuration
- After rebooting, start SplitCam.
- Click Sources in the bottom menu.
- In the drop-down list, make sure you select IP Split Camera . You will get results similar to the following:
 Make sure to select IP Split Camera
- Then in the URL field, enter the livestream URL. For example:
http://192.168.1.17:8081- Click Add.
- After a few seconds, this line will appear in the IP Camera List and the image is in the main window.
You are almost ready. Just configure the video call software again.
Skype configuration
This article will show you how to use the Raspberry Pi as a webcam in Skype, because this is probably the most used tool for this. However, you can apply the same steps with any software.
- Start Skype
- Click . on the left and select Settings.
- In the Settings window , go to Audio & Video .
- In the Camera section , make sure that SplitCam Video driver is the main camera.
 Ensure that SplitCam Video driver is the main camera
- You can check the camera image below. You are now ready to use your Raspberry Pi camera as a webcam.
Related questions
How to automatically start Motion on startup?
You will use a specific configuration file and the command to start temporary motion, but you can move the file into the default directory to configure it as a daemon.
Here is how to do this:
sudo mv motion /usr/bin/motion sudo mv motion-mmalcam-both.conf /etc/motion.confAfter that, edit the daemon configuration file:
sudo nano /etc/default/motionAnd change the start_motion_daemon option to Yes.
On the next reboot, Motion will start directly
Now you know how to use your Raspberry Pi camera as a webcam in any computer software.
Hope this tutorial is helpful for you!
Was this article helpful?
Your feedback helps us improve.
Related Articles
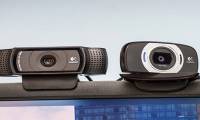 The best webcam models 201813 minutes read
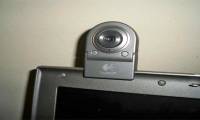 How to check if your webcam is hacked7 minutes read
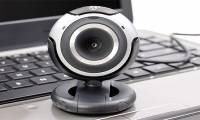
 What is a webcam? Where is the best place to buy a genuine webcam?7 minutes read
 Do you really need a 4K webcam?3 minutes read
 Fixed a problem with invalid webcam windows 1010 minutes read
 What is a USB webcam? Outstanding features of USB webcam6 minutes read
Reader Comments 0
Sign in with email or Google to join the discussion.