Table of Contents
This updated guide examines How to Set up a Custom Banner Message in Your Ubuntu Linux and organizes the essential facts, background, and practical takeaways in clear American English.
Part 1of 3:
Adding a Welcome Message
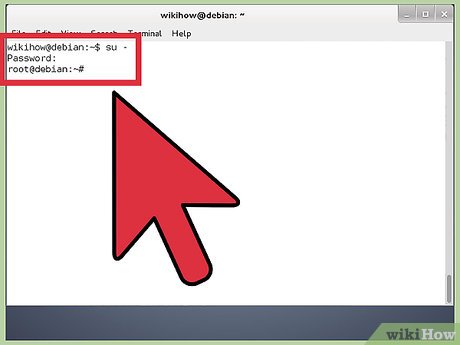 Sudo to root. You will need to modify superuser file.
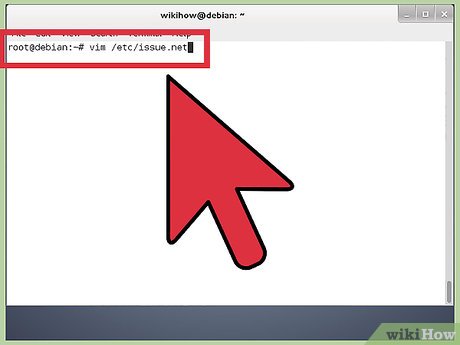 Open the config file for the banner. Type vim /etc/issue.net
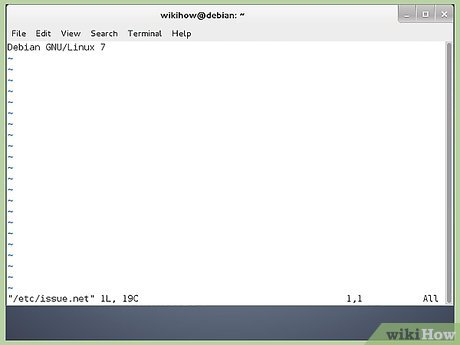 Read the file. You will get a screen similar to the one shown.
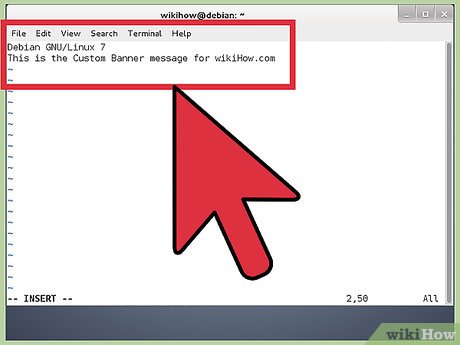 Add your message. Next just below the lines of Debian 6.0, type any custom message you feel.
 Check the look of the file. The issue.net file looks as shown
 Exit out of this file. Save the changes by typing EscKey +!wq
Part 2of 3:
Configuring SSH Daemon
 Close SSH if running. You need to make SSH understand that you need to enable the Banner Message.
 Open the configuration file. Issue the command, vim /etc/ssh/sshd_config
 Modify the file. Now in the sshd_config file, you need to uncomment the Banner portion as shown
 Start SSH. Issue the command --> /etc/init.d/ssh restart
 Wait until restarted. The OpenSSH Server Daemon process will restart.
Part 3of 3:
Testing the Message
 Connect via localhost. After this is done, you can test it by issuing a test login via localhost by issuing the following command ssh localhost
 Type yes to connect.
FAQ
What is How to Set up a Custom Banner Message in Your Ubuntu Linux about?
It provides a structured overview of file, explains the main context, and highlights practical takeaways for readers.
Why does this topic matter?
Understanding the main concepts helps readers evaluate the issue, avoid common mistakes, and make better-informed decisions.
How should readers use this information?
Use the guidance as a practical starting point, confirm details that may have changed, and follow current product, safety, or security recommendations.
Related Articles
 Build a Custom Kernel: How to Create a Custom Kernel on Ubuntu7 minutes read
 Setting Up Ubuntu Virtual Machine with Hyper-v Quick Create on5 minutes read
 How to Troubleshoot Ubuntu Problems Does Not Start10 minutes read
 How to Install Ubuntu in Vmware, Installing Ubuntu on a Vmware Virtual Machine4 minutes read
 Learn About Ubuntu Remote Desktop9 minutes read
 How to Create Custom Whatsapp Message Filters2 minutes read
Reader Comments 0
Sign in with email or Google to join the discussion.