How to Secure a Windows PC
Method 1 of 10:
Creating a Strong Password
-
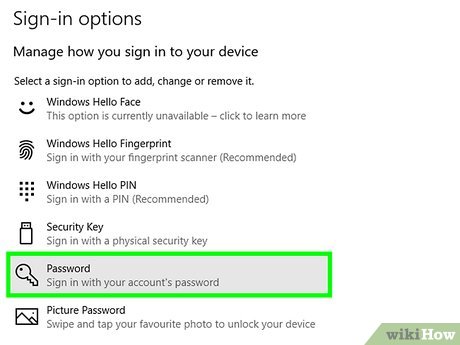
 Avoid using obvious words and character combinations. Securing a PC begins with a good password. Passwords like 1234abcd, password1, and ilovemydog are too predictable and easy to guess. Use a mixture of capital and lowercase letters, numbers, and symbols to make your password difficult to crack.
 -
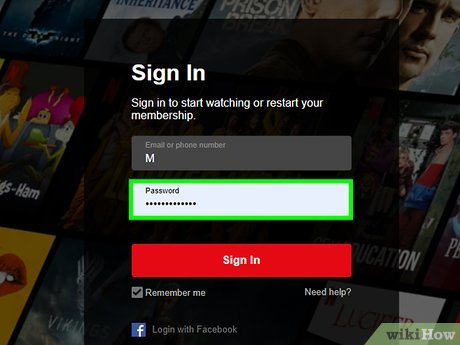
 Create a unique password that's only for your Windows 10 PC. Once you've created a secure password, it can be tempting to use it across multiple platforms. If a hacker cracks that password on any platform, every account and device you own could be compromised, including your Windows 10 PC. Ensure that your passwords are different for each service, like Hulu, Netflix, Facebook, and others.
- Many browsers and platforms now suggest pre-generated passwords that are far more complex than anything humans will create. If you're using an app that suggests a password, it's a good idea to accept the recommended password.
-
 Use a password manager like LastPass and 1Password. These services store your passwords and automatically fill password fields in web pages, programs, and apps. They can even beef up your current passwords during the setup process.
 -
 Change your passwords regularly. Even the most trustworthy sites and apps are subject to weaknesses that can leak your password. Changing your password regularly ensures that if your password is cracked at some point, it won't be useable for too long.
 -
 Never keep your passwords in digital notes. If a hacker gets in to your system and finds a document or note containing your list of passwords, they'll have access to all of your accounts. If you must log your password somewhere, do so on paper, and makes sure you store the paper somewhere nobody would ever think to look.
Method 2 of 10:
Enabling Two-Step Authentication
-
 Visit https://account.microsoft.com/security in your web browser. Prying eyes could watch you enter a password, remember it, and then enter it later to access your PC. With two-factor authentication in place, a second form of verification is needed to access your Microsoft account and Windows 10.
 -
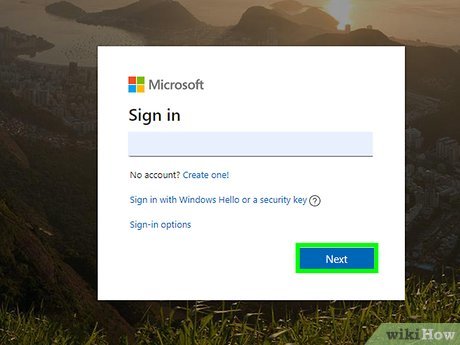
 Log in with your Microsoft account. Use the same account name and password you use to log in to Windows 10.
 -
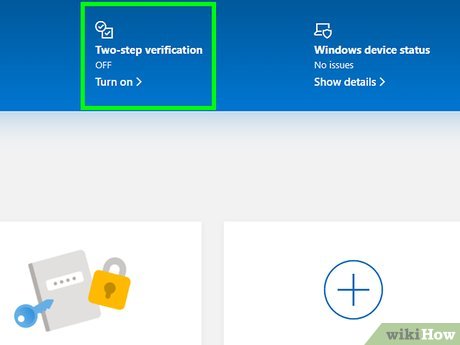
 Click Turn on under "Two-step verification." It's in the blue bar that runs along the top of the page.
- If you are prompted to verify your phone number or email address, follow the on-screen instructions to do so.
-
 Click Set up two-step verification.
 -
 Click Next to continue.
 -
 Write down your recovery code and click Next. Keep this code in a safe place in case you lose access to your second device.
 -
 Configure your second device. To do this, select your mobile platform and follow the on-screen instructions to replace your current on-phone Microsoft password with a pre-generated code.
 -
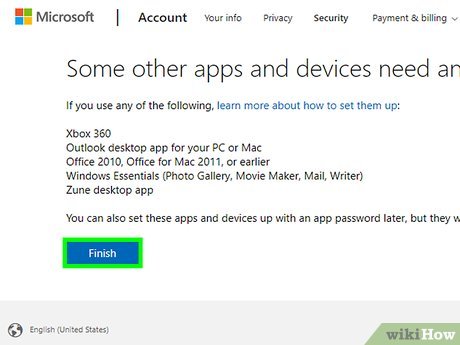
 Click Finish to save your changes. The next time you log into your Microsoft account, you'll receive a verification code on your phone or tablet that you'll have to verify. As long as you have access to that device, you'll be able to log in securely.
Method 3 of 10:
Using Windows Hello to Sign In
-
 Open your Windows Settings. You'll find it in your Start menu. Passwords are both old-school and annoying to remember, especially when you're juggling more than a handful. As an alternative, you can create a PIN, use a fingerprint, or scan your face to log in. You'll also find a Security Key option that replaces password entry with a physical device.
-
 Click Update & Security. It's the icon of two curved arrows.
 -
 Click Windows Security in the left panel.
 -
 Click Account Protection in the right panel. It's under the "Protection areas" header. This opens a new window.
 -
 Click Manage sign-in options in the right panel. It's under the "Windows Hello" header.
 -
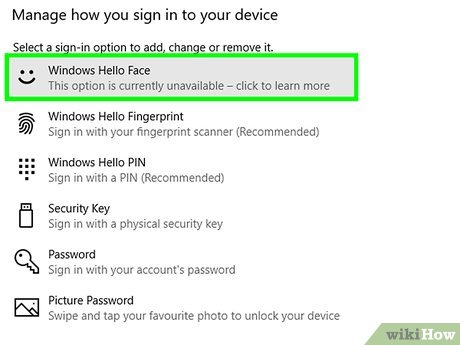
 Click Windows Hello Face to set up facial recognition. If you see "This option is currently unavailable," your PC doesn't support this feature. But if it does, follow the on-screen instructions to set up facial recognition.
- This option is convenient, but requires you to position your face just as Windows Hello captured it in the original scan.
-
 Click Windows Hello Fingerprint to set up fingerprint unlocking. This method is pretty secure, but you could run into problems if you have a cut or burn on the scanned fingertip. If you see "This option is currently unavailable," your PC doesn't support this feature. But if it does, follow the on-screen instructions to scan your fingerprint.
 -
 Click Windows Hello PIN to create a brief PIN. This is an easy entry way into Windows 10, though spying eyes could see you enter the digits. You should only do this if you feel confident that nobody will ever see you enter your PIN.
 -
 Click the Security Key to set up a physical security key. This option will help you set up your physical security key, like the USB-based YubiKey 5 or Yubico's Security Key series.
Method 4 of 10:
Requiring a Password when Waking from Sleep
-
 Open your Windows Settings. You'll find it in your Start menu.
- Use this method to make sure login credentials must be entered each time the PC wakes from sleep mode. This prevents people from moving the mouse or hitting a key to gain instant access to the sleeping system.
-
 Click Accounts. It's the option with the outline of a person's head and shoulders.
 -
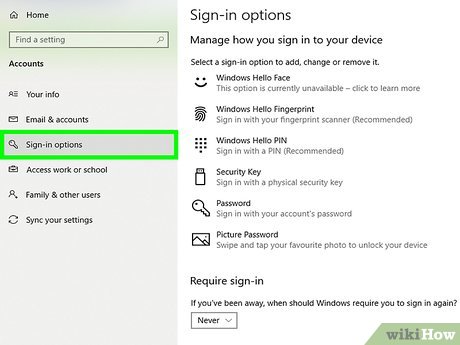
 Click Sign-in options in the left panel.
 -
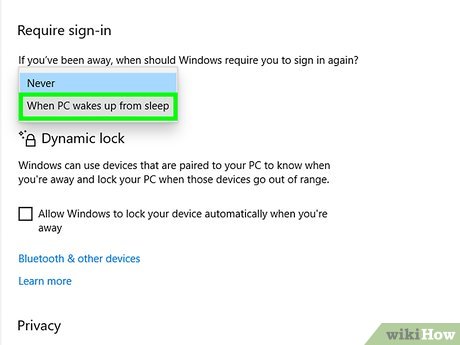
 Select When PC wakes up from sleep from the "Require sign-in method." It's near the top of the right panel. Now that you've selected this option, your PC will require your default sign-in method (e.g., password, facial recognition) each time it wakes from sleep.
Method 5 of 10:
Managing Security and Firewall Settings
-
 Open your Windows Settings. You'll find it in your Start menu.
- Windows 10 ships with a suite of security features spanning antivirus protection, a firewall, browser control, and more. This method teaches you where these features reside.
-
 Click Update & Security. It's the option with two curved arrows.
 -
 Click Windows Security in the left panel. This displays a list of protection areas in the right panel.
 -
 Click Virus & threat protection. It's at the top of the right panel. This opens the Windows Security window.
 -
 Click Manage settings under "Virus & threat protection settings." You may have to scroll down a bit to find it.
 -
 Toggle all available options to the On (blue) position. Some or all may already be turned on, but if not, make sure you enable them now.
 -
 Click Firewall & network protection in the left panel.
 -
 Turn on the firewall for all available networks. All three network types should be protected by firewalls. If a network is set to "Firewall is off," click it and select the option to turn it on.
- You usually won't have to make any adjustments, as Windows Defender does a good job managing inbound and outbound network traffic on its own. Still, there may be cases when you need to alter network connections. For example, you've installed a game and accidentally hit No when prompted by Windows Defender to approve network access. If you do need to make adjustments, such as allowing or denying apps and services on specific ports, click Advanced settings near the bottom of the right panel to access your settings.
-
 Click App & browser control in the left panel. It's near the middle of the menu.
 -
 Adjust all settings in the right panel as desired. The first three are set to Warn by default, which means if a threat is detected, you'll be prompted to block it manually. This is usually good enough, however, if you're being bombarded with warnings, you may want to set one or more of these options to Block automatically.
- Be careful, as sometimes safe apps can be incorrectly flagged as unsafe and be blocked automatically.
-
 Install Windows Defender Application Guard for isolated browsing in Edge. This step is only required if you're using Windows 10 Professional and want to make sure your users are fully protected when using the Microsoft Edge web browser. To do so:[1]
- Click Install Windows Defender Application Guard under the "Isolated browsing" heading in the right panel.
- Select both Hyper-V and Windows Defender Application Guard.
- Click OK and follow the on-screen instructions to restart the system.
Method 6 of 10:
Keeping the PC Up-to-Date
-
 Check for updates that haven't yet been installed. Although Windows 10 is set up to automatically download and install updates, there may be a gap between the update's release date and the time it takes to get to your PC. If you've heard about a new update being released or are experiencing issues with your PC, try checking for an update using these steps:
- Type update into the Windows Search bar. If you don't see the search bar next to the Start menu, click the magnifying glass icon.
- Click Check for updates in the search results.
- Click the Check for updates button at the top of the right panel.
- If an update is found, it will begin downloading immediately. You can keep working in other apps during the download.
- Once the download is complete, you'll be prompted to restart your computer. If you're not ready to restart just yet, click OK to schedule the reboot for a time you won't be using the computer. Otherwise, click Restart Now to reboot and complete the update.
-
 Restrict updates to certain hours. You can defer updates if needed so Windows 10 doesn't reboot for updates at the wrong time. This change could delay important security updates from being promptly installed, but it could also help you prevent unexpected data loss if your computer is shut down in the middle of your work. Here's how to set this up:
- Open the Start menu and click Settings.
- Click Update & Security. It's the icon of two curved arrows.
- Click Change active hours in the right panel.
- Select the hours you are normally using your computer. The time period you enter should be when you do not want Windows to perform automatic updates.
- Click Save and then Change to accept your changes.
- If you'd prefer Windows to determine the best time to run updates, slide the "Automatically adjust active hours for this device based on activity" to the On position.
-
 Delay new updates by a specific time period. You should only do this if you have a reason to suspect an update is going to harm your PC. Why delay updates if they're important? For compatibility and stability reasons. Sometimes updates don't work as planned despite Microsoft's best intentions. That's due to the overall Windows 10 ecosystem spanning thousands of hardware, software, and app configurations. Here's how to delay new updates:
- Click the Start menu and select Settings.
- Click Update & Security.
- Click Advanced Options in the right panel.
- Slide the "Update notifications" switch to the On position.
- Scroll down to "Choose when updates are installed" and select the number of deferred days from each drop-down menu.
- Feature update: These typically arrive twice a year bringing new features and improvements. Try not to delay these more than a week.
- Quality update: Contains security updates and OS patches. The sooner you install these, the better. It's best not to delay these updates for more than a few days.
-
 Use your PC manufacturer's software to update your drivers. PC manufacturers typically install software that scans your system to detect outdated drivers. For example, Dell supplies its SupportAssist program on Alienware PCs to scan for outdated drivers, hardware and performance issues, and more. If you have something similar installed on your PC, make a habit of running it at least once a month.
- Updated drivers typically mean better performance, as they're continuously tweaked to make the most out of your installed hardware. They're also updated to remove flaws that could translate into gateways for hackers.
-
 Update the apps on your PC. Although many apps are capable of updating themselves, some require you to perform a few steps from within the program. Here are a few examples:
- Google Chrome: In Chrome, click the three-dot menu at the top-right corner, select Help, and then About Google Chrome. If an update is available, it will install now. Once it's complete, you'll be prompted to click Relaunch.
- Microsoft Office: Most Office products are updated through Windows Update, but you can customize your update preferences in any of the Office apps. Just click the File menu, select Account, and then choose Update Options to view and change your options.
- Microsoft Store: Apps you've installed from the Microsoft Store are configured to update automatically unless you've chosen a different option. To check your preferences, open the Microsoft Store app, click the three-dot menu at the top-right corner, and then select Settings. If "Update apps automatically" is not already set to the On/blue position, toggle the switch now.
Method 7 of 10:
Changing Account Privileges
-
 Open your Windows Settings. You'll find it in your Start menu.
- Windows 10 provides four account types: Administrator, Standard, Child, and Guest. Use this method to downgrade any Administrator-level account to a lower level, and/or block users from signing in to the computer.
- Typically, all new accounts (after the PC owner) default to the Standard User mode.
-
 Click Accounts. It's the option with the outline of a person's head and shoulders.
 -
 Click Family & other users in the left panel. It's near the bottom of the option list.
 -
 Block an account from logging in to the PC. You'll see the user list in the right panel. If you don't want one of these users to be able to access the computer, click their account and select Block.
- To allow a user to sign in, select their account and click Allow.
-
 Change an account's access level. To change an account from an Administrator to a Standard User, follow these steps:
- Select the account in the right panel.
- Click Change account type.
- Select Standard User from the menu.
- Click OK.
Method 8 of 10:
Preventing Non-Administrators from Installing Apps
-
 Type edit group policy into the Windows Search bar. If you don't see the search bar next to the Start menu, click the magnifying glass icon to make it appear.
- This feature is only available on Pro and Enterprise editions of Windows.
-
 Click Edit group policy in the search results. This opens the Local Group Policy Editor window.
 -
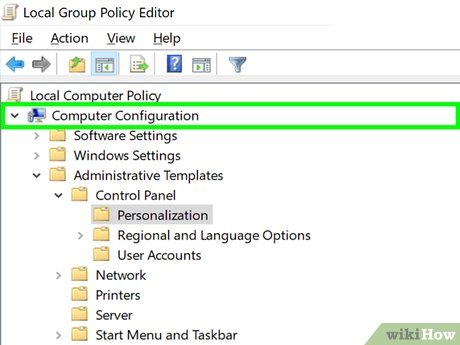
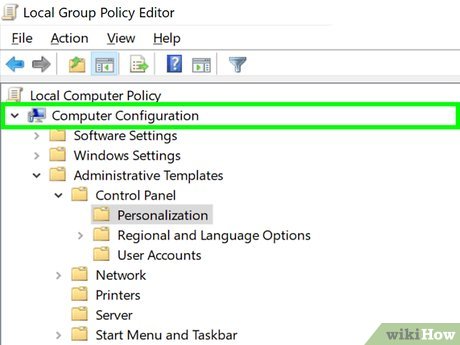
 Expand the Computer Configuration group in the left panel. If the group is already expanded you can skip this step.
 -
 Expand the Adminstrative Templates folder. It's in the left panel.
 -
 Expand the Windows Components folder. It's in the left panel.
 -
 Click Windows Installer. It's in the left panel. A group of settings will now appear in the right panel.
 -
 Right-click Turn off Windows Installer in the right panel. A context menu will expand.
 -
 Click Edit on the menu.
 -
 Select "Enabled" and click OK. The "Enabled" option is at the top-left corner. Once you're finished, users that aren't administrators will not be able to install apps.
Method 9 of 10:
Making the PC Invisible on Public Networks
-
 Open your Windows Settings. Here's an option to prevent other PCs from seeing your PC on a local or public network. Network discovery is typically used on home and office networks so family members or co-workers can share files with each other. Using network discovery on a public network, such as at a coffee shop or airport, could open your system up to hackers. Follow this method to turn network discovery off.
-
 Click Network & Internet. It's the option with a globe icon.
 -
 Scroll down and click Sharing options. It's in the right panel.
 -
 Expand the Guest or Public option.
 -
 Select Turn off network discovery. If desired, you can also turn off the ability for other computers to share your printer and files by selecting Turn off file and printer sharing too.
 -
 Click Save Changes. It's at the bottom of the window. The changes will take effect immediately.
Method 10 of 10:
Encrypting Your Hard Drive
-
 Make sure Windows is capable of encryption. Encrypting drives is not available on Windows 10 Home. For Enterprise and Pro editions, you'll need to determine if the PC is capable of hardware or software encryption. First, determine if the PC has a Trusted Platform Module using these steps:
- Right-click the Start menu and select Device Manager.
- Expand Security Devices.
- If you see "Trusted Platform Module" in this section, you can encrypt the drive. If not, you'll need to install the software with BitLocker.
-
 Install Trusted Platform Module if it isn't already installed. If you were able to verify the installation in the last step, skip to the next step. If not, here's how to install it:
- Open the Windows search bar and type edit group policy.
- Click Edit group policy in the search results.
- In the left panel, navigate to Computer Configuration > Administrative Templates > Windows Components > BitLocker Drive Encryption.
- Select Operating System Drives to expand options in the right panel if you just want to encrypt the primary Windows 10 drive, or Fixed Data Drives > Configure use of hardware-based encryption for fixed data drives if you want to encrypt all drives.
- Right-click Require additional authentication at startup in the right panel and click Edit.
- Select Enabled.
- Select Allow BitLocker without a compatible TPM. As stated, you'll need a password or startup key.
- For the Fixed Data Drives option, you'll see the "Use BitLocker software-based encryption when hardware encryption is not available" option instead.
- Click Apply and then OK.
-
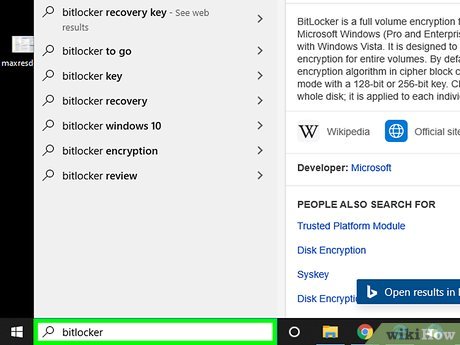
 Open your BitLocker settings. You can do this quickly by typing bitlocker into the Windows Search bar and clicking Manage BitLocker in the results.
 -
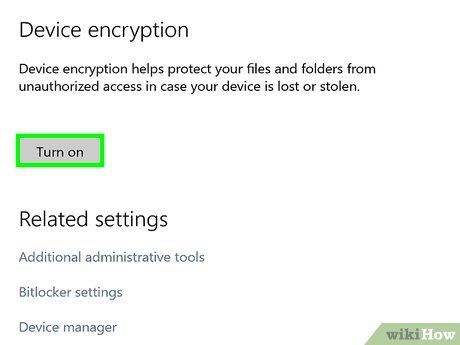
 Click Turn on BitLocker on the drive you want to encrypt. A pop-up window will appear.
 -
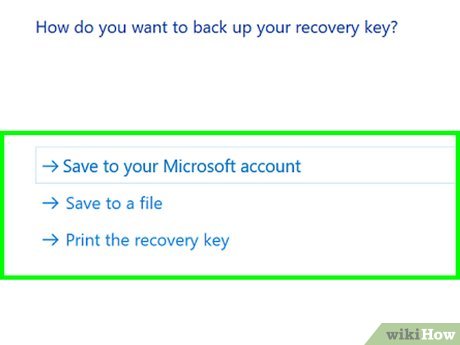
 Select an option for backing up your recovery key and click Next. You can save it to your Microsoft Account, a local file, or print the recovery key.
 -
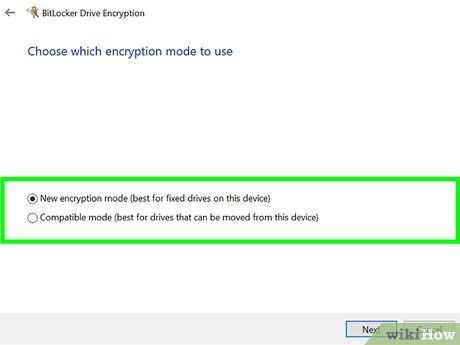
 Select the amount to encrypt and click Next. You can encrypt used space only or the entire drive. As Microsoft states, encrypt the entire drive if it's not new to prevent third parties from accessing deleted files. Simply protect used space if you're encrypting a new drive.
 -

 Share by David PacUpdate 04 March 2020
