How to scan old photos with your phone
Scanning and digitizing old photos is difficult without the right equipment, but you can easily scan film photos with your phone and get great results to share digitally.
Table of Contents
If you were born in the 90s, you probably have tons of old photos from your childhood, as well as decades of family photos stored in boxes and albums. Scanning and digitizing old photos is a pain without the right equipment, but you can easily scan film photos with your phone and get great results for digital sharing.
6. Suitable lighting
One of the biggest problems when taking photos of anything is getting the right lighting. Whether you're taking passport photos at home with your smartphone or just want to take professional portraits at home, lighting is often the biggest hassle.
Scanning photos with your phone in the best lighting conditions will help you get the best results before applying any other tips.
Turn off your phone's flash and make sure any other bright lights around you are off or not distracting. Otherwise, you'll just see their reflections in the scanned image.
Second, avoid shadows and reflections as much as possible when setting up your space. You don't want light shining directly behind or above you, as this will cause your silhouette or reflection to blend into the scanned image.
The best lighting tip is to use neutral-colored bulbs — white, not orange-colored tungsten — in a brightly colored space. While you don't need to photograph the background or walls, the effect of the room's color will impact your results.
If you have a large window and the weather outside is neutral, overcast, or generally bright, that's the best light for scanning old photos with your phone. If you have a diffuser or light box, that can enhance the neutral, flat light even more.
5. Straighten the photo
You should aim to lay the photo straight. This may take a little patience or a few tries to get it perfect, but it will prevent any warping or odd angles in the result. Don't shoot your print from the bottom up or sideways, or you'll have to correct the warping later, which will affect the quality.
Lay the photo flat on the surface as much as possible. All edges should be perpendicular to each other. If you cannot get flat edges, you may need to crop the photo after scanning.
While you can correct the angle by editing later, the quality will be slightly reduced if you need to adjust the result to get square corners. Getting it right the first time will give you a higher quality result.
4. Use standard lens and zoom feature
It's better to use a photo scanning app instead of the default phone camera, but even with a phone camera, there are ways to ensure better results.
Set your camera to take photos with a standard lens. This will eliminate most lens distortion around the edges, which can cause straight lines to curve.
Don't use the zoom feature on your phone. You won't need to be far away from the image you're scanning, so there's no need to zoom in anyway. Zooming in can distort the image, resulting in a poor quality digital scan.
Avoid using Portrait or Macro mode, as this can cause blurring around the edges. You want a photo with as little outside distraction as possible for best results. A straight photo using a standard lens in good lighting conditions will be your best bet.
3. Use a scanning app
You can 'scan' old film photos with your phone's camera, but there are dedicated scanning apps that guarantee even better results. With a choice of free and paid tools for both Android and iPhone, it's worth trying a scanning app instead of just using your phone's camera.
In addition to the apps listed here, there are other app tools, such as PhotoMyne or Adobe Scan, that may also work. You'll find that each app has different ways of scanning or taking photos, and different formats for saving them. Find the app that works best for you.
iScanner
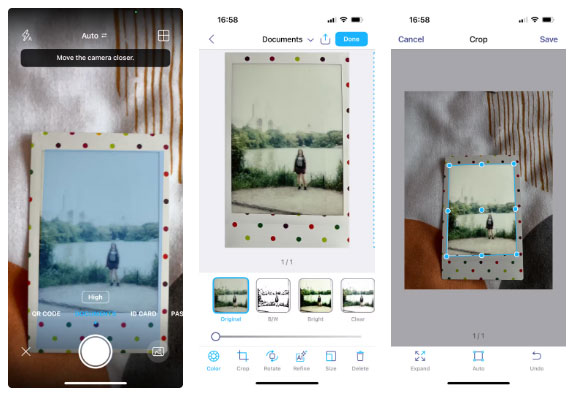
The iScanner app is available for iOS and Android phones as a free app with additional paid features. While the app's main focus is document scanning, iScanner also works great for scanning old film photos using the Documents setting.
After taking a photo, you can use native editing and enhancement tools like color correction, crop, rotate, AI tweak or resize.
- Download iScanner for iOS | Android (Free, in-app purchases available)
Google PhotoScan
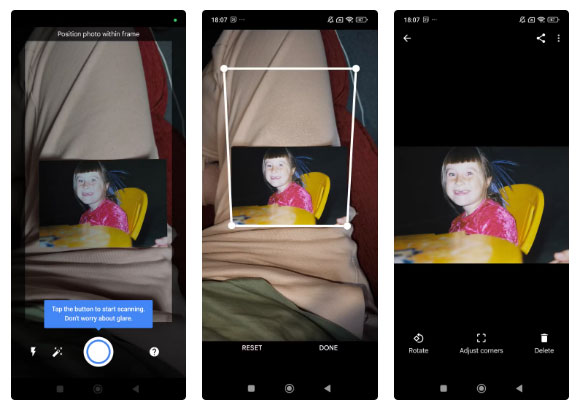
PhotoScan by Google Photos is available for both iOS and Android devices.
PhotoScan's features can fix inevitable problems like curved angles when you take physical photos - this makes it easier if you can't take photos directly, as mentioned earlier.
PhotoScan also benefits from automatic edge detection and smart rotation when scanning photos. This eliminates glare and can digitally stitch multiple photos together if you need to capture more than one frame to get the scanned image. This gives you the best final result.
Google PhotoScan's scan results are really impressive. I scanned my photo in low light rather than on a flat surface, but it handled the glare and warping well, and allowed for precise cropping to fix everything.
- Download PhotoScan for iOS | Android (Free)
Microsoft Lens
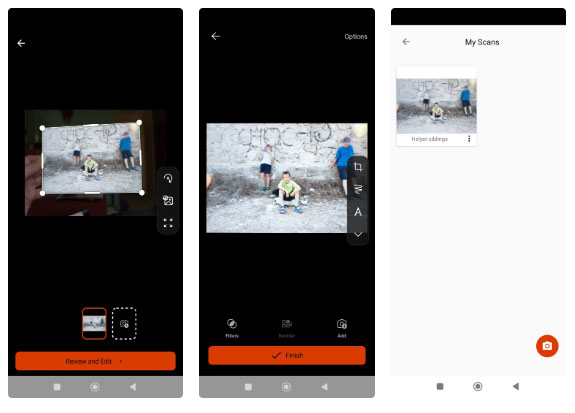
Microsoft Lens is another scanning app available for both iOS and Android.
Of the three apps listed, Microsoft Lens came in second. Even though I didn't scan my photo in the best of circumstances, the results were impressive. After scanning, you can crop corners very precisely using the crosshair feature.
- Download Microsoft Lens for iOS | Android (Free)
2. Edit scanned photos
There are tons of editing apps out there, with Lightroom Mobile and Snapseed being the top picks for basic photo editing features. If you want to combine scanned digital photos, use tools like Canva or Adobe Express for tons of options for templates, stickers, and fun text.
Using a dedicated photo editing application, you can edit the color of your scanned photo and improve aspects like contrast, saturation, and sharpness.
1. Negative film photography
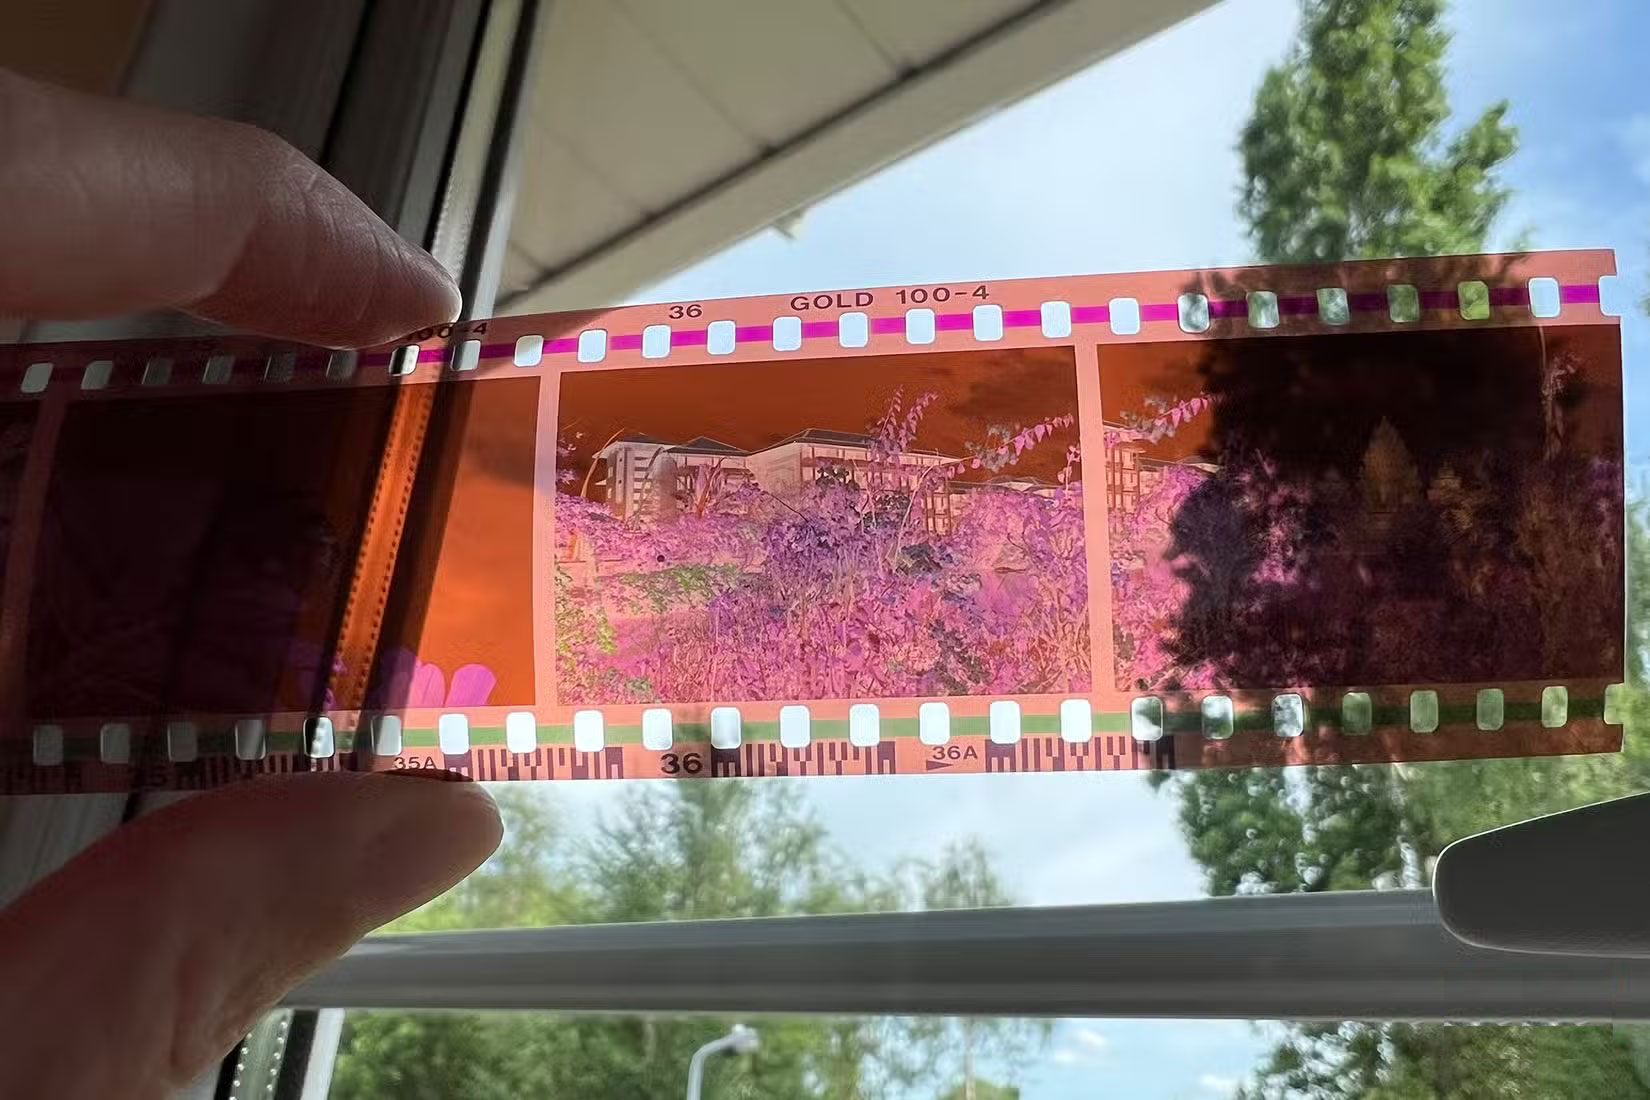
In case your old photos are only available as negatives, there is still a way to scan them and create digital photos on your phone.
You'll need to find a flat white light source, such as a window on a bright but overcast day. Follow the same techniques as for film photography, holding the negative straight up to the phone lens and making sure there's nothing but brightness behind the negative frame.
Once you've taken your negative, take it into any editing tool on your phone, whether it's Photoshop for mobile, Adobe Express, PicsArt , or one of the many others.
Use the Invert feature to flip the negative into a positive. You can also use any app with a Curves feature to invert the RGB curves to get the same result. You may need to do a little more color correction than just scanning a film print.
We use our phones to take and share photos of almost everything in our daily lives. Back when film cameras were the norm, it was usually only the big events and memorable moments that were photographed. Our past photos are now often left in photo albums or in drawers collecting dust, but with modern technology and the convenience of smartphones and a little technical know-how, it's easier than ever to digitize your photos using your phone.
Was this article helpful?
Your feedback helps us improve.
Related Articles
 How to scan documents into PDF files on your phone using Google Drive2 minutes read
 Instructions to scan photos on iPhone2 minutes read
 How to Scan QR Codes on Photos6 minutes read
 Top 5 App scan best documents on phone5 minutes read
 Adobe's new Adobe Scan application turns your phone into a document scanner3 minutes read
 How to scan documents using Notes app on iOS4 minutes read
Reader Comments 0
Sign in with email or Google to join the discussion.