Table of Contents
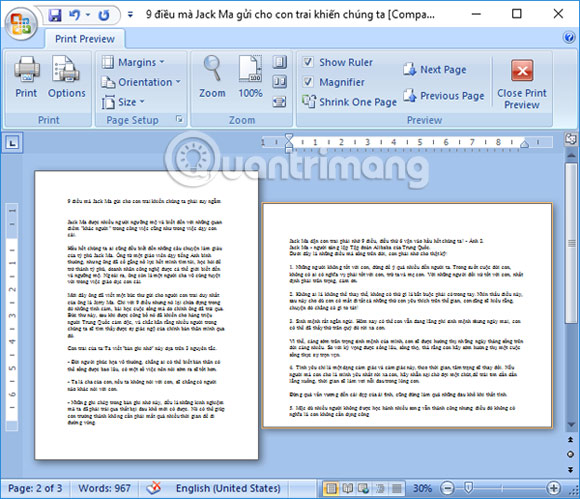
To make only one page landscape in Microsoft Word, select the content on that page, open the Page Setup dialog, choose Landscape, and set Apply to to Selected text. Word creates the necessary section boundaries so the pages before and after can remain portrait.
If the target page is blank, contains content that is difficult to select, or needs exact section control, insert section breaks before and after it instead. A regular page break is not enough because page orientation is a section-level setting.
Method 1: Make selected content landscape
This is usually the quickest method in Word for Microsoft 365, Word 2024, 2021, 2019, and 2016.
- Select all text, images, tables, and other content that should appear on the landscape page.
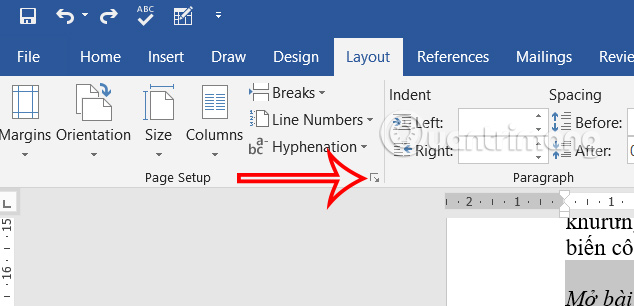
- Open the Layout tab and click the small Page Setup dialog launcher in the lower-right corner of the Page Setup group.
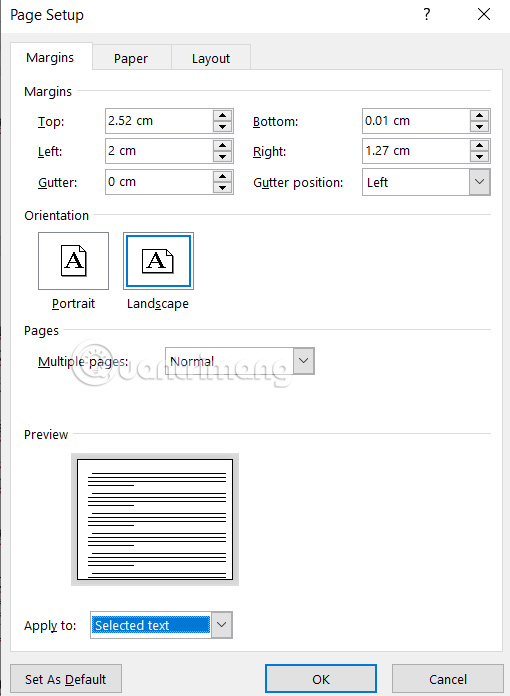
- Under Orientation, choose Landscape.
- Set Apply to to Selected text, then select OK.
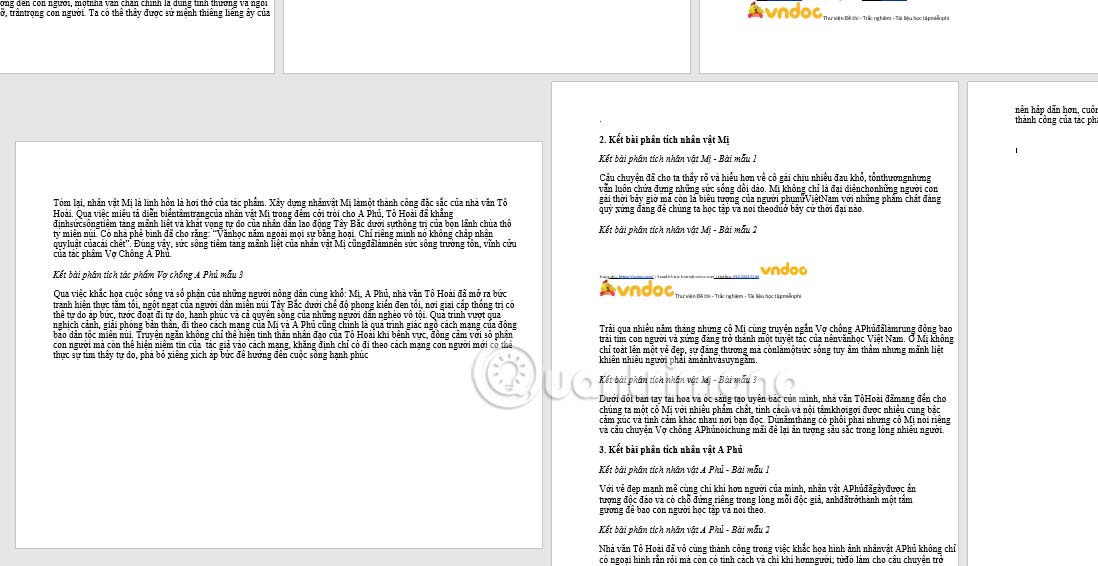
Word may move the selection to a separate page so it can create a landscape section. Check the result in File > Print before printing or exporting to PDF.
Microsoft documents the same workflow in its page-orientation instructions.
Method 2: Use Page Setup from a specific point
This method creates the first boundary by applying Landscape from the cursor onward, then creates a second boundary by restoring Portrait after the target page.
- Place the cursor at the beginning of the page that should be landscape.
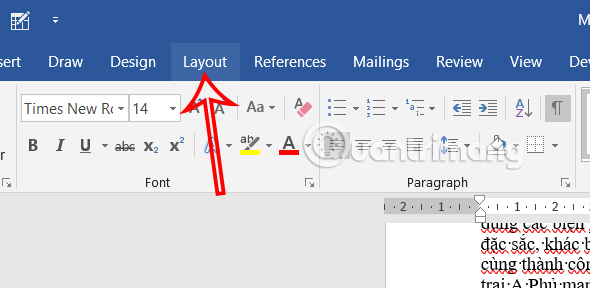
- Go to Layout and open the Page Setup dialog.
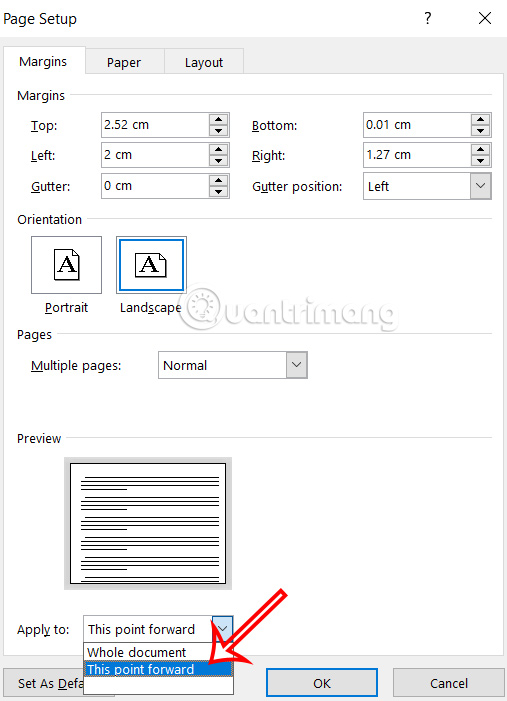
- Choose Landscape, set Apply to to This point forward, and select OK.
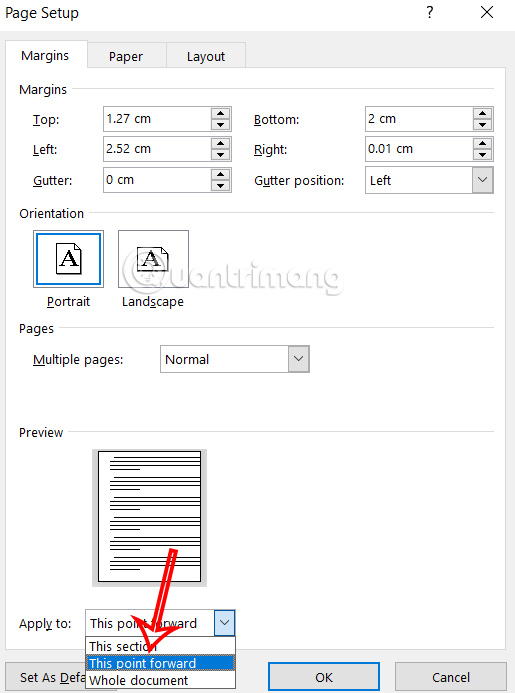
- Place the cursor at the beginning of the following page. Open Page Setup again, choose Portrait, and apply it to This point forward.
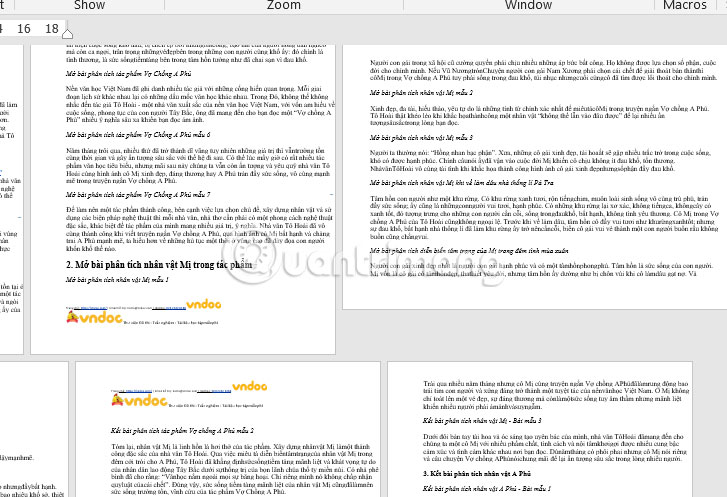
Method 3: Insert section breaks manually
Use this method when you need predictable boundaries, especially for a blank page, a wide table, or a document with several layout changes.
- Place the cursor at the start of the target page.
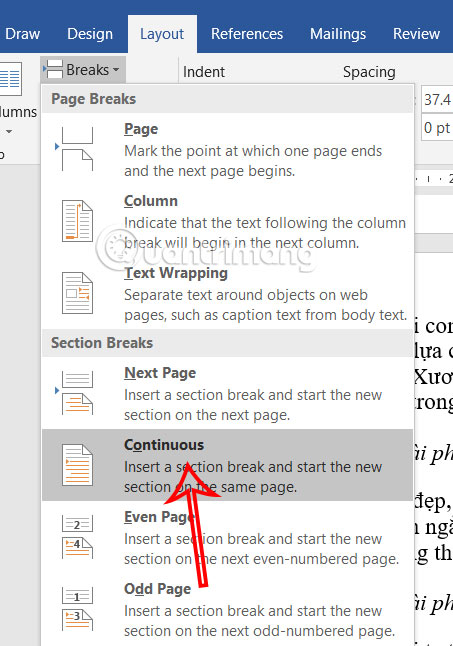
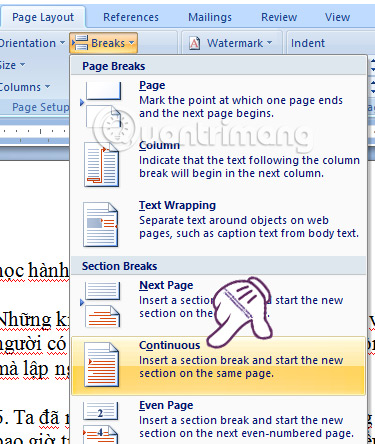
- Go to Layout > Breaks. Under Section Breaks, choose Next Page when the landscape content should begin on a new page. Choose Continuous only when the section change should start at the current position on the same page.
- Place the cursor at the start of the page after the target page and insert another section break.
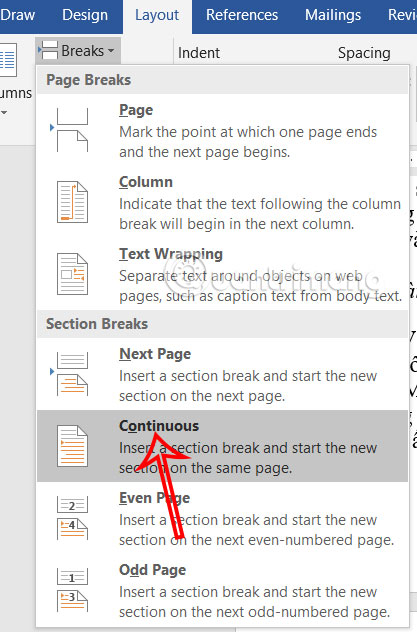
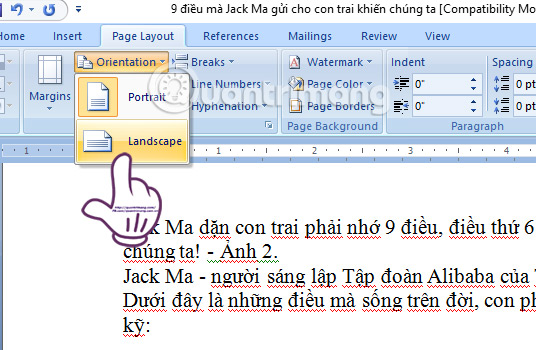
- Click anywhere between the two section breaks, then choose Layout > Orientation > Landscape.
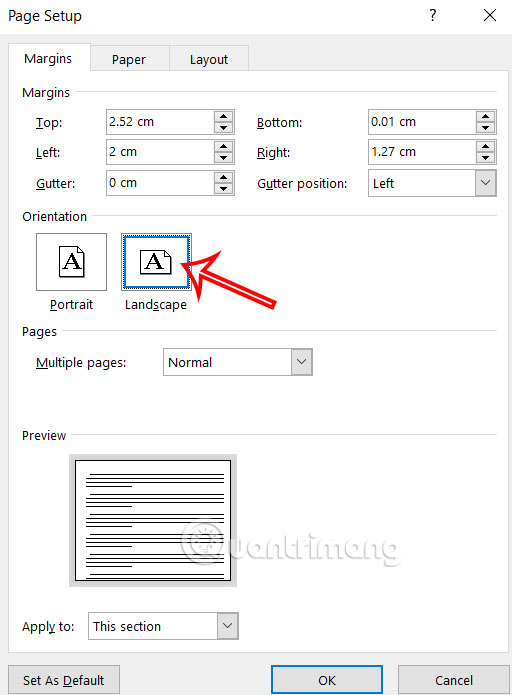
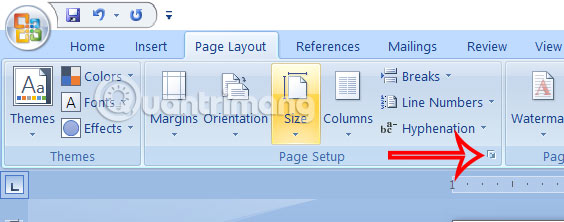
Microsoft's section-break guide explains that orientation, margins, and columns can differ by section. For more examples, see TipsMake's guide to mixing portrait and landscape pages in Word.
Steps for Word 2007
Word 2007 uses the Page Layout tab rather than the newer Layout label, but the underlying process is the same.
Use the Page Setup dialog
- Place the cursor at the start of the target page. Open Page Layout, then click the Page Setup dialog launcher.
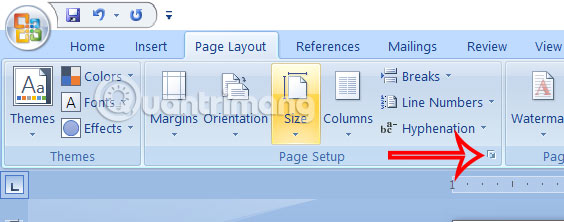
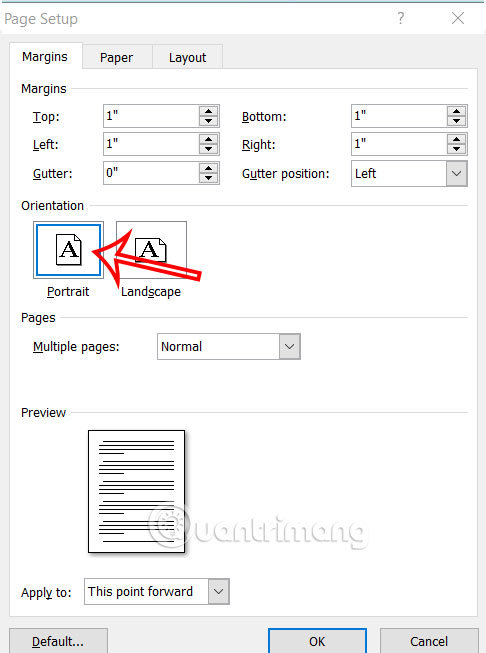
- Choose Landscape and apply it to This point forward.
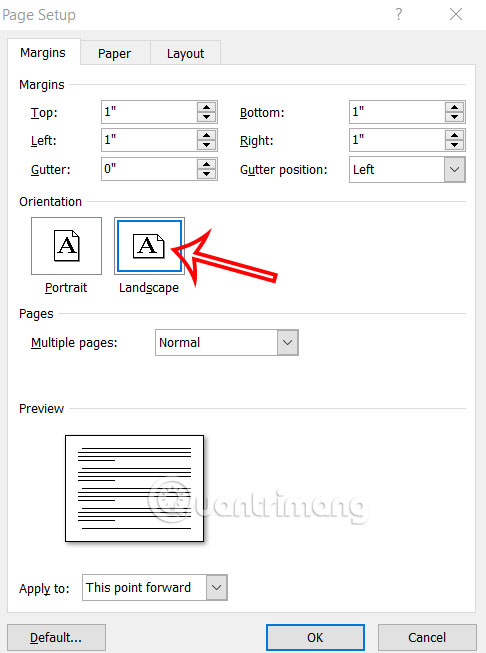
- At the start of the following page, reopen Page Setup, choose Portrait, and apply it to This point forward.
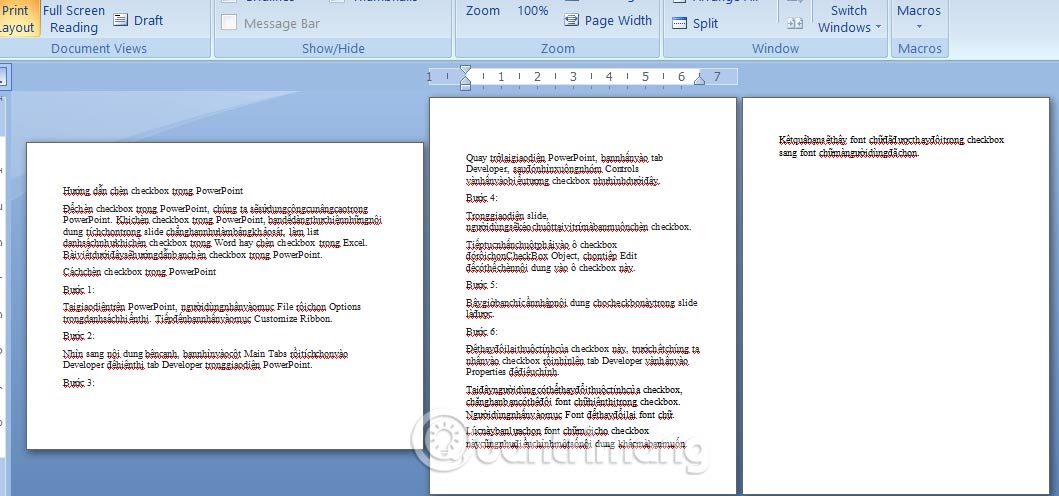
Use section breaks in Word 2007
For precise control, place the cursor before the target page and choose Page Layout > Breaks, then insert a section break.
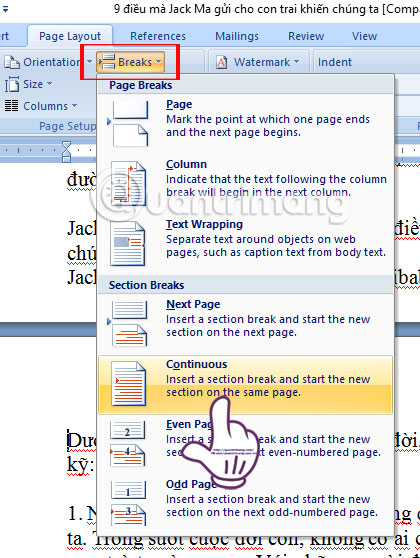
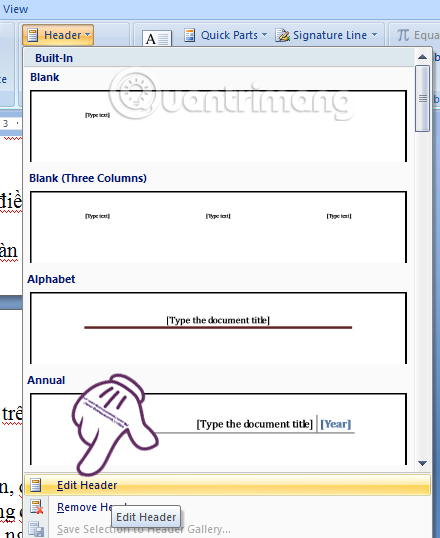
To confirm the page is in a separate section, display formatting marks with Home > Show/Hide (¶). You do not need to open the header merely to verify the break.
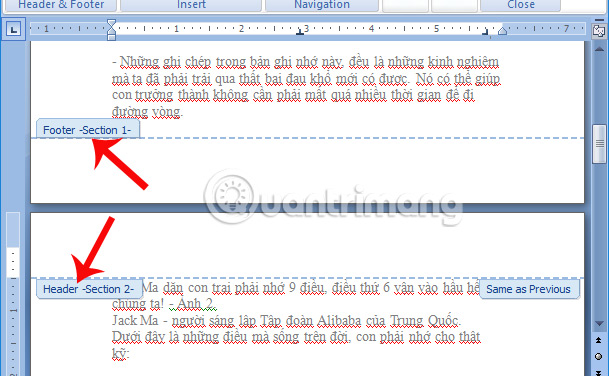
Insert a second section break after the target page, then click within the isolated section and choose Page Layout > Orientation > Landscape.
Troubleshooting
The whole document turned landscape
Undo the change, then select only the intended content or insert section breaks on both sides of the target page. In Page Setup, verify that Apply to is not set to Whole document.
An extra blank page appeared
Turn on Home > Show/Hide (¶) and inspect the break type. A Next Page section break intentionally starts a new page; replace it with Continuous only if the layout should change without forcing a new page. Do not delete a section break casually, because Word merges the surrounding sections and adopts the formatting of the section that follows.
Headers, footers, or page numbers changed
Section breaks can also define header, footer, and page-number behavior. Check whether Link to Previous is enabled before changing those elements. TipsMake's guide to different headers and footers in Word sections explains the controls.
The table still does not fit
Landscape orientation gives the page more horizontal space, but a very wide table may still overflow. Adjust column widths, margins, font size, or table AutoFit settings rather than shrinking the entire document. If you are still learning the Ribbon, review the basic Microsoft Word interface.
Related Articles
 Rotate Any Page Horizontally in Word3 minutes read
 How to Rotate a Page Horizontally in Word 2016, 2013, 20104 minutes read
 How to Horizontally Rotate Any Page of Paper in Word4 minutes read
 How to Pan Across a Page in Excel: Step-by-Step Guide4 minutes read
 How to Rotate Video Horizontally or Vertically for Free8 minutes read
 How to Rotate Images Backwards, Horizontally on Computers Without4 minutes read
Reader Comments 0
Sign in with email or Google to join the discussion.