How to restore Windows 10 data when it fails to boot

If your computer encounters an error that cannot boot and the system cannot access Windows 10, it will make it difficult to back up data. This article will show you two ways to restore or backup data on Windows when it fails to boot.
1. Access Windows Recovery
Once your Windows computer boots, accessing Recovery is very easy, you can access it in many different ways. However, when you cannot access Windows, access is difficult, you will have to create installers on USB and use them to enter Recovery.
Preparation: USB capacity over 8GB (the larger the better)
Step 1: Once you have the USB, you will have to create a Windows 10 installer and please refer to the article Instructions for creating a Windows 10 USB installer
Step 2: Then, plug the USB into the computer and reboot to enter Windows Setup mode. In this window, select Repair your computer to see more options.

Step 3: Once in Recovery mode, select Troubleshoot to open the Windows repair tool.

Step 4: Next, select Advanced Options mode to see available options.

Step 5: To restore data on Windows, we will use Command Prompt (CMD) available on the computer.
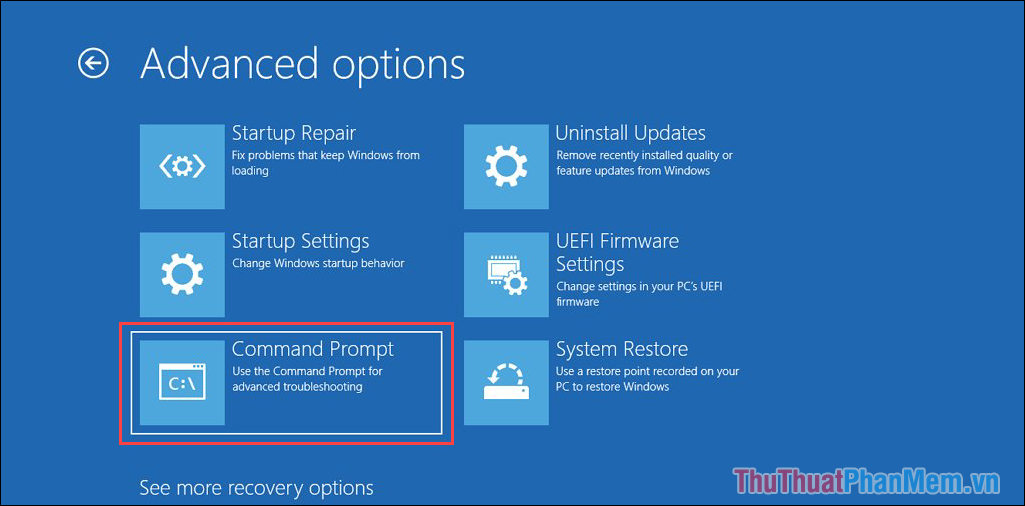
2. How to restore data with Command Prompt
In this case, the computer cannot access Windows 10 and we will have to copy important data to the plugged USB (Step 1). The larger the USB capacity, the more data you will be able to recover at once.
Step 1: In the opened Command Prompt window, enter the following command and press Enter to open Notepad.
| Notepad.exe |
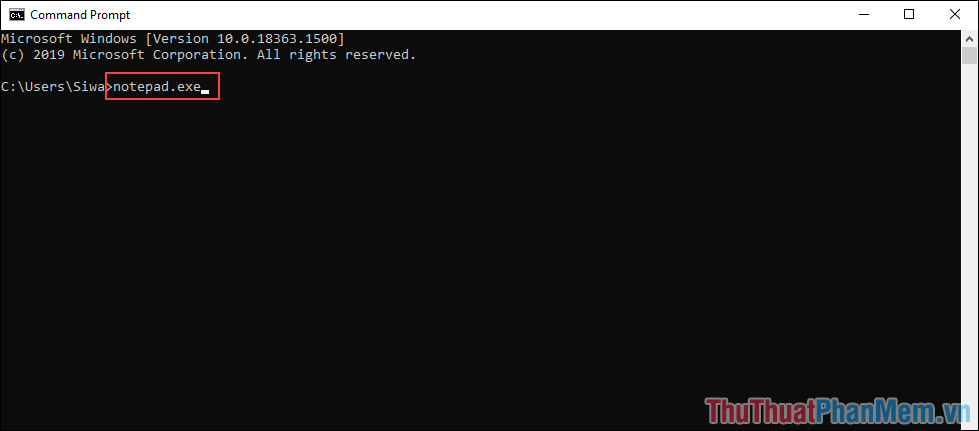
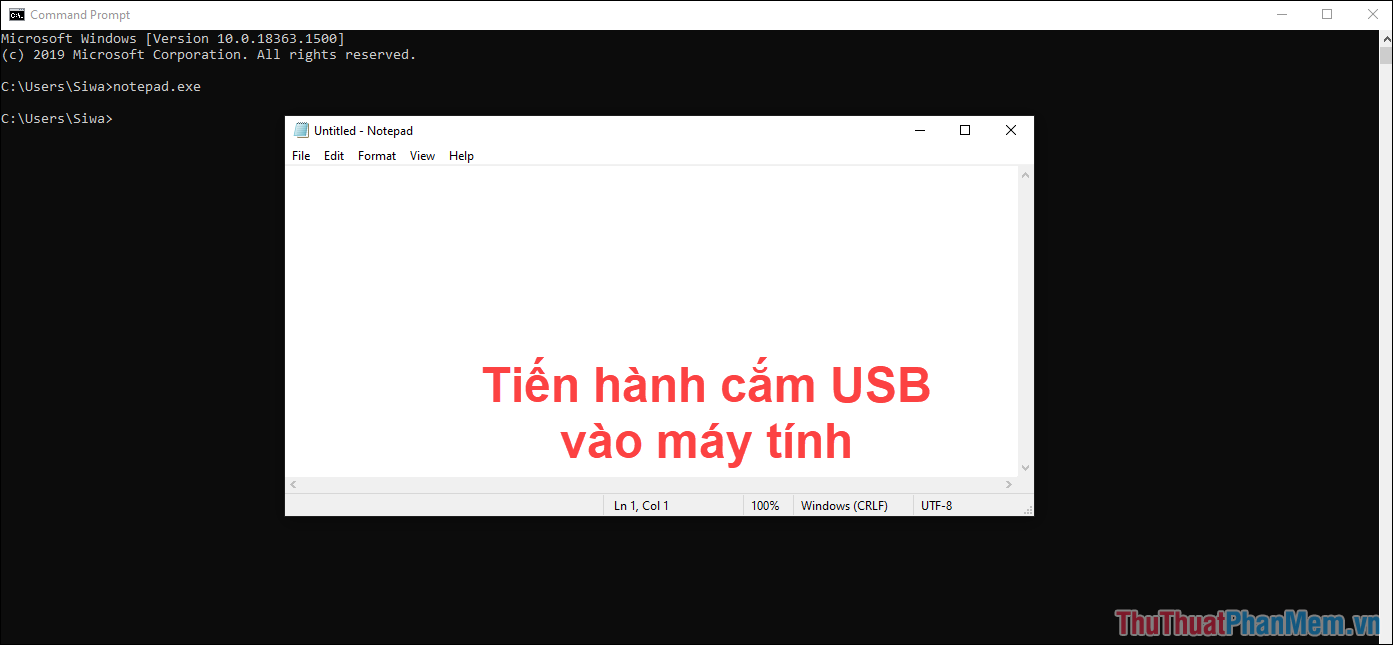
Step 2: When NotePad is opened, make sure the USB is plugged into the computer, check again before restoring data.
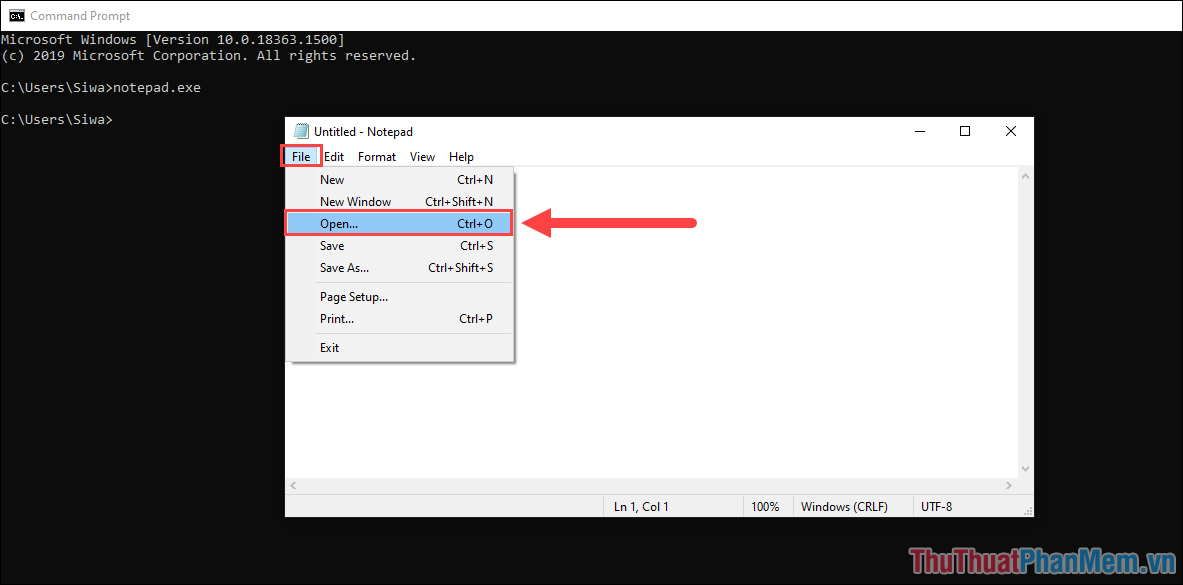
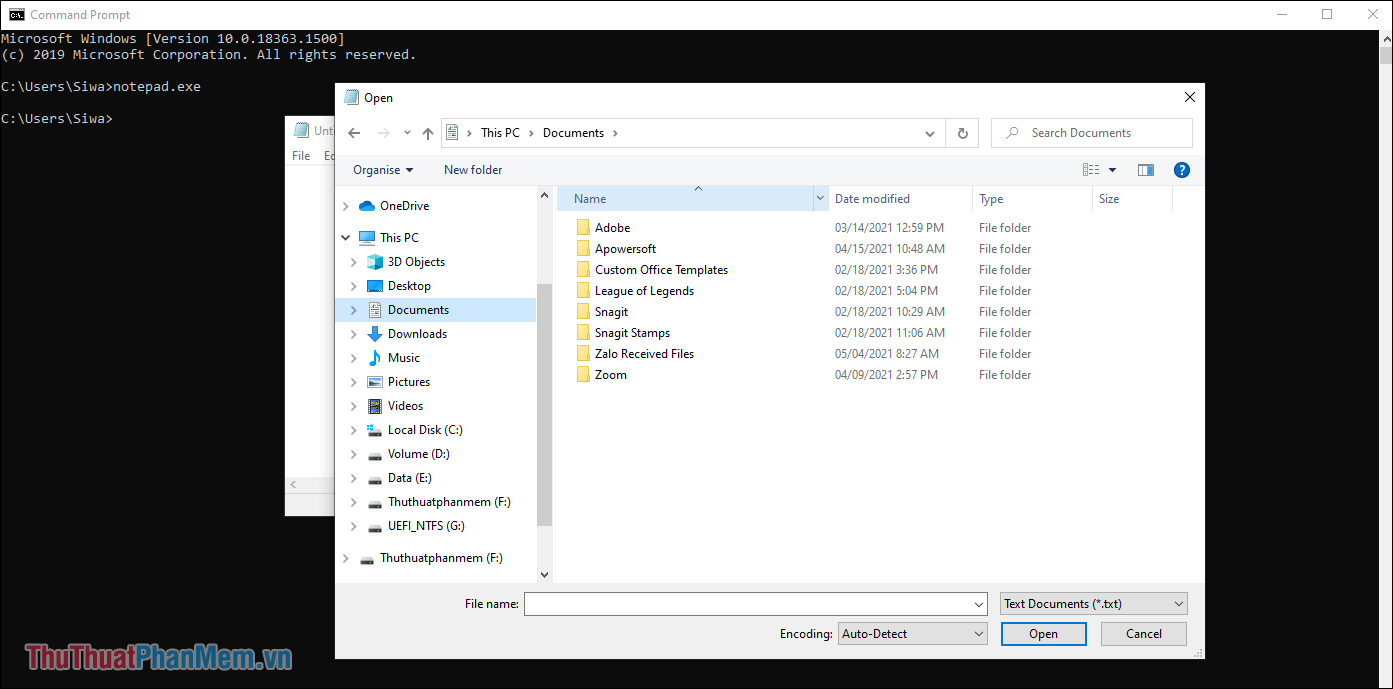
Step 3: Next, select File -> Open to open existing files on your Windows computer.
Step 4: In this mode, you will be able to view all data on your Windows computer. Please open the folders one by one to search for the data that needs to be restored.
Step 5: Once you have identified the folder and content to restore, right- click on the folder and select Send to => USB name .
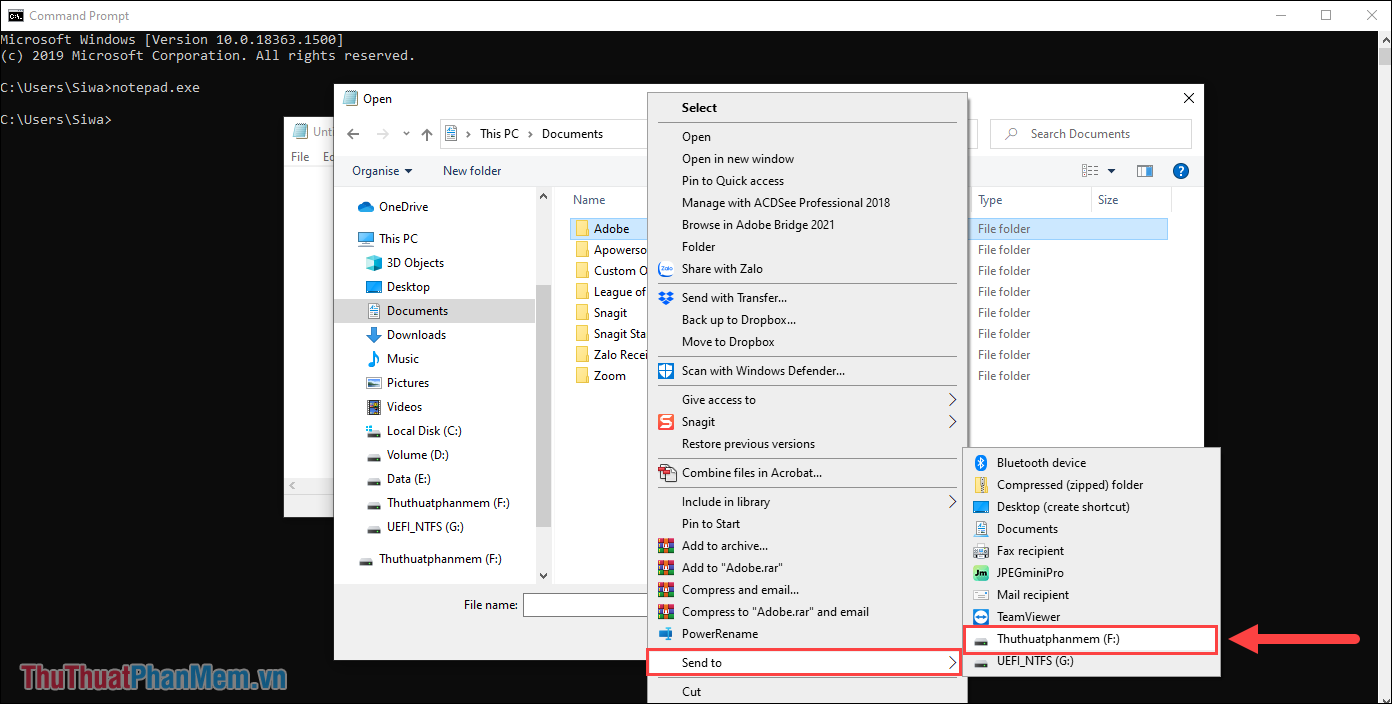
So, you have copied the data you need to restore to USB.
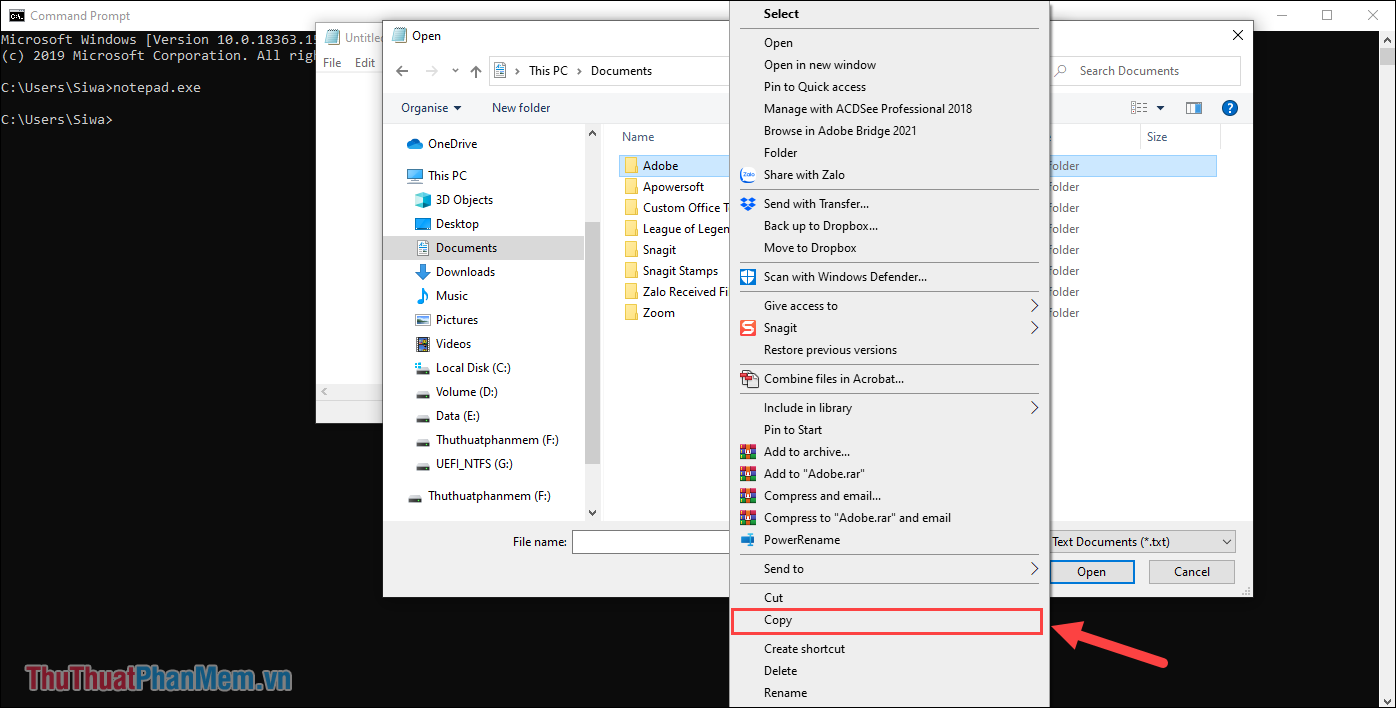
Step 6: Additionally, you can also right-click to select Copy to copy the content on your computer.
Step 7: To copy, you just need to switch to the USB folder and press Paste to paste.
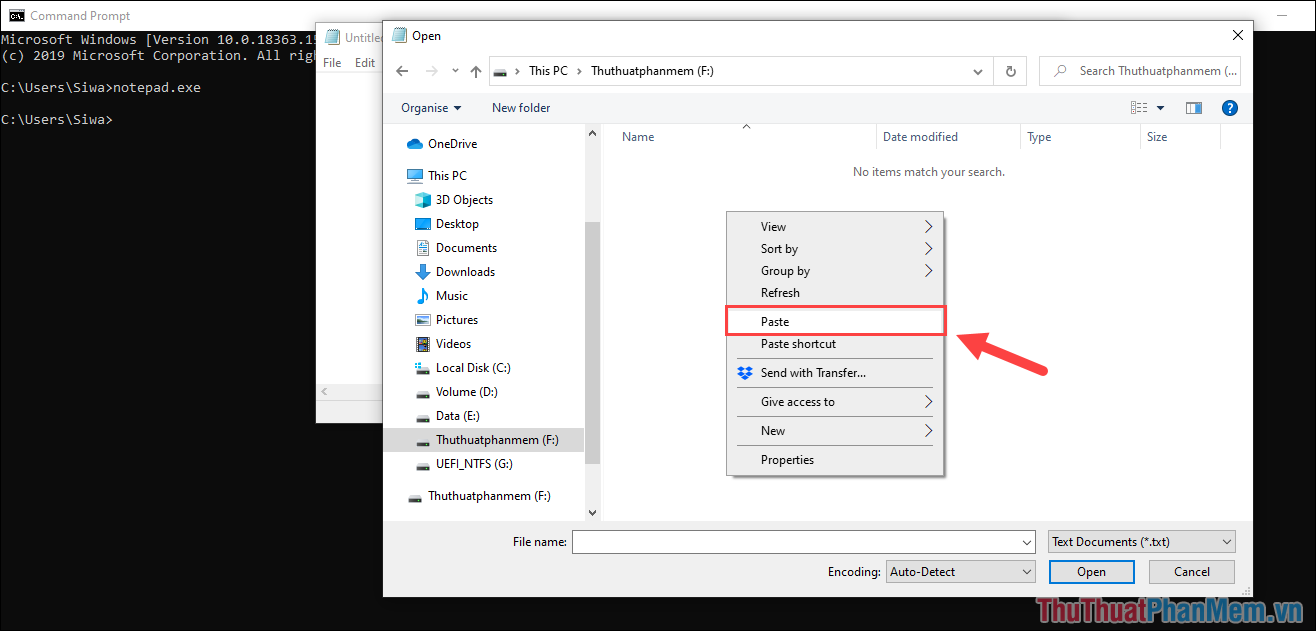
With this method, you will be able to restore almost all personal data on a damaged Windows computer.
In this article, Tipsmake has shown you how to restore data on Windows 10 quickly and effectively. Wishing you a nice day!
You should read it
- Instructions for creating backup and restore points (Restore Point) on Windows 10
- How to use System Restore in Windows: Turn off, turn on, create, restore System Restore
- Instructions for restoring the system on Windows
- Instructions on how to use System Restore on Windows
- How to use Iperius Backup Free to back up Windows data
- How to back up and restore data saved on PS4
 How to draw AI paintings with Windows Paint completely free
 Turn off Windows 10, 11 updates completely - Turn off Windows 10, 11 Update
 Windows 10 users just received this additional useful feature
 Microsoft announces pricing for Windows 10 extended security updates
 How to change Windows 10 interface to default
 How to turn on Bluetooth on Windows 10, turn on Bluetooth on Windows 8/7