Reinstall and restore Windows via 8 steps
Your computer may not be able to boot or may be infected with some kind of nasty malware. Maybe Windows will display the 'dead' screen every time you type a word, ...
Network administration - Your computer may not be able to boot or may be infected with some kind of annoying malware software. It is possible that Windows will display a 'dead' screen whenever you type a word. No matter what problems your computer has, the usual help people can tell you to reformat the hard drive, reinstall Windows and your applications, and then restore the documents, Your photos and music files from a back up.
However, that is not always good. If you can't fix the problem of being unable to live together, start with the 'broken pile' that might be the best solution.
However, you should not do this unless you've tried the methods. For example, if your computer refuses to boot, take a look at some articles that show you how to diagnose and fix non-bootable errors of XP or Vista, some bootable disks that can save your computer. . If Windows starts and then behaves strangely, then check the malware software, remove the unwanted auto load components and upgrade the driver. You can even consider cleaning the Registry.
However, after attempting to fail, you must clean up Windows and reinstall it, in which case follow the 8 steps below to perform a safe process and avoid problems. Bad topics can happen to you.
Step 1: Learn recovery tools
You need some boot environment that can be restored and reinstalled Windows - maybe one. Windows-based computers can choose one of the following options:
A recovery disk is a bootable CD or DVD that can restore your hard drive to its original state when leaving the factory. In most cases, recovery discs will destroy all your data - including all kinds of data, photos and music files, etc. Some manufacturers may not provide The recovery disk is included with your computer, but instead of installing software on your hardware, you can create your own recovery discs. If your computer has an attached recovery disk, but you can't find it, then learn more about how to recover Windows in case of a CD recovery disc.
The recovery partition is hidden in your hard drive. You access it by pressing a certain key combination at startup. Check your documentation to see if you have this feature and how to access it. Partition will also do the same job as recovery disk.
However, a Microsoft Windows CD or DVD will be the best tool of all.
Step 2: Collect everything you need
Make sure you get all of the following before proceeding:
- A backup of the driver .
- A software and a backup device : You need an external hard drive (or better yet two), a blank DVD and a backup software. We will introduce in more detail in sections 3 and 4.
- Your applications : For programs that you use that do not come with your computer, you need their installation CDs, their serial numbers, good registration codes, . If you have downloaded an application, please Create a backup for the download file or check it to make sure you can easily download it again.
- Time : In fact, this project will take you several hours, but you can spend up to a day in case you don't find important drivers or software discs. This project is best done at the beginning of the long or minimum holidays at the beginning of the weekend, to avoid touching your work if something goes wrong.
- A good book : You will spend a lot of time sitting in front of the computer without doing anything. If your computer is a laptop, then leave it next to a cup of coffee on the table so you can watch TV and sip coffee while your settings are running.
Step 3: Create an image backup for the hard drive
In the event that is less likely to happen that something has gone wrong (for example, you forgot to save a copy of an important slide that will be needed for work on Monday), a backup The image for your hard drive in its current state will allow you to quickly and easily restore everything to its previous state. Be persistent and should take this step because it is the safest solution for you.
What should you back up? An external hard drive - may be inexpensive and easy to work with. For best results, choose an external hard drive that is twice or three times the amount of data you have on your computer. If the 160GB hard drive has 90GB of data in it, choose an external hard drive with a capacity of 200GB. While 500GB and 1TB drives are currently on the market and are affordable, we recommend using external drives that are large enough that you can afford; That way you can save more than one copy of your files to the drive or even use it to back up to multiple computers.
What software should you use? Norton Ghost and Acronis True Image are the best image backup programs but they don't just have one function. Check your normal backup program (do you make regular backups?) About the feature image-backup, can also be used as Disaster Recovery. The backup software that comes with your external drive may also have such components.
Vista Business and Ultimate also have the included image backup utility. Just click Start , type backup , select Backup Status and Configuration and press Enter . Click Complete PC Backup then select Create a backup now .
However, you can also choose other free options, in these free options we recommend Runtime Software's DriveImage XML.
However, you should remember that image backup is useless if you don't boot from CD or DVD to restore it. Both Ghost and True Image have tools to create such a disc. If you choose to use Vista's backup tool, make sure you have the correct Windows Vista DVD or Vista Recovery Disc for recovery purposes. Besides, you can restore DriveImage XML backup through Ultimate boot CDs for Windows.
Step 4: Create a data backup
We have just introduced a backup for everything on your hard drive, including data. However, the purpose of that first backup is to add an extra layer of security. This back up is intended to make recovering your data easier when you reinstall Windows.
Here we introduce some of the directories that you need to back up in XP and Vista:
In XP: All these folders reside in the C: Documents and Settings login folder, where login is the name you use when you log into Windows:
- My Documents
- Desktop
- Application Data
- Favorites
- Local SettingsApplication Data
In Vista, the directories reside in C: Users login :
- Documents
- Pictures
- Desktop
- Music
- Contacts
- Videos
- AppData
- Favorites
With these directories, once again, the external hard drive will be the best option. If you are careful, use a different hard drive than the one you used for the image backup; It will be safer to put all your backups on a single external hard drive. If you only have a few GB of data files, burning them to DVD is also a good and cheap solution.
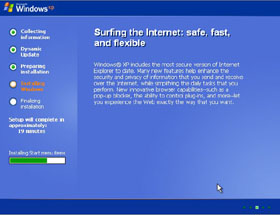
Step 5: Format and restore
Now go to the main job. We can't give you specific instructions on using recovery tools, because we don't know which recovery tools you have in your hands and only refer to them and with some reminders. All of them are designed as simply as possible.
Step 6: Create your own Windows
Congratulations. You now have a new version of Windows, configured exactly how Microsoft or your system vendor recommends it (or how they use it at the time you buy the computer).
At this point, you have to configure it, re-install the pre-installed messy components, install your own software and make it work again. From my personal point of view, this is the longest and most annoying part. In section 7 we will tell you how to avoid it in the future. However, for now, follow the instructions below:
1. In the Control Panel's Users applet, create log-ins for yourself and other users. You need to have at least one Administrator user.
2. Remove the wrapped programs you don't want. You can use the portable version of Revo Uninstaller to do this.
3. Restore your backed up drivers. You can skip drivers for anything related to your computer because the recovery tool can create a new version of Windows that has already set them up.
4. Download and install Windows updates.
5. Start your security software, install the programs you use that are not on your computer. Upgrade them and then configure them to your liking.
6. Unscramble the Start menu according to your wishes
7. Select your desktop, screen saver, favorite capacity settings, .
Step 7: Create another backup image
It's not a joke. This step may not be necessary, but if you need to restore Windows to this computer again, please perform a simple backup of your personal data, restore this image 'genuine version' later. That puts your data back into its place.
Remember, the recovery tool restores your Windows and company configurations, not you. Think of this image as your own, a custom recovery tool that will allow you to skip step 6 on the next attempt.
Since you have not copied your data back to the hard drive, this image will be relatively small. Put it in a series of DVDs instead of an external hard drive, then label them clearly with the date and store them in a secure location.
Step 8: The final step
With a ready and recoverable Windows, recover your data from data backup with simple drag-and-drop gestures. In the unlikely event that a backup is corrupted, restore it from the image backup. Then keep both backups for about a month or so, this is to prevent when you lose important files.
Finally, a refreshing sigh, relax yourself for what has been done and continue your life.
- Restore previous Windows version from Windows 7
- How to reinstall the removed default application on Windows 10?
- Download Ghost win xp, win 7, 8, 10 32 and 64bit Link Google Drive
- How to Reinstall Kindle
- Instructions on how to use System Restore on Windows
- Steps to restore Windows Security on Windows 10
- Instructions for resetting Recall in Windows 11
- How to create Restore Point on Windows 10 with just 1 double click
- How to Recover Data After a Factory Reset on iPhone or iPad
- How to Retrieve Deleted Texts
- Backup and restore Registry on Windows
- Backup and Restore Wifi settings in Windows 7
- Transfer Exchange 2003 to Exchange 2007 (P.4)
- Backup and Restore Exchange 2003 with Recovery Storage Group
- Delete log information in Windows Server Backup
- Set of recovery and diagnostic tools - Part 4
- Restore and secure Wi-Fi encryption key
- Restore hidden folders in Windows when infected


-
 How to fix a stuck Windows Restore error.
-
These backup mistakes could cost you years of photos
-
5 tips to reduce WhatsApp backup file size
-
How to Backup and Restore Microsoft Authenticator on iPhone
-
How to turn off WhatsApp message backup on phone
-
Microsoft launches new utility to simplify data backup and transfer on Windows 11
 How to fix a stuck Windows Restore error.
 These backup mistakes could cost you years of photos
 5 tips to reduce WhatsApp backup file size
 How to Backup and Restore Microsoft Authenticator on iPhone
 How to turn off WhatsApp message backup on phone
 Microsoft launches new utility to simplify data backup and transfer on Windows 11