11 ways to open System Restore on Windows 11
System Restore is useful when you have problems after installing an app or an update that crashes your PC. Windows creates restore points and automatically deletes them to make room for new restore points. System Restore prevents you from immediately using other recovery methods such as resetting or reinstalling Windows that may affect your data and applications. Here are 11 ways to launch this trusted tool on Windows 11.
1. Using the Start menu
The Start menu is the most common means of accessing Windows apps and tools. Improved search integration and app launch tracking show the apps and settings you access most of the time. Follow these steps:
1. Press the Win key to open the Start menu.
2. Type System Restore and press Enter key. Then click the Open System Restore button .
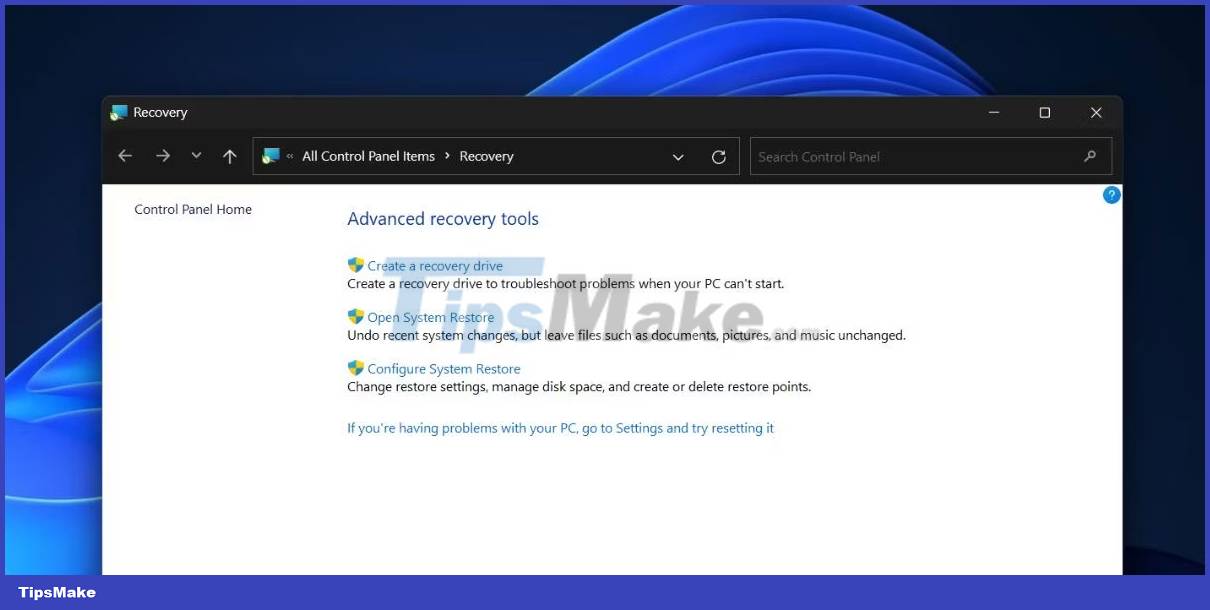
3. Click the Next button to view and select from the list of available options.
2. Using the Control Panel
The Control Panel contains all of Windows' tools and settings, making them easy to find. Even Windows search points to the Control Panel window of Recovery options. Here's how to do it:
1. Press the Win key , type Control Panel , and then press the Enter key.
2. Click the View by: drop-down list and select the Large icons option .
3. Now, click on the Recovery option.
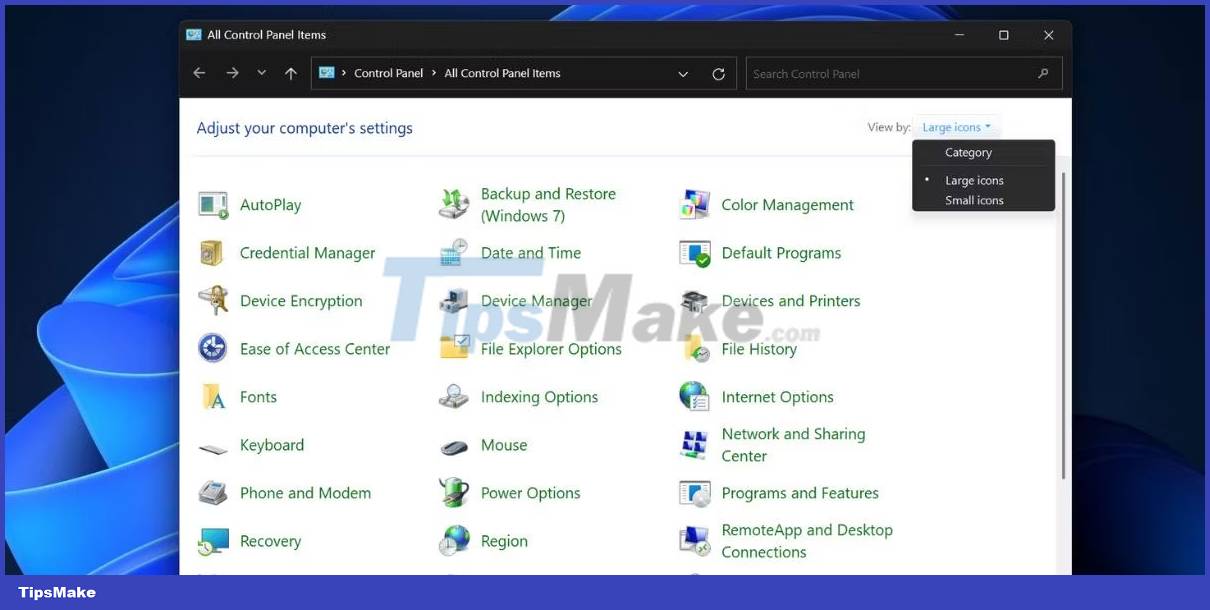
4. Finally, click the Open System Restore button .
3. Using the Advanced System Properties window
You can quickly access System Restore using the Advanced System Properties window. Follow these steps:
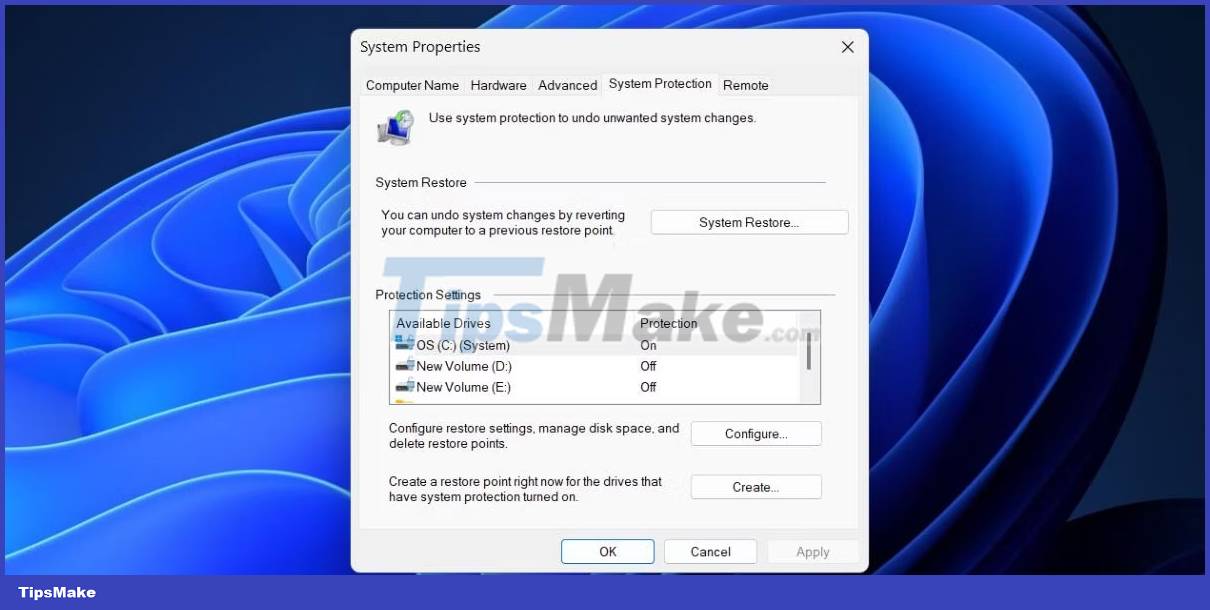
- Press the Win key , type sysdm.cpl , and then press the Enter key.
- Now, switch to the System Protection tab .
- Click the System Restore button to launch the tool.
4. Using the Settings app
Microsoft is still trying to bring everything from the Control Panel to the Settings app. But even if searching for System Restore in Control Panel points to the Settings app, you won't find the tool there. Instead, you have to search for System Restore inside the Settings app. Here's how to do it:
1. Right-click the Start button to open the Power User menu. Click the Settings option .
2. Go to the search bar in the upper left and click on it.
3. Type Restore and click the Recovery search result . It will take you to the Control Panel's list of available recovery options.
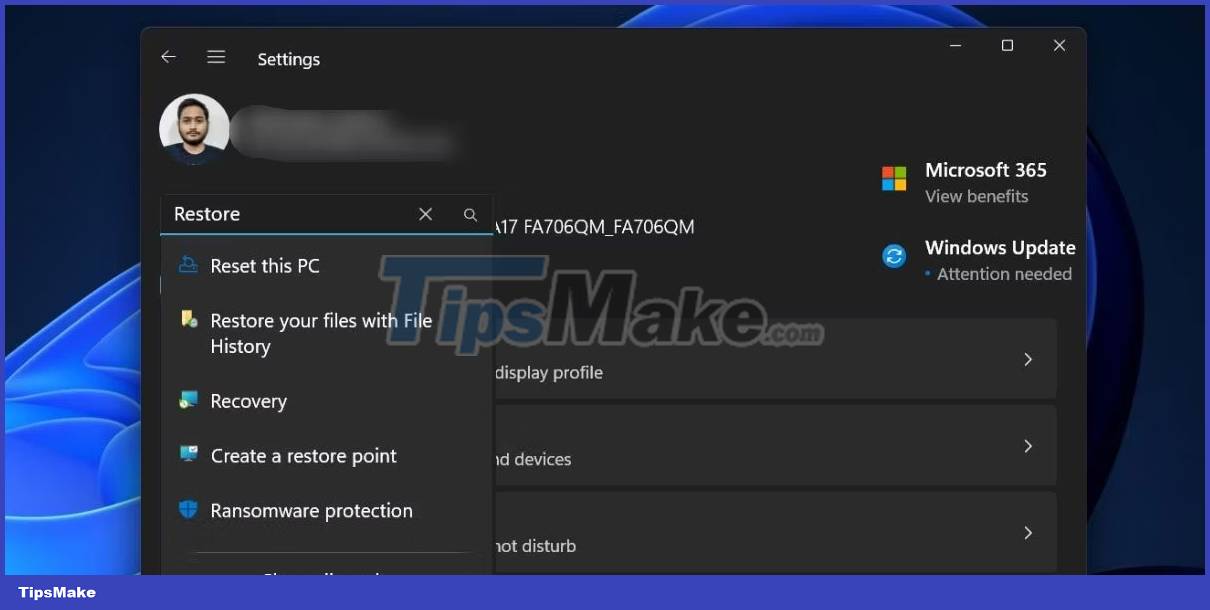
4. Now, click the Open System Restore button .
5. Using the Run dialog box
The Run dialog supports short codes that allow you to access the application faster (provided you know the right code). You can even open file locations with this tool. Follow these steps:
1. Press Win + R to open the Run dialog box. Type rstrui in the text box.
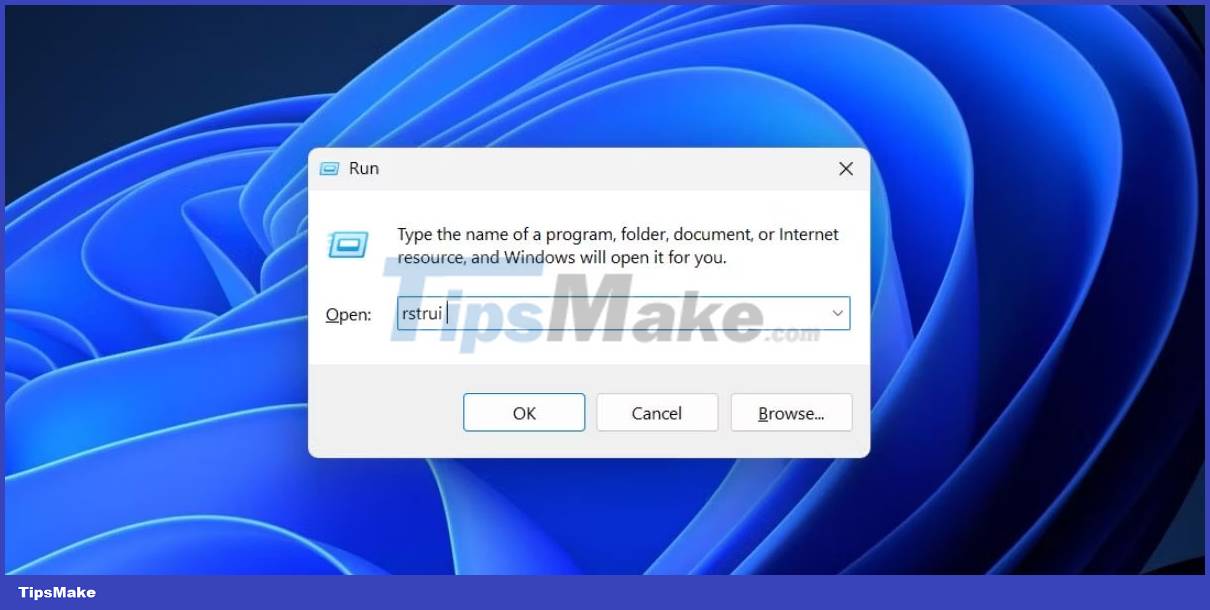
2. Click the OK button to open the System Restore tool .
6. Use a Pinned Shortcut on the Taskbar
If you search for System Restore in the Start menu, you won't find an option in the right pane to pin apps to the Start menu or Taskbar. But you can pin the tool's application file to the Taskbar by accessing its folder location. Here's how to do it:
1. Press the Win key , type rstrui and click the Open file location option on the right.
2. Find the rstrui.exe application in the folder and right click on it. Select Show more options from the context menu.
3. Click the Pin to taskbar option .

4. The System Restore icon will appear on the Taskbar. You can change its position on the Taskbar by clicking and dragging it in either direction.
7. Using Task Manager
If the Control Panel app doesn't open on your Windows PC, you can use the Task Manager to launch the System Restore utility. Here's how to do it:
1. Press Ctrl + Shift + Esc keys at the same time to open Task Manager.
2. Click the Run new task button .
3. Type rstrui.exe and click the OK button to launch the System Restore tool.
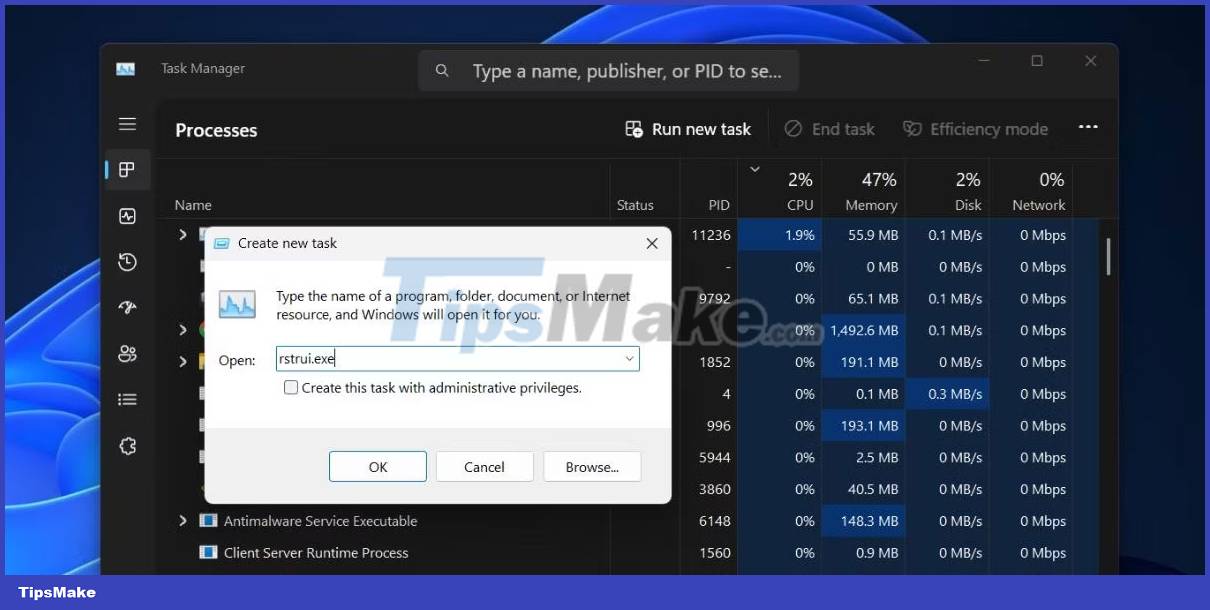
4. Close the Task Manager window.
8. Using File Explorer
System Restore, like all other Windows tools and Control Panel applets, is located in the System32 folder. So you can use File Explorer to access the tool. Follow these steps:
1. Press Win + E to open File Explorer.
2. Go to the top area and click on the address bar. Paste the following path and press Enter key: C:WindowsSystem32
3. Click the search bar and type rstrui then press Enter key to search.
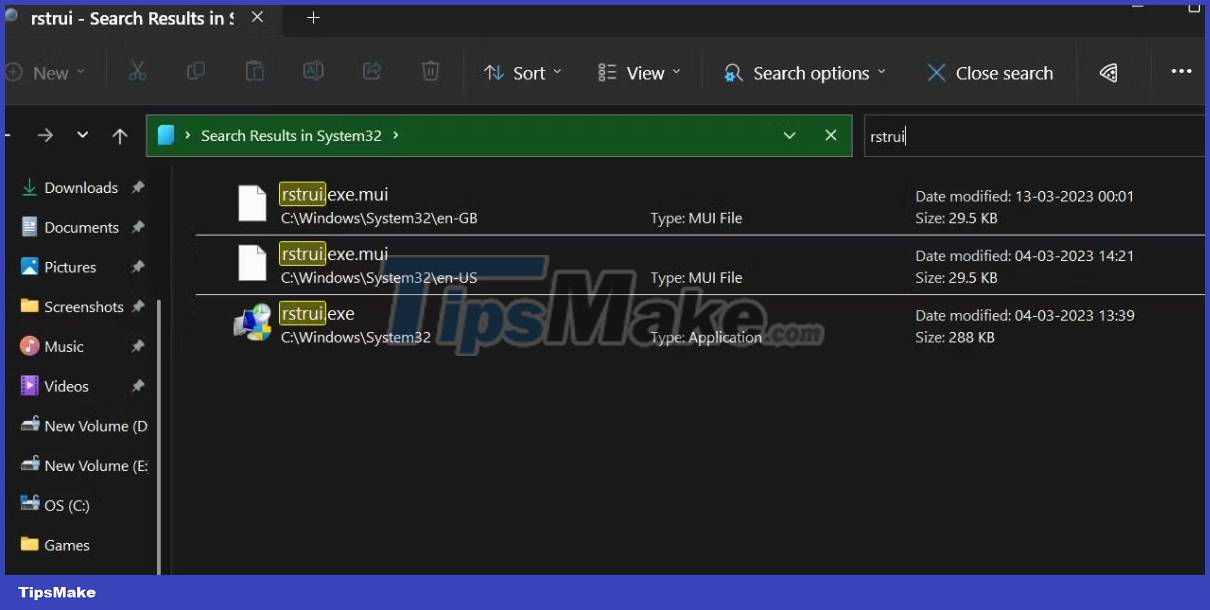
4. Double-click the rstrui.exe file to open the tool.
9. Use CMD or PowerShell
Terminal lovers don't like the idea of navigating through menus to open a program. If you are one of them, here is how you can open the System Restore utility in Windows 11 using Command Prompt or PowerShell:
1. Press Win + R to open the Run dialog box. Type cmd or Powershell in the text box and press Enter key.
2. Now type the following command in terminal and press Enter key : rstrui.exe
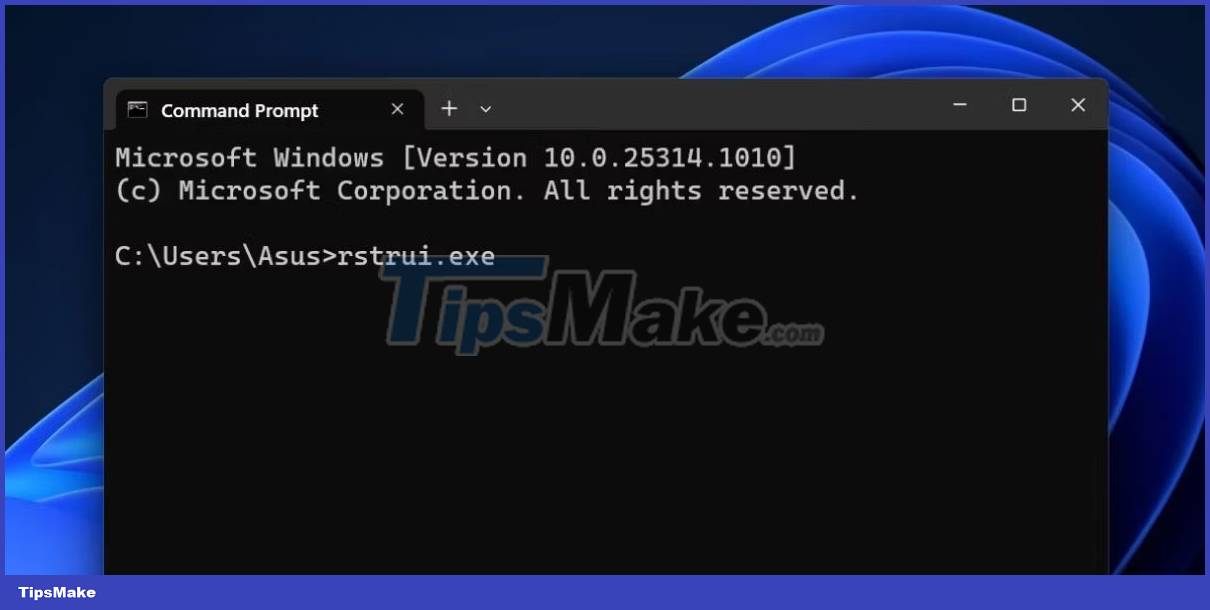
3. Alternatively, you can use the start-process cmdlet in PowerShell to launch the tool: start-process rstrui.
4. Close the Command Prompt or PowerShell window.
10. Use desktop shortcuts
Desktop shortcuts are one of the easiest methods to open frequently used applications and programs. You can create a manual Windows shortcut for the System Restore utility and then launch it whenever you want. Follow these steps:
1. Press Win + D to switch to the desktop.
2. Right-click on an empty area of the desktop without an icon.
3. Select the New > Shortcut option from the context menu.
4. Windows will create the shortcut and open its custom window.
5. Click the text box and paste the following path: "C:WindowsSystem32rstrui.exe"
6. Click the Next button .
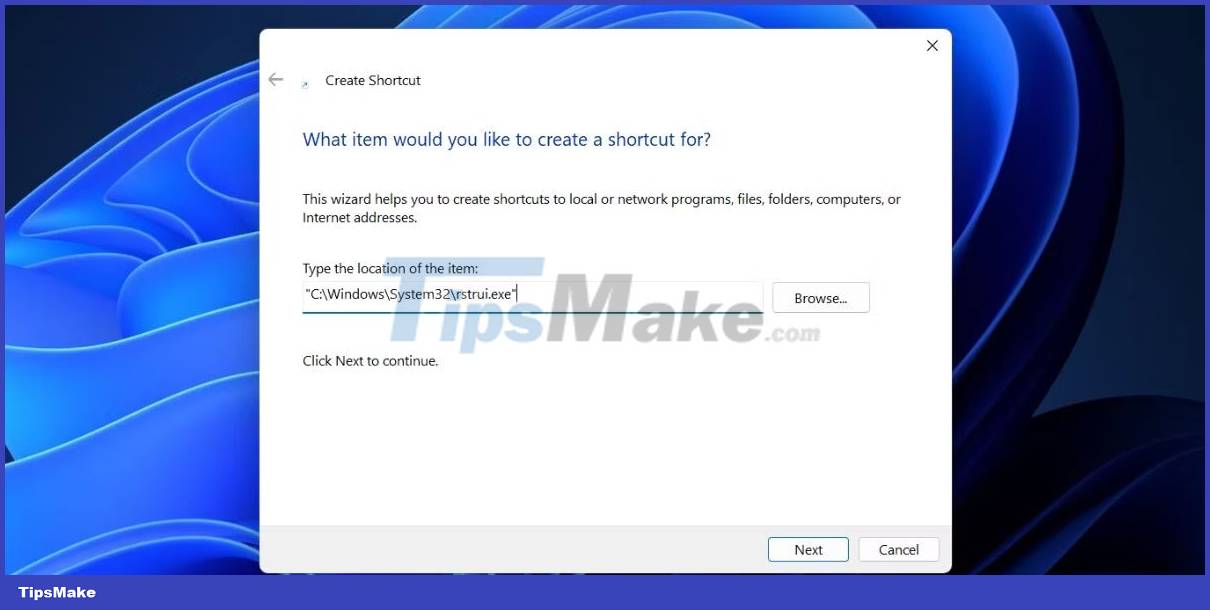
7. Now save the shortcut with the name System Restore and click the Finish button .
8. Double-click the newly created shortcut to launch System Restore.
11. Use keyboard shortcuts
The last method on the list is to map the keystrokes on the keyboard to the newly created shortcut. So you can press the mapped keys and launch the tool whenever you want. Follow these steps;
1. Press Win + D to switch to the desktop.
2. Find the newly created System Restore shortcut and right click on it. Select the Properties option from the context menu.
3. Go to the Shortcut key field . You can map a combination that starts with Ctrl + Alt + another key. There are keys that are reserved for system shortcuts and you cannot use them.
4. Press the Ctrl + Alt + S keys at the same time to assign the key combination of your choice. You can use any other key instead of the 'S' key.
5. Click the Apply button and then click the OK button.
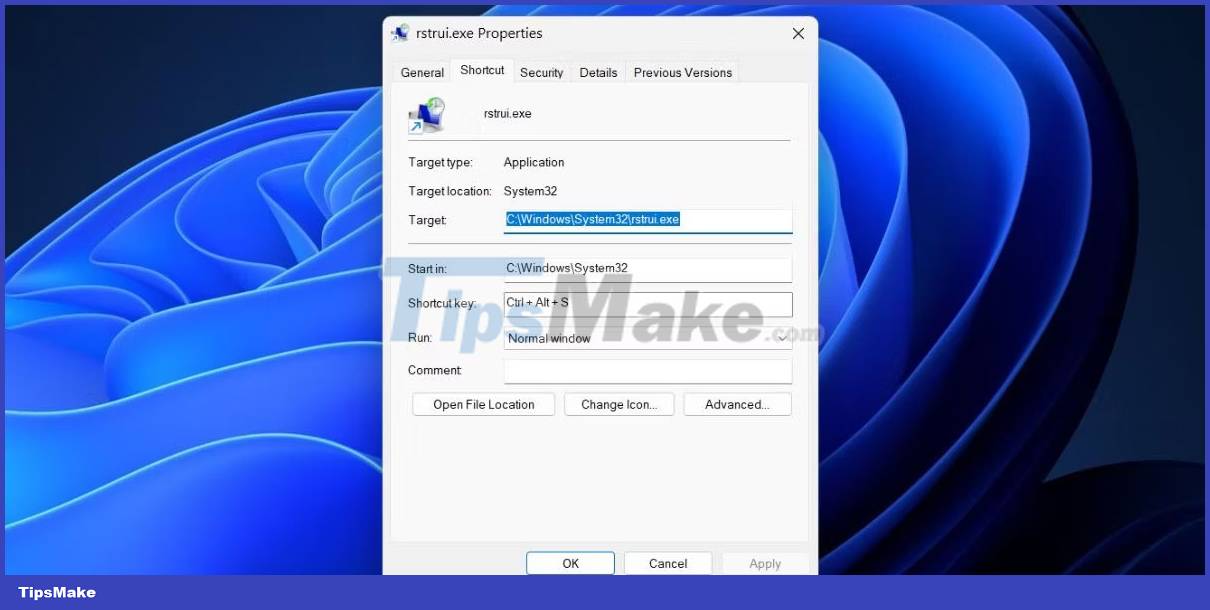
6. Switch to the desktop or any other window and press the specified key combination. The System Restore utility will appear.
You should read it
- ★ Configure the System Restore feature in Windows 10
- ★ How to use System Restore in Windows: Turn off, turn on, create, restore System Restore
- ★ Instructions for restoring the system on Windows
- ★ Instructions for creating backup and restore points (Restore Point) on Windows 10
- ★ Restore the system due to a corrupted Registry in Windows XP