Turn off Windows 10, 11 updates completely - Turn off Windows 10, 11 Update
Turning off Windows 10 and 11 updates helps your computer operate more stably and not encounter silly errors in new Updates. In this article, TipsMake shares with you the most detailed way to turn off Windows 10 and Win 11 updates.
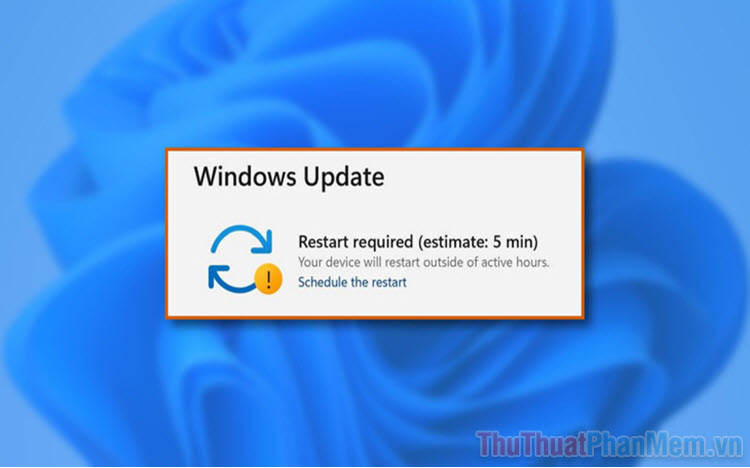
1. Turn off Windows 10/11 updates in Settings
The Settings tool on Windows allows users to 'pause' Windows 10 and 11 updates for up to 5 weeks. After 5 weeks, you can continue to pause updates if you want. In case you just want to turn off updates temporarily and still want to receive the next update later, this is the most effective way.
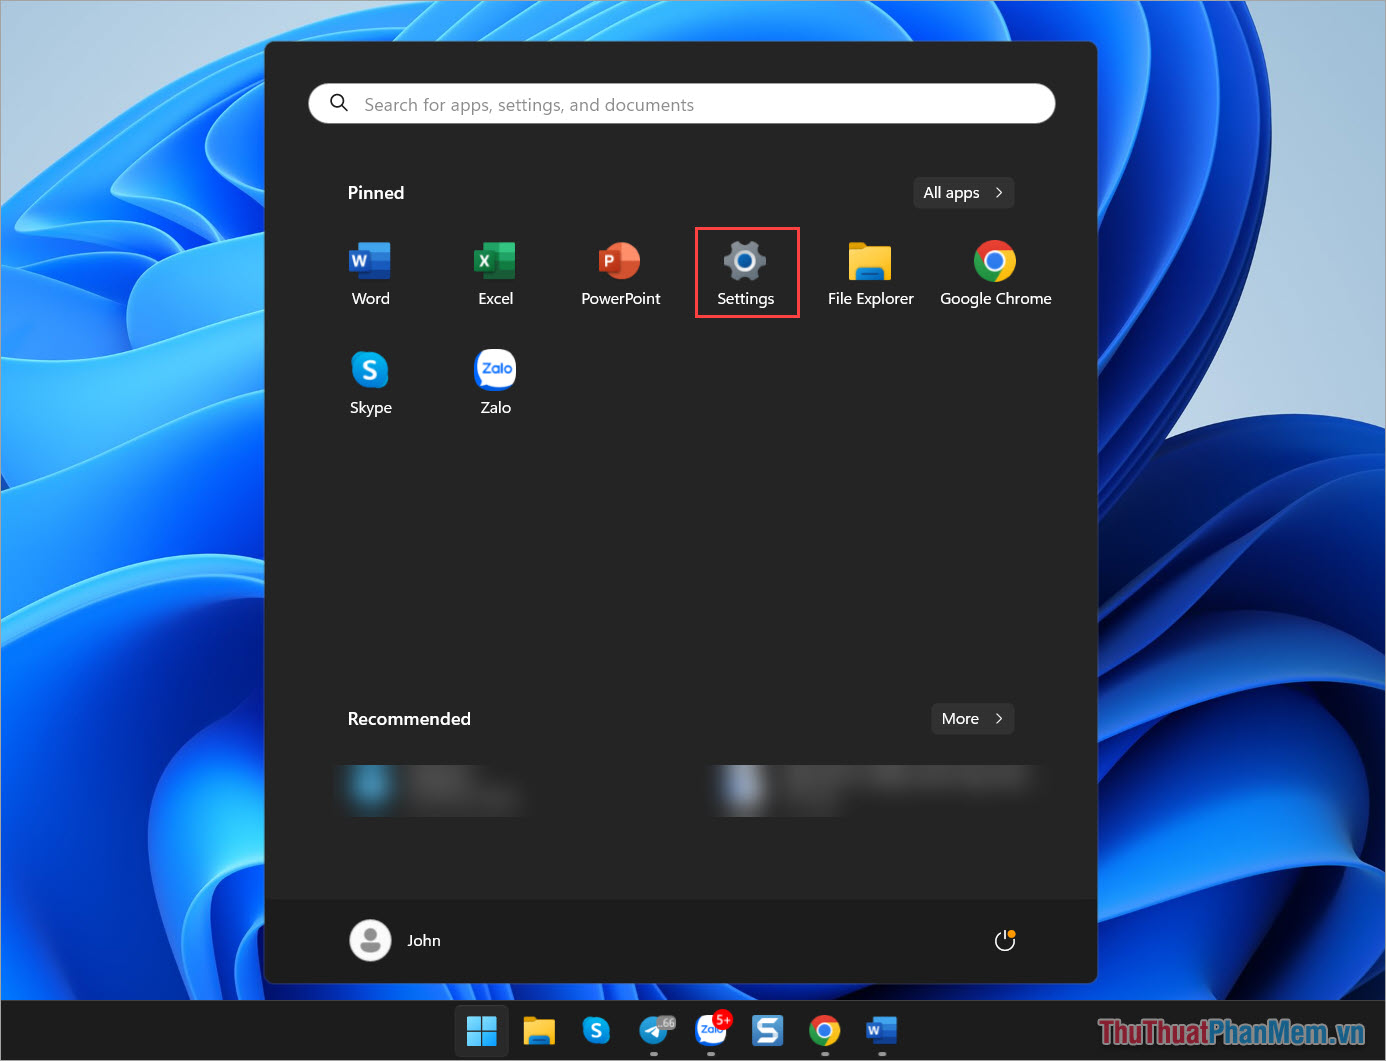
Step 1 : Open Start , select Settings to open settings on Windows (or press Windows + I ) .
Step 2 : In Settings , select Windows Update to set up Windows updates.
Here, you will see the Pause Updates section , select the time you want to pause Windows updates.
- Pause for 1 week : Pause updates for 1 week
- Pause for 2 weeks : Pause updates for 2 weeks
- Pause for 3 weeks : Pause updates for 3 weeks
- Pause for 4 weeks : Pause updates for 4 weeks
- Pause for 5 weeks : Pause updates for 5 weeks

Step 3 : Immediately, you will see the system display the message Updates Paused Until . completed. So you have successfully turned off Windows updates.
When you need to re-enable update mode on Windows 10, 11, select Resume updates .

2. How to completely turn off Windows 10 and 11 updates using Services
Services is a service management tool on Windows 10 and 11 and allows users to quickly turn on and off the automatic Windows update feature. Based on the Services tool, you can completely turn off the update feature permanently so that your computer becomes stable and does not encounter minor errors during the update process.
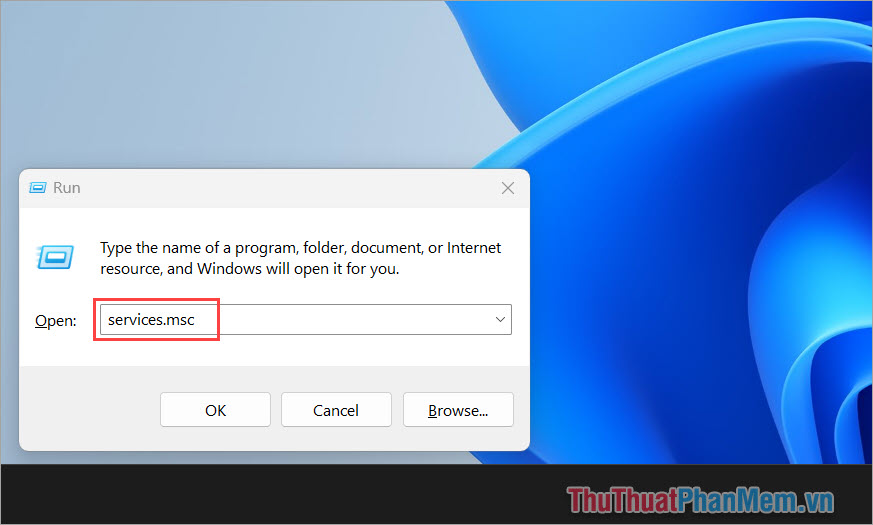
Step 1 : Press Windows + R to open the RUN window and enter Services . msc to open the Windows services panel.
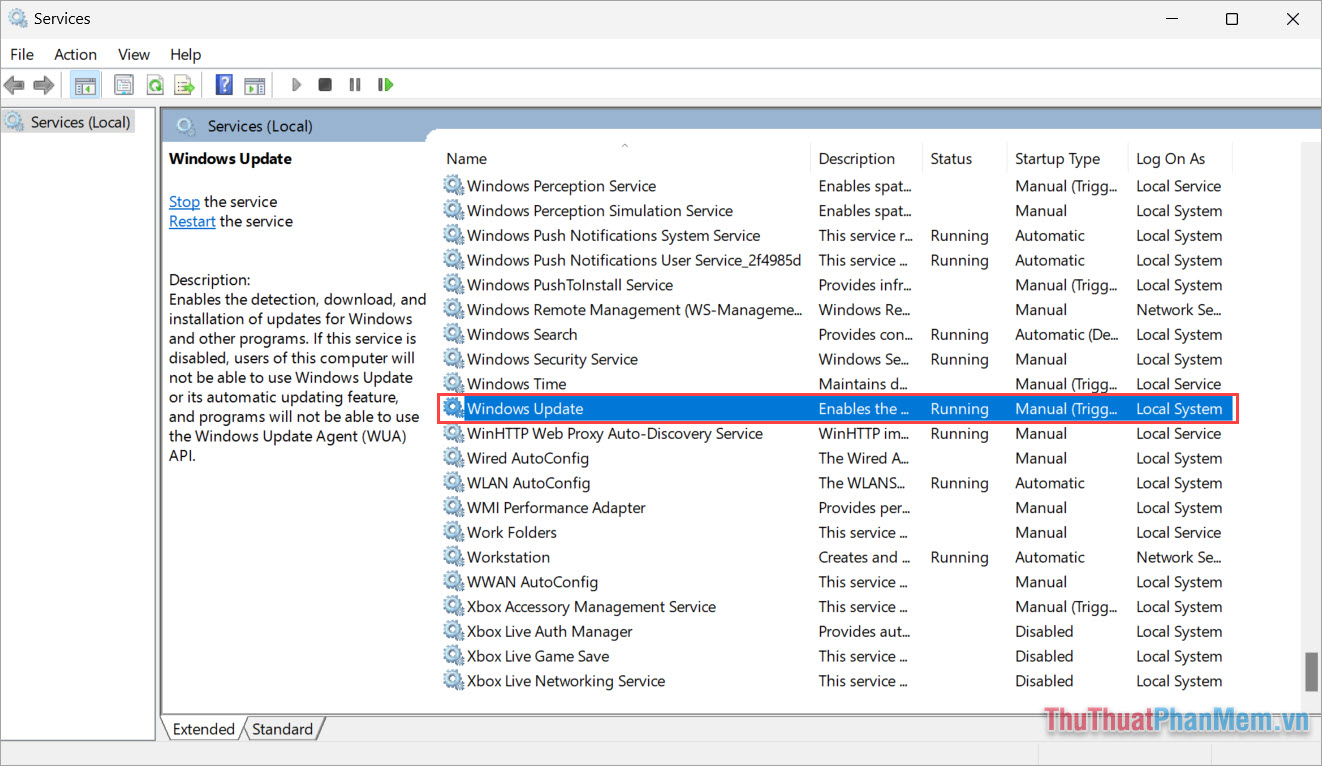
Step 2 : Then, find the Windows Update tab and double-click to open it.
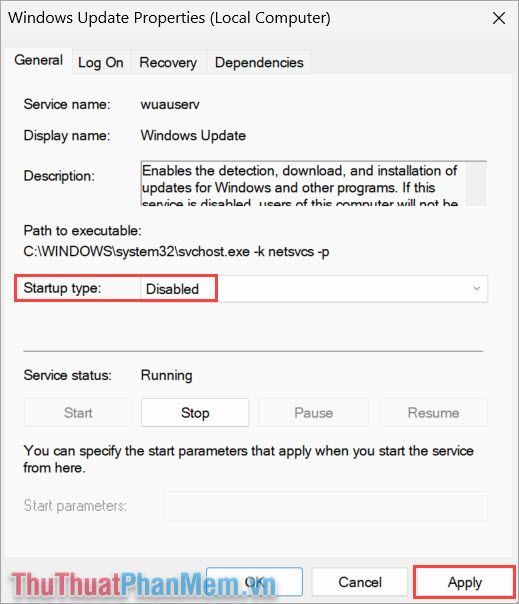
Step 3 : In the Windows Update Properties setting window , switch Startup type to Disabled and select Apply to apply.
So, you have completed permanently turning off Windows 10 and 11 updates on your computer. Later when you want to open the update again, follow the same steps and change the Startup type to Automatic .
3. Turn off Update Windows 10 and 11 completely using Local Group Policy
Local Group Policy allows you to set up everything on Windows 10, 11, including completely turning off Windows 10, 11 updates. To completely turn off updates on Windows 10 and 11, do the following:
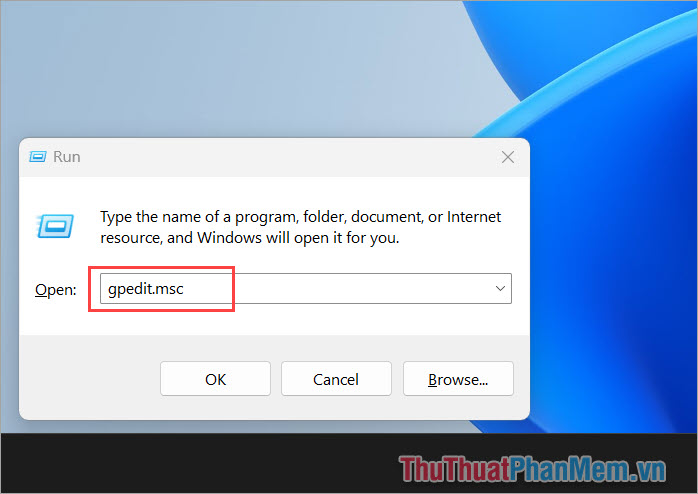
Step 1 : Press Windows + R to open RUN and enter gpedit.msc to open Local Group Policy Editor.
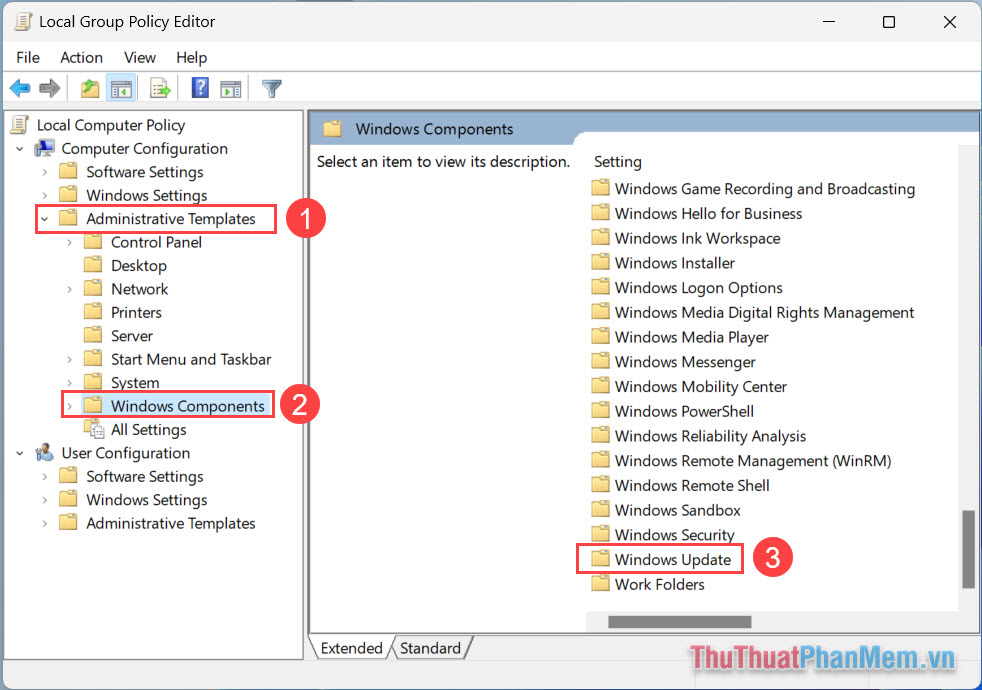
Step 2 : Then, you select Administrative Templates (1) => Windows Components (2) => Windows Update (3) .
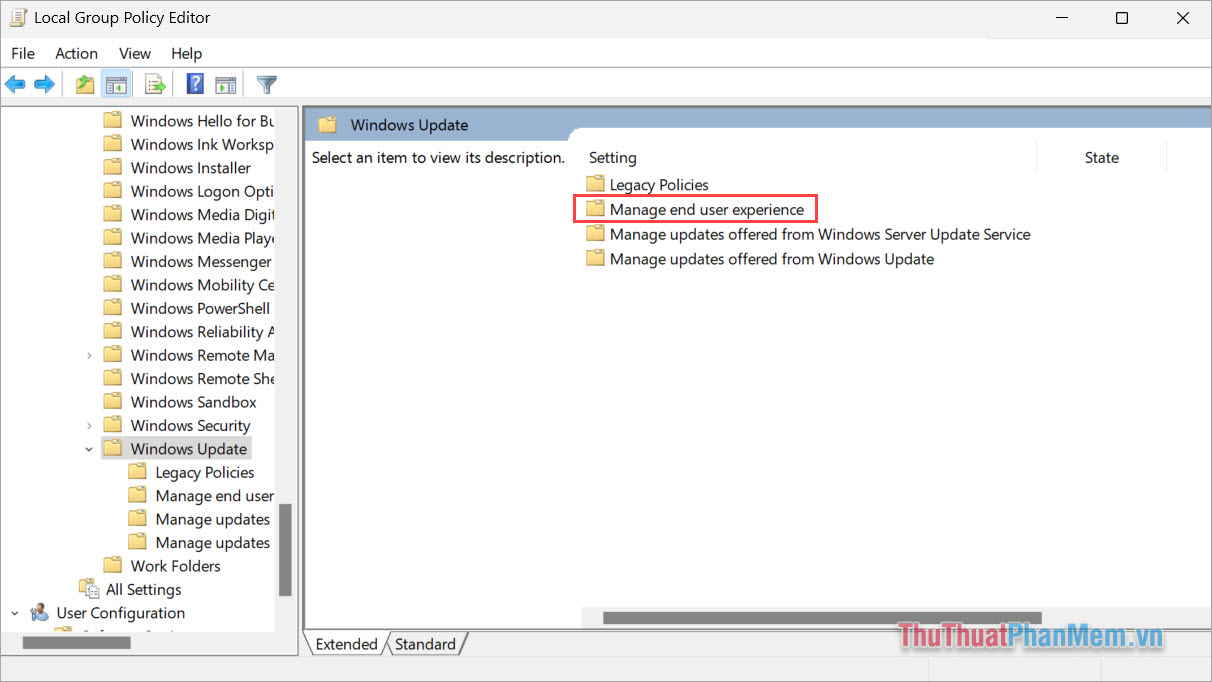
Step 3 : Next, select the Manager end user experience folder to view Windows update settings.
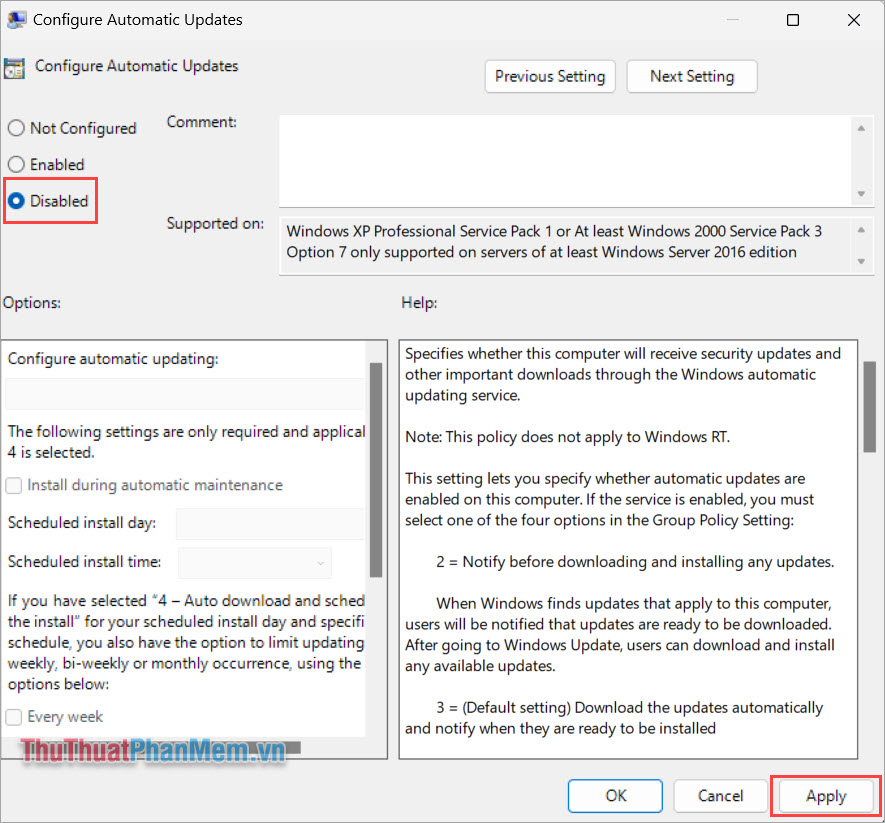
Step 4 : Open the Configure Automatic Updates section to permanently turn off Windows updates.

Step 5 : To permanently turn off Windows 10 and 11 Update, select Disabled and select Apply to apply the changes.
4. How to completely turn off Windows 10 and Windows 11 updates in Regedit
For Windows users, Regedit is a divine tool for interfering with all problems and all features of the operating system. When you need to turn off Windows updates permanently, Regedit is the top choice.
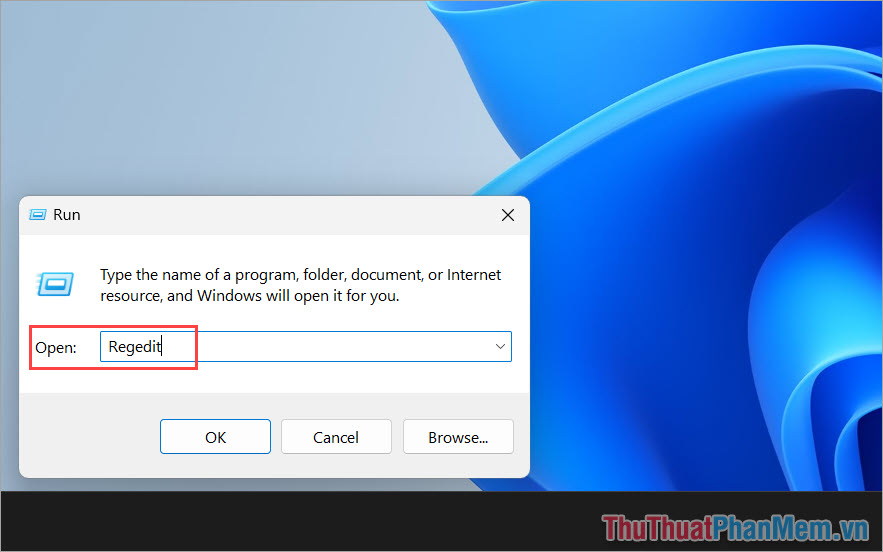
Step 1 : Press Windows + R to open the RUN window and enter Regedit to open Registry Editor.
Step 2 : Then, copy the link below and paste it into the navigation bar to open the AU (Auto Updates) folder. Or you can also open each folder in turn.
| ComputerHKEY_LOCAL_MACHINESOFTWAREPoliciesMicrosoftWindowsWindowsUpdateAU |
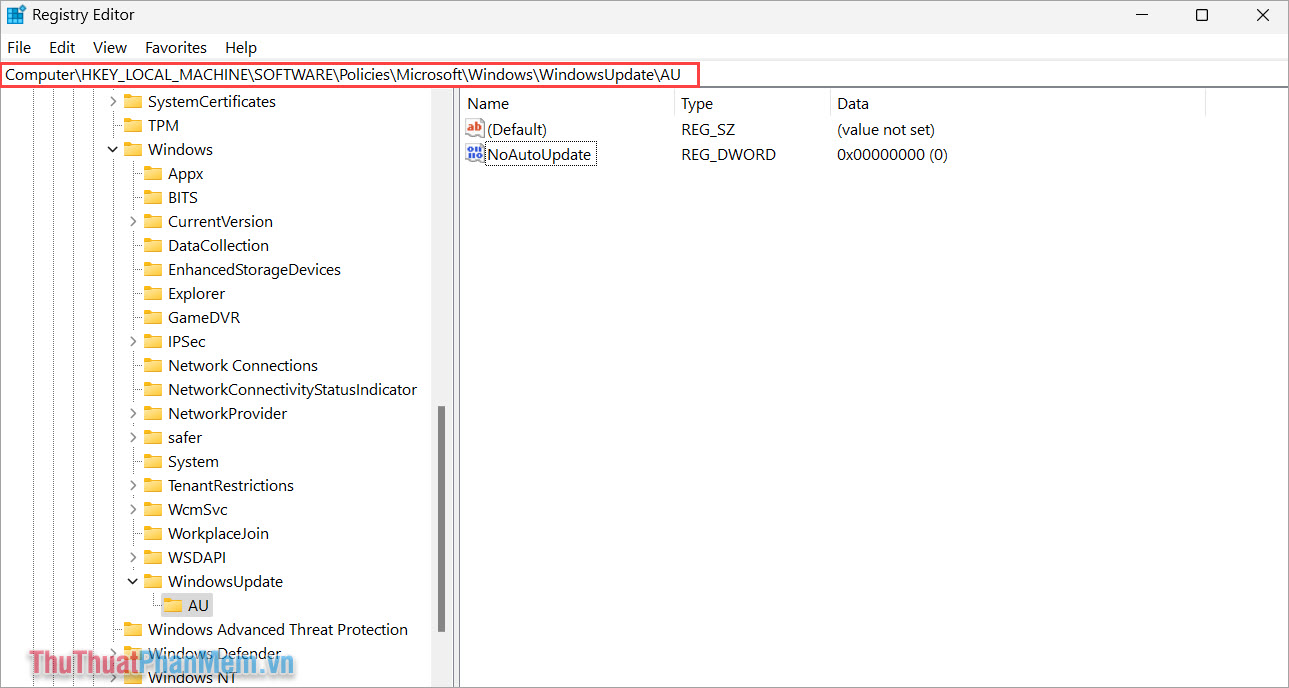
Step 3 : To turn off the self-update feature on Windows 10 and 11, select NoAutoUpdate (1) , set Value Data to 1 (2) and click OK to complete.
So, you have completed turning off updates on Windows 10 and 11 permanently.

5. How to turn off Windows 10 and 11 updates using EaseUS Clean
EaseUS Clean is known as a tool to clean data on your computer and optimize Windows computers. In the EaseUS Clean tool, there is also a feature to turn off Windows 10 and 11 updates effectively and is worth experiencing.
- Download EaseUS Clean
Step 1 : Download EaseUS Clean to your computer and start to install.
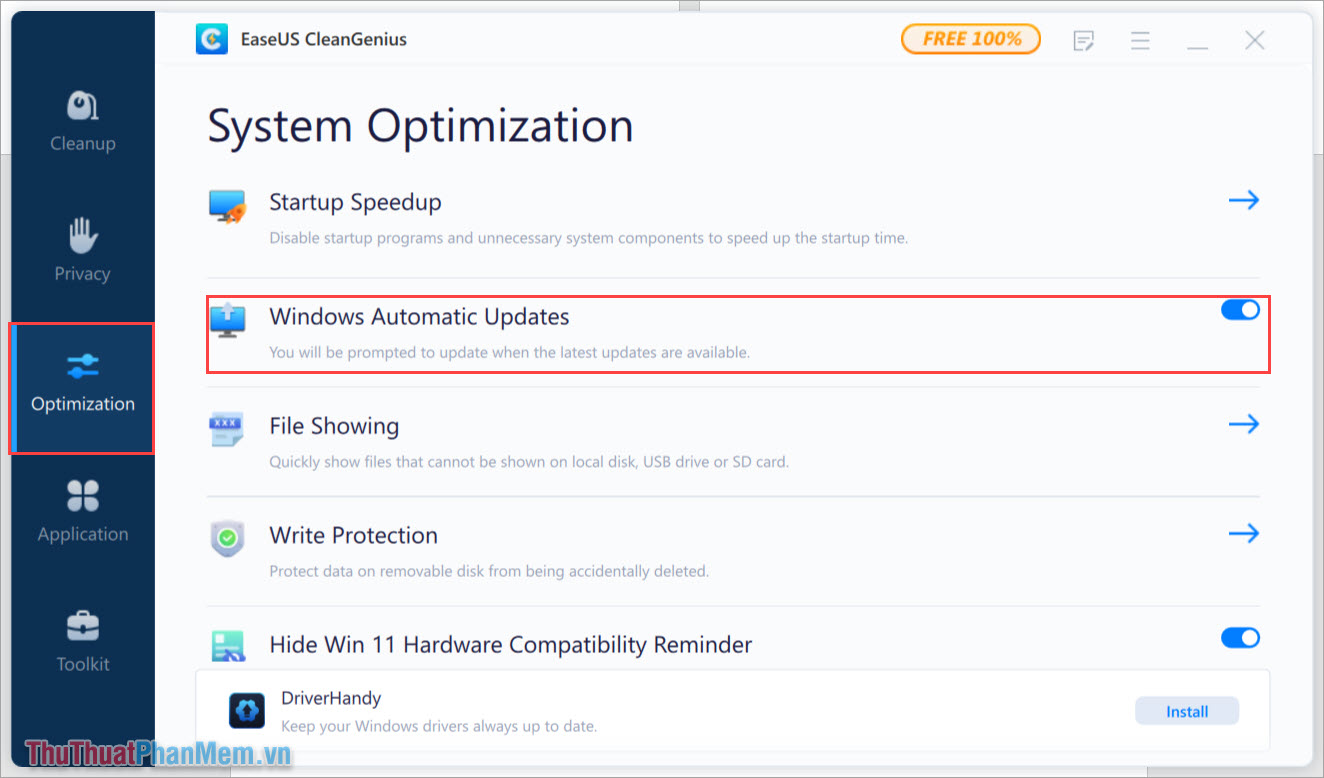
Step 2 : Open EaseUS Clean, select the Optimization tab and turn off Windows Automatic Updates .
In this article, TipsMake has shared with you the fastest and most detailed way to turn off Update Windows 10 and Windows 11. Have a nice day!
 Windows 10 users just received this additional useful feature
 Microsoft announces pricing for Windows 10 extended security updates
 How to change Windows 10 interface to default
 How to turn on Bluetooth on Windows 10, turn on Bluetooth on Windows 8/7
 5 easiest and fastest ways to take screenshots of Windows 10
 What is Computer with Windows 10 in S Mode?