Table of Contents
This guide explains how to rename Data Series in Excel Chart, with clear steps, practical tips, and important checks before you begin.
Instructions for renaming data series in Excel
Step 1:
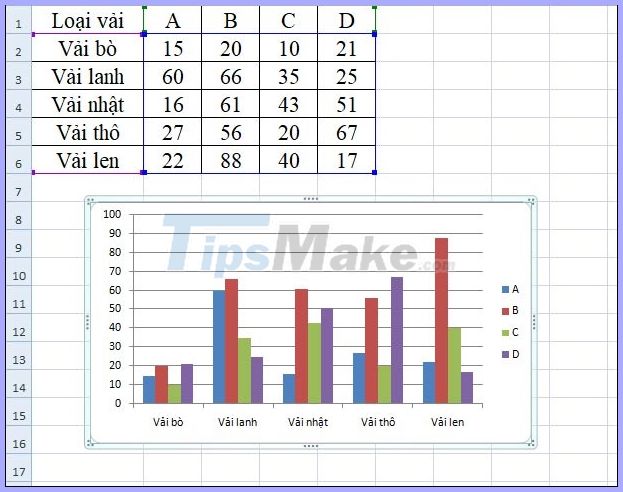
For example, we have the data sheet and the chart from the data table as below. We will rename the data series A, B, C and D in the chart.
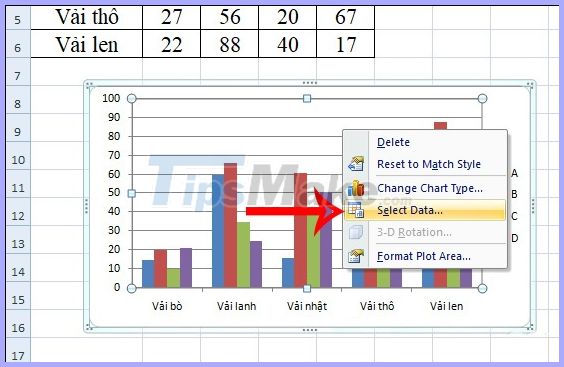
We right click on the chart and select Select Data .
Step 2:
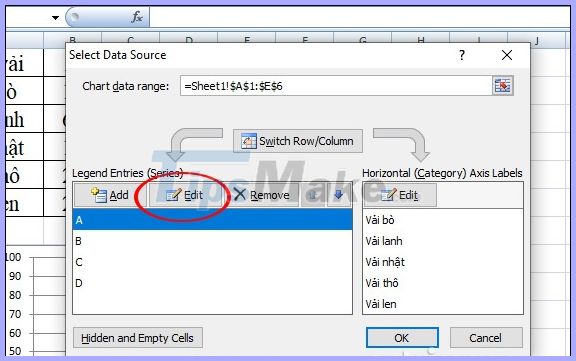
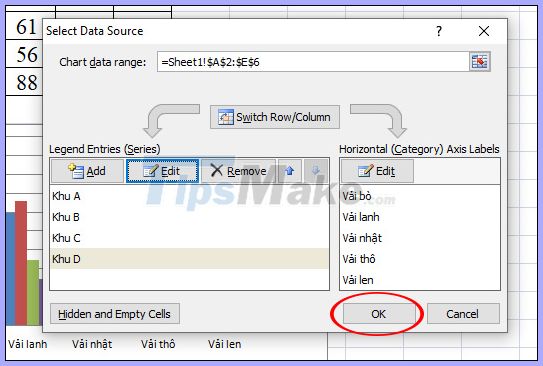
Display the new interface for us to select the data source. You click on the name A and click Edit to proceed to edit.
Step 3:
Now you need to enter a new name for the data column in Series name and then click OK below to rename this data column.
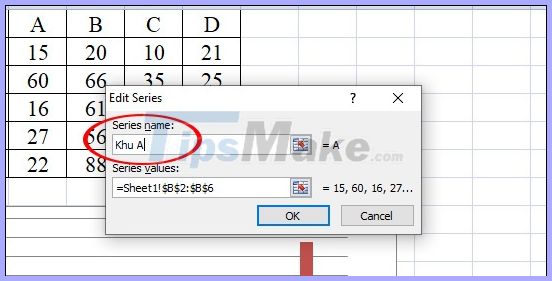
Back in the Select data table, we will see the name of a column of data that has been changed. You continue with the remaining data columns. After renaming the column, click OK below to save the new changes.
The result of the data series in the chart has been changed to another name for easier viewing of the chart.

FAQ
What should I know about Rename Data Series in Excel Chart?
Focus on the key features, requirements, limitations, and practical use cases explained in this guide.
How do I get the best results with Rename Data Series in Excel Chart?
Follow the recommended steps, use current software or information, confirm compatibility, and review settings before major changes.
Are there any risks or limitations?
Potential limitations depend on compatibility, data quality, cost, privacy, support, and how the product or method is used.
Related Articles
 8 Types of Excel Charts and When You Should Use Them9 minutes read
 Steps to Use Pareto Chart in Excel3 minutes read
 Create Excel Charts That Automatically Update Data with These Three4 minutes read
 How to Create a Bar Chart in Excel4 minutes read
 'Moving' Chart in Excel: Value3 minutes read
 How to Make a Pie Chart in Excel4 minutes read
Reader Comments 0
Sign in with email or Google to join the discussion.