Table of Contents
Google Meet can record a meeting to Google Drive, stream it to view-only guests inside an organization, or—in eligible editions—broadcast it publicly to YouTube. These are separate features. Your Workspace edition, administrator settings, meeting role, Drive availability, and organization policy determine which controls appear.
Before you record or stream
- Confirm that your Google Workspace edition includes the feature you need. Consumer accounts do not include every premium Meet feature.
- Ask the administrator to enable recording, internal livestreaming, cross-domain streaming, or YouTube streaming for the correct organizational unit or group.
- Join from a computer with an account and meeting role permitted to start the action.
- Confirm that the meeting organizer's Google Drive is enabled and has storage available for a recording.
- Tell participants what will be captured, who can access it, why it is needed, and how long it will be retained.
- Follow applicable consent, education, employment, privacy, and records-retention rules. Meet's on-screen notification does not replace a legal or organizational consent requirement.
- Do not record confidential, medical, student, customer, or personnel information unless the organizer has an approved basis and secure sharing plan.
Google maintains a current premium Meet feature matrix. Check it rather than relying on an old list of plan names, participant limits, or viewer counts.
Enable recording and livestreaming as an administrator
- Sign in to the Google Admin console with an account that can manage Meet settings.
- Open Apps > Google Workspace > Google Meet > Meet video settings.
- Select the organizational unit or configuration group that should receive the setting.
- Open Recording and enable the option that lets people record meetings.
- Open the livestream setting and enable the appropriate internal, trusted-domain, or YouTube option if the edition supports it.
- Save the change and allow time for it to propagate.
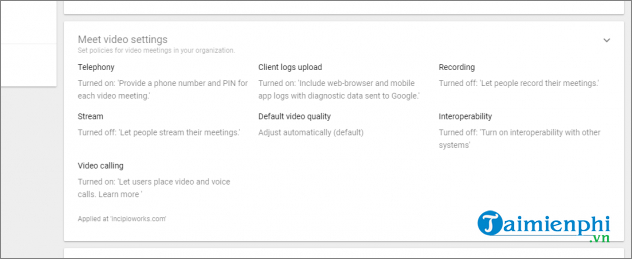
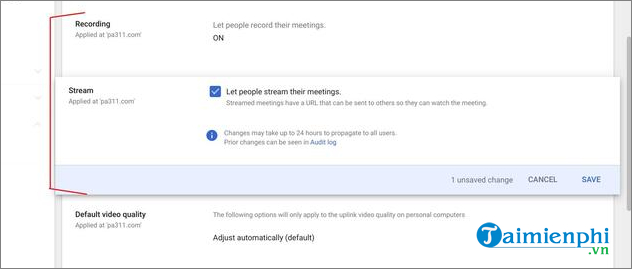
The screenshots above show an older Admin console. Current labels can differ, and a missing section usually means the edition, administrator privilege, organizational unit, or service configuration does not support it.
How to record a Google Meet meeting
- Start or join the meeting from a supported computer browser.
- At the bottom right, select Meeting tools.
- Choose Recording.
- If offered, select the language for recorded captions.
- Select Start recording and confirm.
- Wait for the recording indicator. Participants receive an on-screen notification when recording starts or stops.
The older interface placed recording under the three-dot menu:
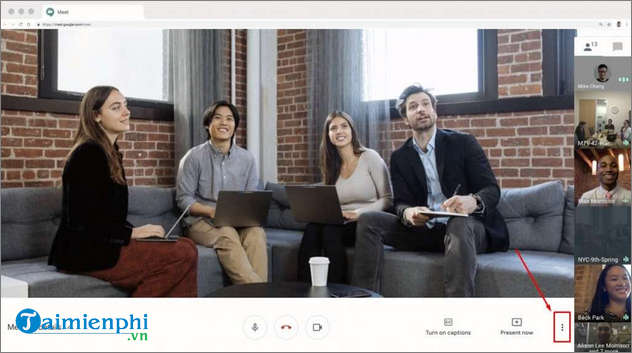
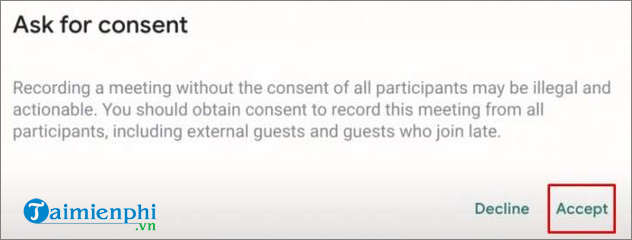
Stop the recording
- Select Meeting tools > Recording.
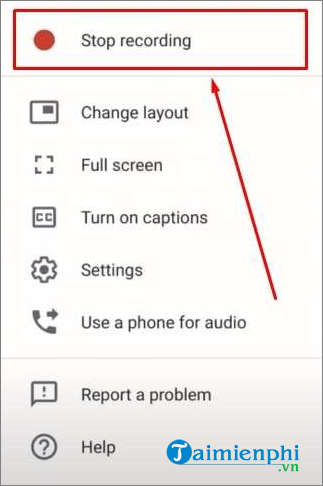
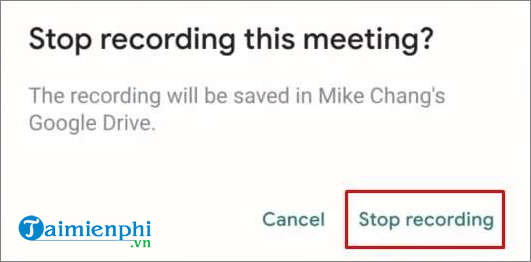
- Choose Stop recording and confirm.
The recording also stops when everyone leaves, and Google limits the total recording duration. Stop it deliberately so the file excludes post-meeting conversation.
Find and share the recording
After processing, Google saves the file in the meeting organizer's Drive under the Google Meet folder. The organizer and the person who started recording receive an email link. For a meeting scheduled in Google Calendar, the recording link can also be attached to the event.
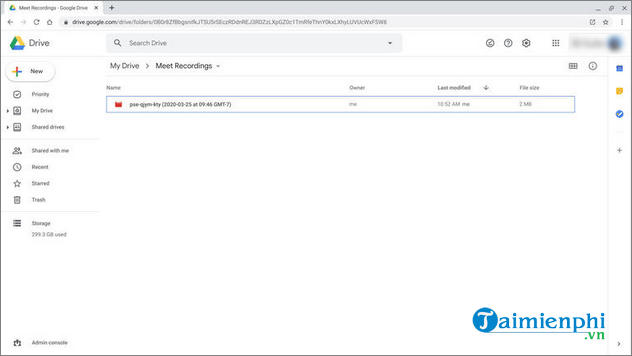
The image above was previously mislabeled as a transcript. A video recording and a Meet transcript are different artifacts. Transcription has its own edition, language, role, and admin requirements and normally creates a text document rather than a video.
Before sharing:
- Open the file once to confirm audio, video, captions, and duration.
- Remove accidental material before wider distribution when policy permits editing.
- Share with specific people or an approved group instead of “Anyone with the link” when the content is sensitive.
- Set an owner and deletion date that match the organization's retention policy.
- Do not move the file to a personal account if it is an organization record.
Google's official recording guide lists current eligibility, roles, file behavior, and troubleshooting.
How to create an internal view-only livestream
An internal Meet livestream lets a larger audience watch without joining as full participants. It is not public by default. Ordinary internal streams are limited to the organizer's organization; an administrator can allow approved trusted Workspace domains when supported. Viewer capacity depends on the Workspace edition.
Create the presenter meeting and stream
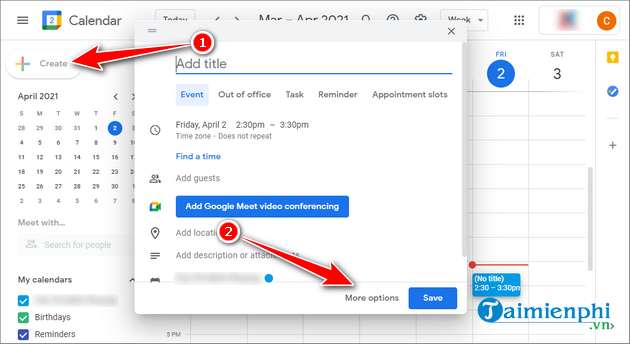
- On a computer, open Google Calendar and create an event.
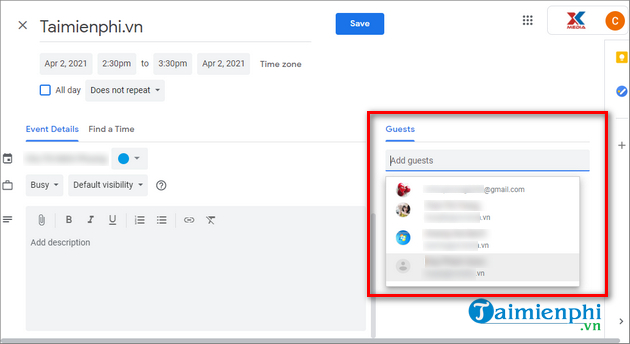
- Add the date, time, description, and people who need full participation.
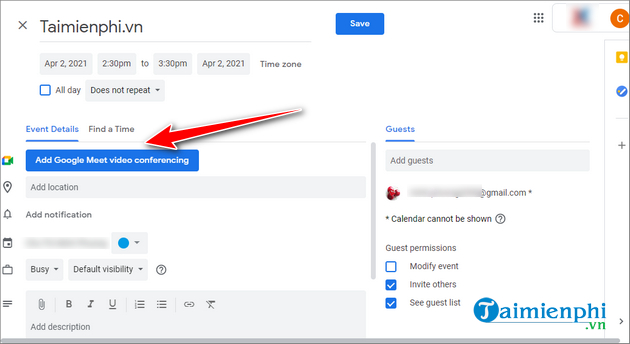
- Add Google Meet video conferencing.
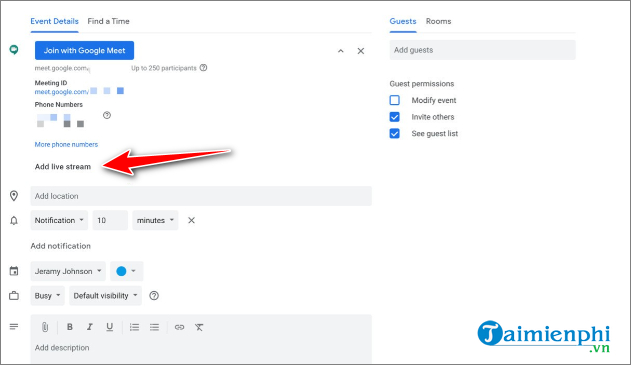
- Next to Join with Google Meet, open the dropdown and choose Add live stream.
- Save and send the event.
Create a separate view-only event
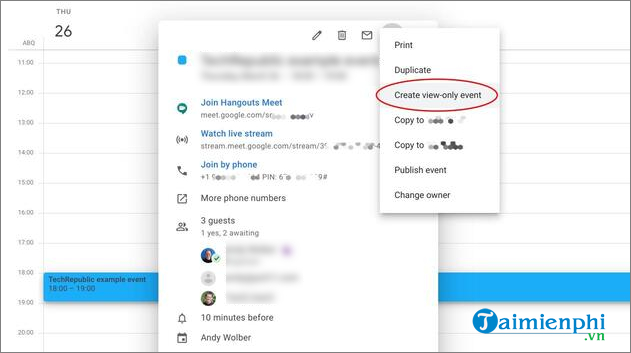
- Open the live-stream event and select Edit.
- Open More actions and choose Create view-only event.
- Add only the viewers and rooms that should receive the view-only invitation.
- Add clear joining instructions, save, and send.
A view-only invitation does not bypass domain access. The viewer still needs to be in the organization or an approved trusted domain, depending on the administrator's configuration.
Start and stop the internal stream
- Join the full-participant meeting from a computer.
- Select Meeting tools > Live streaming > Stream internally.
- Choose the available caption language and select Start streaming.
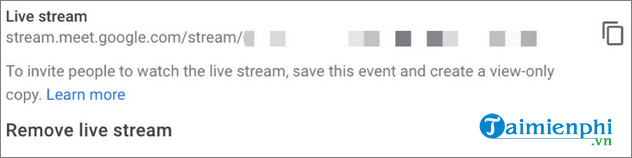
- Copy the streaming link if needed and verify it with a test viewer account.
- When finished, return to Meeting tools > Live streaming and stop the stream.
Adding a livestream to a Calendar event does not start it. A permitted full participant must start it inside Meet. Internal streams have a time limit, and recording does not start automatically; start recording separately if you need an archive.
Google's internal livestream guide explains host controls, chat, Q&A, captions, viewer reports, cross-domain access, and the current limitations.
How to stream a Google Meet meeting to YouTube
Eligible editions can send a Meet meeting to a public, unlisted, or private YouTube event. The YouTube channel must already be approved for live streaming, it must be connected to the meeting account, and the person starting the broadcast must be allowed to use that channel. This action must start from a computer.
- Join the Meet with the email that has access to the intended YouTube channel.
- Select Meeting tools > Live streaming > Stream with YouTube.
- Select the channel and choose an existing event or create a new one.
- Enter the title, choose the privacy level, and select a caption language.
- Review YouTube's terms and select Start streaming.
- Copy the public viewing link and share it with the intended audience.
- Use the same panel to stop streaming when the event ends.
First-time YouTube live approval can take up to 24 hours, so do not enable it on the day of an important event. A Meet-to-YouTube stream can create a replay on the channel; review its privacy and delete it if it should not remain available.
See Google's Meet-to-YouTube guide for the current eligible editions and channel rules.
Troubleshooting missing controls
- No Recording option: check the Workspace edition, admin setting, computer browser, meeting role, Drive service, and breakout-room status.
- No internal livestream option: confirm the edition and admin setting and ensure continuous meeting chat did not make the option unavailable.
- A viewer cannot open the stream: confirm the viewer's domain is permitted and that they received the view-only link rather than the full meeting code.
- No YouTube option: check the edition, admin policy, linked channel, channel live approval, and account used to join Meet.
- File is not in Drive yet: allow processing time, then check the organizer's Google Meet folder and the organizer's email.
- Someone cannot download: review the Drive sharing role and the owner's download, copy, and print restrictions.
- Recording has no desired content: Meet records the meeting output, not every participant's private layout; run a test for presentations, captions, and media playback.
Pre-event checklist
- Use a test Calendar event with presenter and view-only accounts.
- Confirm microphones, camera, presentation audio, and network stability.
- Assign a host, co-host, moderator, recorder, and backup operator.
- Choose internal, trusted-domain, or YouTube access deliberately.
- Prepare a privacy notice and obtain required consent.
- Set chat, Q&A, poll, and caption controls.
- Start recording and livestreaming separately and verify both indicators.
- Document where the recording will be stored and who may share it.
For meeting-platform alternatives, see our Zoom alternatives. If the goal is searchable notes rather than a video archive, compare AI meeting assistants and review their recording, consent, and data-retention terms.
Related Articles
 How to Return or Livestream with Google Meet7 minutes read
 How to Set Up an Online Meeting in Google Hangouts Meet5 minutes read
 Link Download Google Meet: Free Online Meeting Application6 minutes read
 Google Meet Can't Open the Camera? Here Is How to Fix It!6 minutes read
 Compare Google Meet with Zoom: Which Is the Best Online8 minutes read
 How to Share Audio on Google Meet6 minutes read
Reader Comments 0
Sign in with email or Google to join the discussion.