Table of Contents
Windows and macOS can place two or more application windows side by side without extra software. On Windows, use Snap and Snap Layouts. On a current Mac, use window tiling for normal desktop windows or Split View when you want two apps in a dedicated full-screen space.
The fastest shortcuts are Windows key + Left/Right Arrow on Windows and the tiling menu behind the green window button on a Mac.
Split the screen on Windows 10 or Windows 11
Make sure Snap is enabled
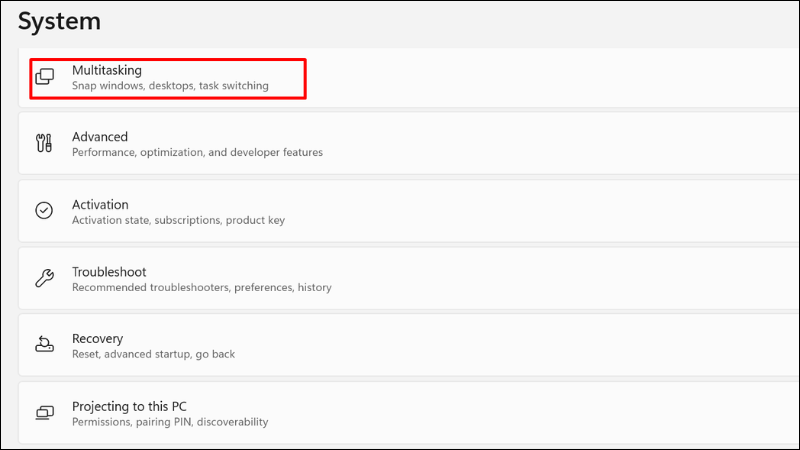
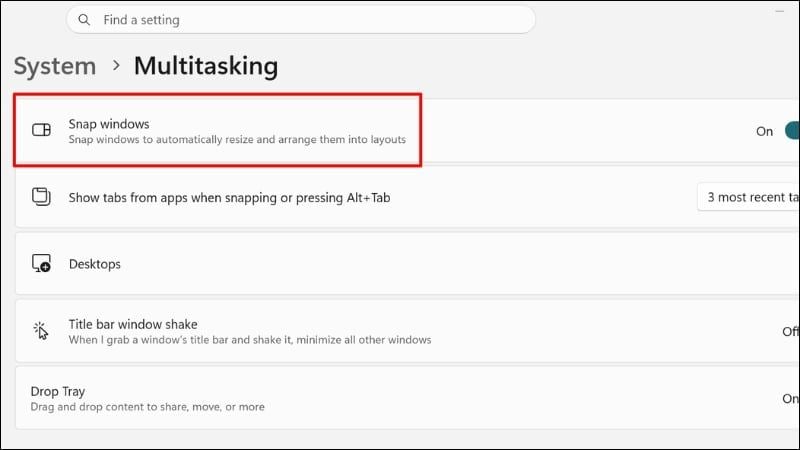
If a window does not resize when you drag it to an edge, open Settings > System > Multitasking and turn on Snap windows. Expand the setting to control Snap Assist suggestions and other behavior.
Drag windows to the edges or corners
- Open the two applications you want to use.
- Drag the first window by its title bar to the left or right edge of the screen.
- Release it when the translucent placement outline appears.
- Choose another open window from Snap Assist to fill the remaining space.
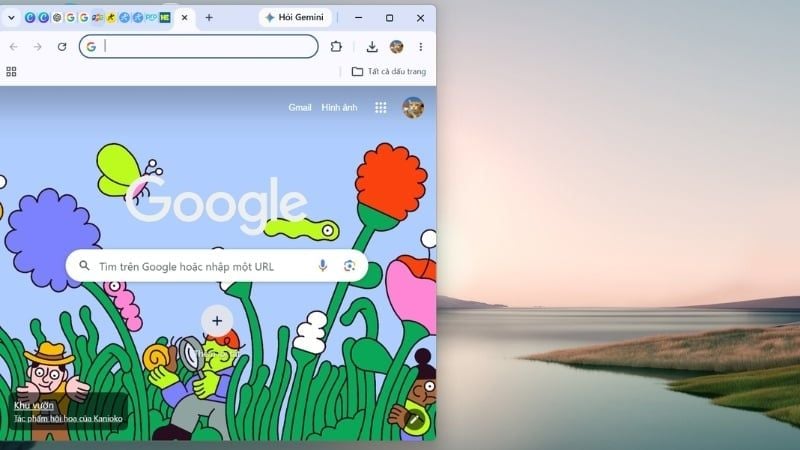
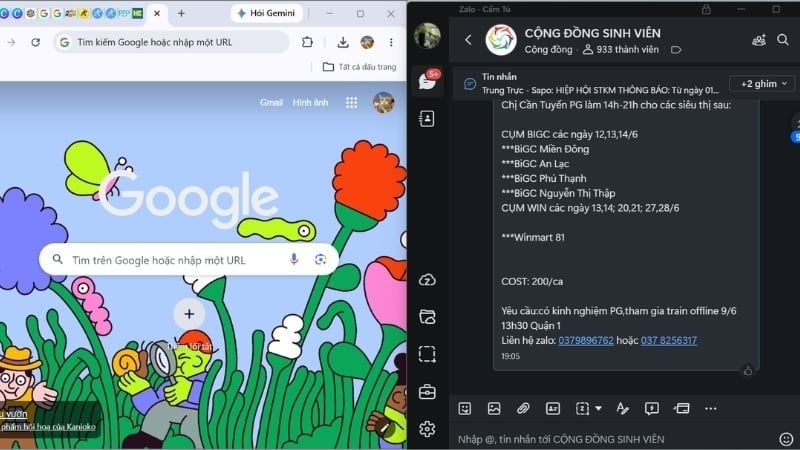
Drag a window to a corner to place it in a quarter of the display. In Windows 11, dragging a window to the top of the screen can also open the Snap Layouts bar.
Use keyboard shortcuts
- Windows key + Left Arrow: snap the active window to the left half.
- Windows key + Right Arrow: snap it to the right half.
- Windows key + Up/Down Arrow: maximize, restore, minimize, or move a snapped window into a corner, depending on its current position.
- Windows key + Z: open Snap Layouts in Windows 11.
- Windows key + Shift + Left/Right Arrow: move the active window to another monitor.
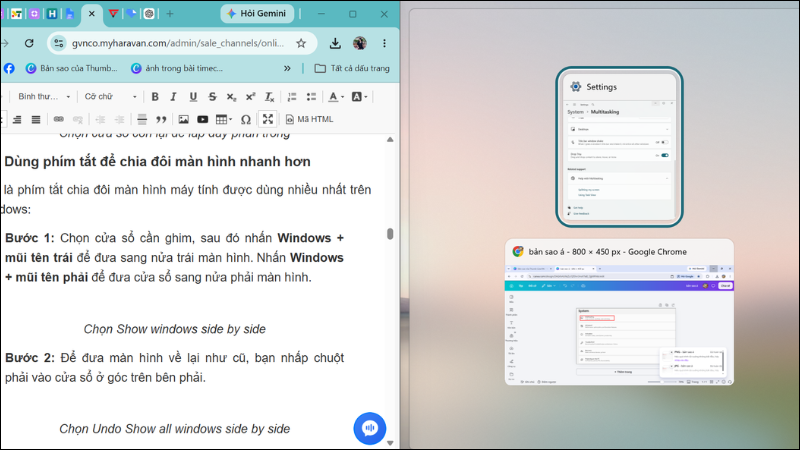
To return a snapped window to a normal size, drag its title bar away from the edge or select the Restore button beside Close.
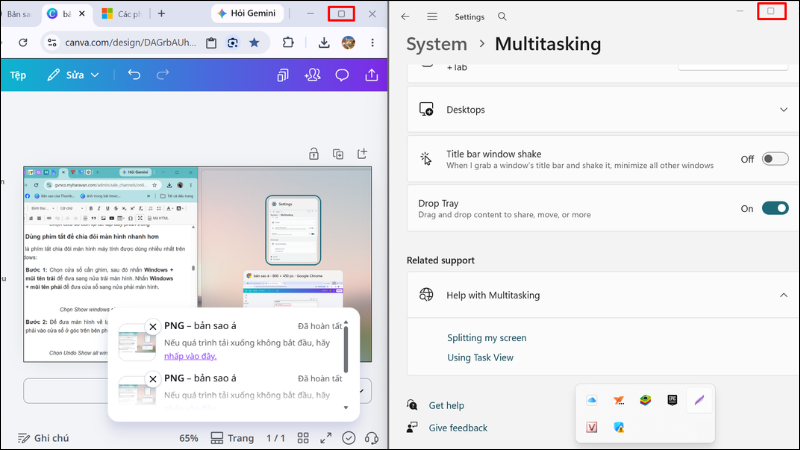
Microsoft’s current Snap guide covers mouse, keyboard, and layout methods. Windows 10 supports edge and corner snapping, while Windows 11 adds the more visible Snap Layouts chooser. TipsMake’s Windows 10 and Windows 11 comparison explains that interface difference.
Arrange three or four windows in Windows 11
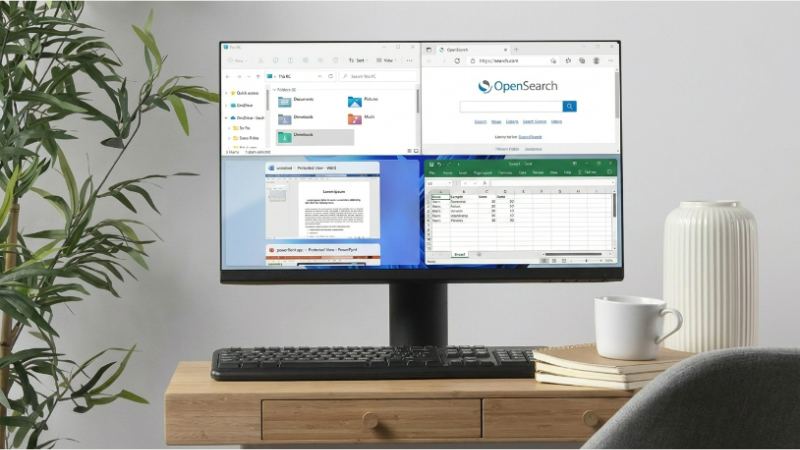
Press Windows key + Z or hover over a window’s Maximize button. Select a layout, choose the region for the active window, and fill the remaining regions from the suggested open apps. The layouts offered depend on the screen size, scaling, and orientation.
For a simple four-window grid, you can also drag each window to a different corner or combine Windows key + Left/Right with Windows key + Up/Down.
Windows 10 taskbar arrangement
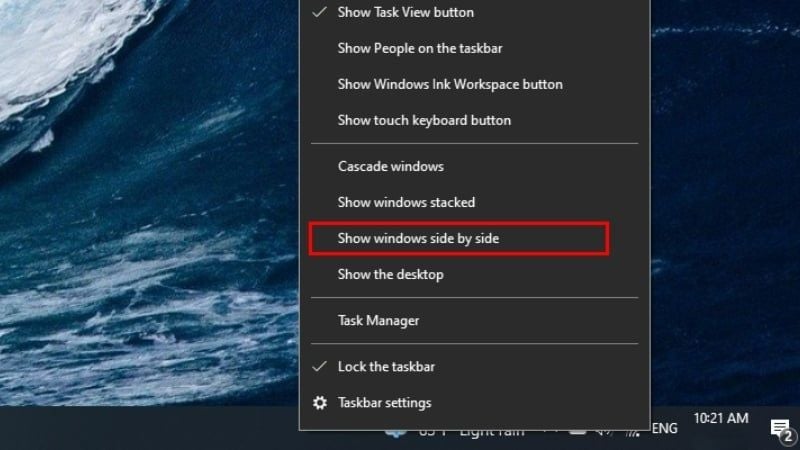
Windows 10 may show Show windows side by side when you right-click an empty area of the taskbar. This arranges multiple non-minimized windows automatically. The command is a Windows 10-era option and may not appear on the Windows 11 taskbar; use Snap Layouts instead.
After the windows are arranged, drag the border between them to give one app more space.
Split the screen on a Mac
Tile normal desktop windows
Current macOS versions can tile windows while keeping the menu bar and desktop available:
- Hold the pointer over the green button in the upper-left corner of a window.
- Choose a placement from the tiling icons, or open Window > Move & Resize from the menu bar.
- Select another window for the remaining area when prompted.
You can also hold Option while dragging a window toward an edge or corner, then release it when the target area is highlighted. Apple documents the available icons and shortcuts in its Mac window tiling guide.
Use Split View for a full-screen workspace
Split View places two apps in their own full-screen space:
- Open both app windows.
- Hold the pointer over the first window’s green button.
- Choose Full Screen > Left of Screen or Right of Screen.
- Select the second window on the other side.
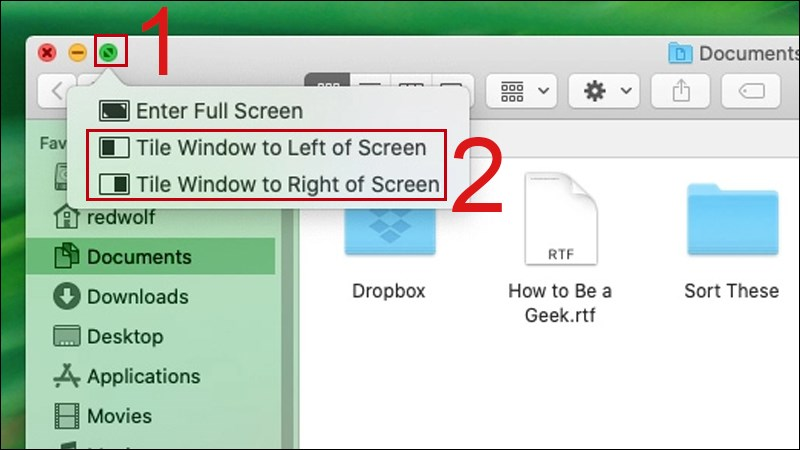

Move the divider to resize the two sides. To replace one app, use its green-button menu and select Replace Tiled Window. To leave Split View, use the same menu to move a window back to the desktop or make it full screen.
Apple’s Split View instructions explain these controls. TipsMake also compares macOS window tiling with Windows 11 Snap Layouts.
Use Mission Control and Spaces
Mission Control shows every open window and desktop space; it does not automatically resize arbitrary desktop windows. Open it with the Mission Control key (often F3), Control + Up Arrow, or a three- or four-finger upward swipe, depending on Trackpad settings.
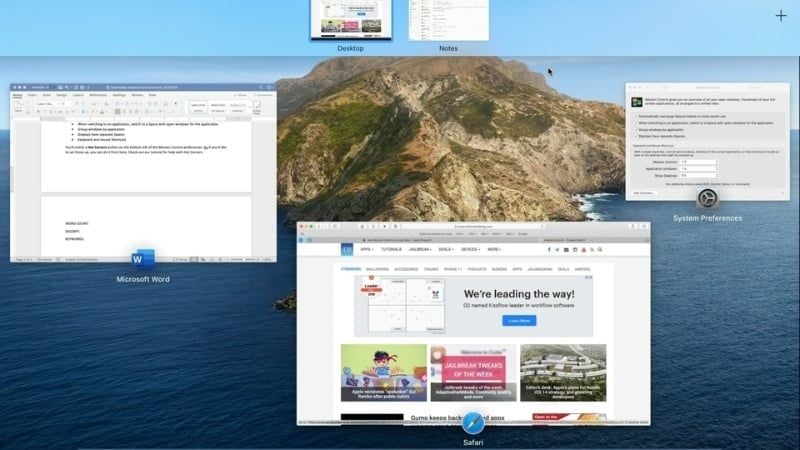
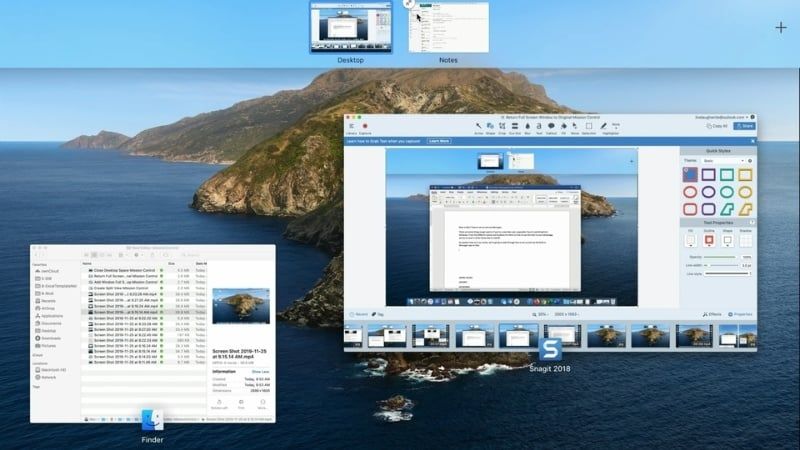
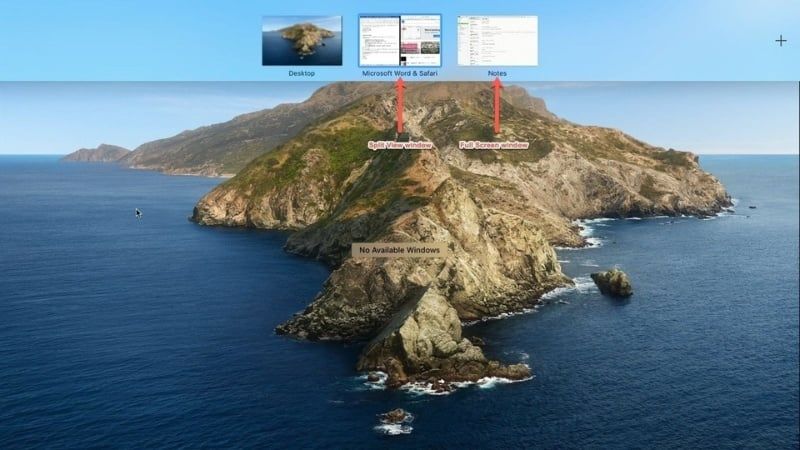
Use Mission Control to switch spaces, move windows between desktops, or create Split View by dragging a compatible window onto a full-screen app’s thumbnail in the Spaces bar. For ordinary side-by-side desktop windows, use window tiling instead.
If snapping or tiling does not work
- Windows: confirm Snap windows is enabled and the app is not using exclusive full-screen mode.
- Windows 11: if Windows key + Z does nothing, install pending Windows updates and test with a standard app such as File Explorer.
- Mac: some apps have a fixed minimum size or do not support Split View; try normal tiling instead.
- Mac gesture: check System Settings > Trackpad > More Gestures because Mission Control may use three or four fingers.
- Either system: reduce display scaling or close sidebars when windows cannot become narrow enough for the selected layout.
Use the screen space effectively
- Give the larger region to the active task and the smaller region to reference material, chat, or notes.
- Use two windows on a 13-inch display unless both apps remain readable at a smaller size.
- Hide unnecessary toolbars and side panels before adding more windows.
- Use virtual desktops or Mac Spaces to separate projects instead of stacking many tiny windows on one screen.
- On multiple monitors, place communication tools on one display and focused work on the other.
- For custom Windows grids, Microsoft PowerToys includes FancyZones; TipsMake covers it among useful Microsoft apps.

A practical layout should reduce switching without making text, controls, or captions difficult to read. When four windows feel cramped, two well-sized windows plus a second virtual desktop is usually the better arrangement.
Related Articles
 How to Split Screen on macOS: Step-by-Step Guide3 minutes read
 How to Use Split Screen on Mac with Split View10 minutes read
 How to Split the Screen on a Windows 11 Laptop7 minutes read
 How to Split Laptop Screen in Half on Windows 7, 10, Super Easy!9 minutes read
 How to Split Screen on Windows 105 minutes read
 How to Split Screen PC: How to Split a Computer Screen3 minutes read
Reader Comments 0
Sign in with email or Google to join the discussion.