How to easily split the screen on a Windows or Macbook computer.
This guide shows you how to split your Windows computer screen using Multitasking mode, the mouse, the Taskbar, keyboard shortcuts, etc. It also explains how to easily split your Macbook screen..
One of the benefits of owning a large computer monitor is that you can split the screen into multiple windows side-by-side, up to 4 windows. Splitting the screen in Windows 10 will help you work and access information between windows more easily, also known as multitasking. So how do you split your computer screen? Please follow the instructions below!
Benefits of splitting your computer screen
Splitting your PC screen is an incredibly useful tool that significantly increases productivity. You'll be surprised by the amazing benefits of using this split-screen feature:
- Thanks to this tool, users can increase their productivity and switch between applications without wasting too much time. This helps you compare information, perform multiple tasks simultaneously, and save considerable time.
- Splitting your computer screen in Windows 10 or 11 allows you to focus on a specific task while still monitoring related information.
- If users frequently work with multiple applications simultaneously, split-screen mode is a perfect solution. You can draft a document while simultaneously accessing data from a spreadsheet or web browser.
- Splitting the screen in Windows 11 is suitable for a wide range of users, from office workers to graphic designers and programmers.
- It helps maximize device space, display more information, and create a professional and organized workspace.
In short, splitting your computer screen is a simple feature but offers incredibly practical benefits. Take some time to experience this new feature and feel the difference!
Splitting your computer screen is an incredibly convenient feature.
How to split the screen on a Windows 10 or Windows 7 computer.
Split your computer screen in half using Multitasking mode.
To be able to perform the following actions, you should first enable Multitasking on Windows 10. Here's how:
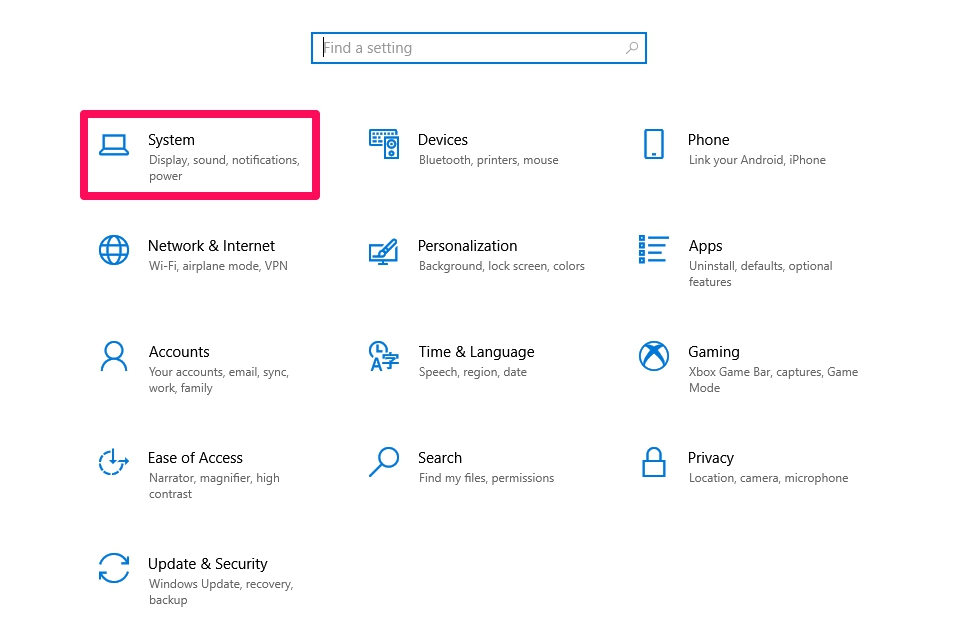
Step 1: Press the Windows + I key combination to access Settings. Select System .
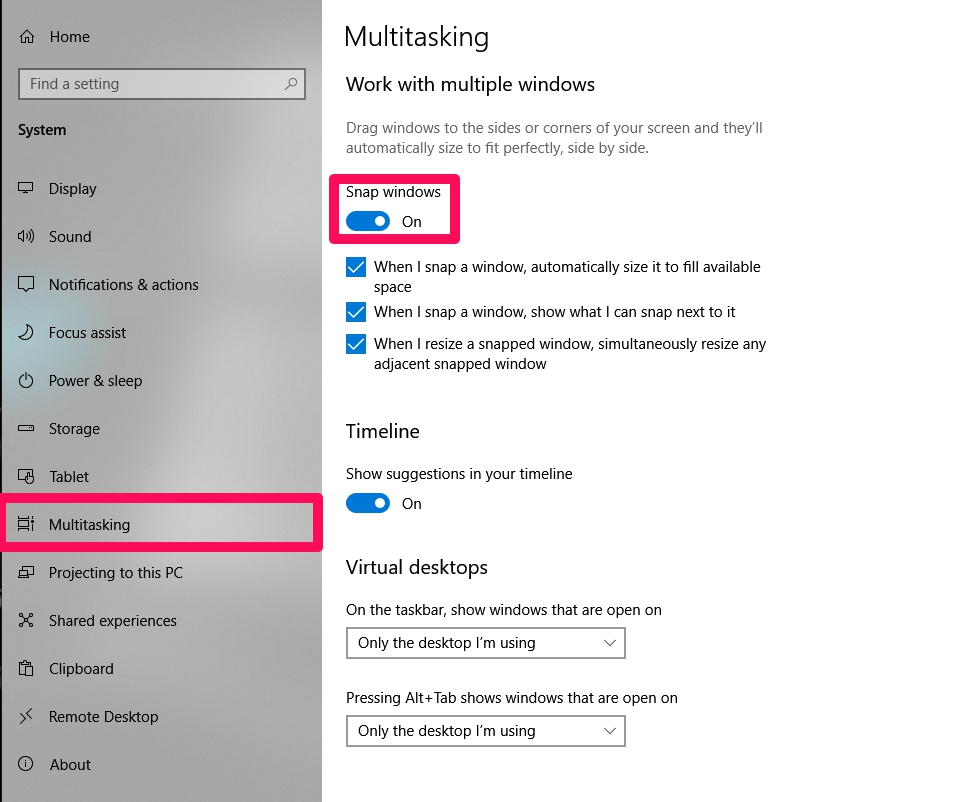
Step 2: Select Multitasking. Under Work with multiple windows , turn on Snap windows . The split-screen feature is now enabled. Follow the steps below.
When choosing a laptop , you should consider many factors to ensure that the device suits your needs. From performance and screen size to weight and battery life, each factor is important in making a purchase decision. Below are some modern laptop models with many advanced technological features and reasonable prices that you can consider:
Split your computer screen using the mouse.
Step 1: Drag the window you want to minimize to the left or right edge of the screen until you see a half-screen border, then release the mouse .
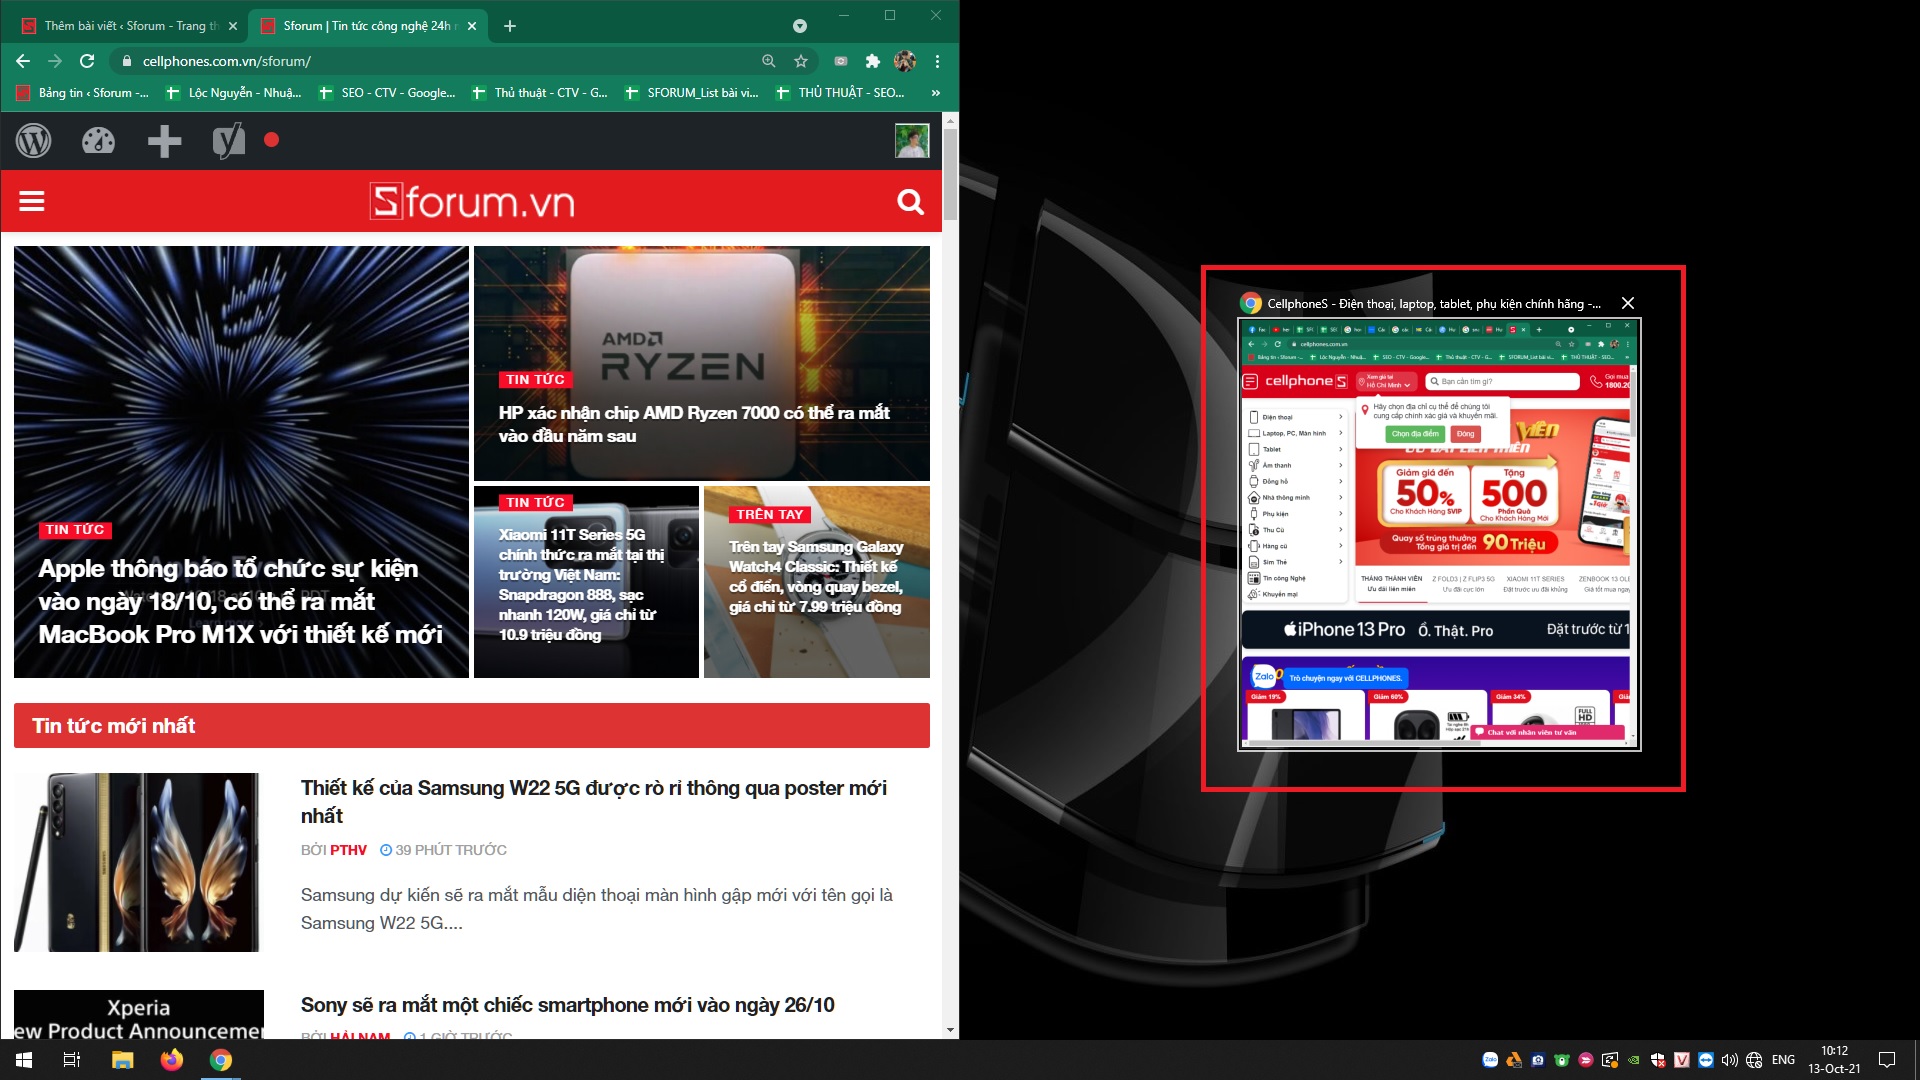
Step 2: The screen will display the remaining windows; select the window you want to fill the remaining half of the screen, and you're done.
Use the Taskbar
Step 1: To do this, right-click on the Taskbar and select " Show windows side by side" . Your computer will then automatically split the screen depending on the number of applications and windows you have open.
Step 2: If you want to revert the screen to its original state, right-click on the Taskbar again and select Undo Show windows side by side .
Use Windows keyboard shortcuts to split your computer screen.
You can also split your computer or laptop screen using the following keyboard shortcuts:
Step 1: Click on the window you want to split the screen in half.
Step 2: Press the following key combination:
- Windows + left/right arrow: Splits the computer screen vertically.
- Windows + up/down arrow: Splits the screen horizontally.
Step 3: After moving the window, release the Windows key. The remaining windows will appear on the screen. Select the window you want to fill the remaining half of the screen, and you're done.
Split into multiple screens
If you own a computer or laptop with a high resolution (2K, 4K), you can use the extremely attractive Corner Snap feature.
To do this, simply drag each window to a different corner of the screen, and the computer will automatically adjust and split it into four equal windows for you.
How to easily split the screen on a MacBook.
The following guide on how to split your Macbook screen will help you increase your productivity, check it out now!
Step 1: Prepare the application windows before proceeding with split-screen mode.
Step 2: Click the green button in the upper left corner of the window as shown in the image. You will see two options: align the window to the left/right of the screen. At this point, users simply need to adjust the window position to their liking to start working more efficiently.
Step 3: Immediately, the Macbook screen will be intelligently split in half, with each side containing an application. You can completely customize the size of each section by dragging the divider bar in the middle of the screen.
The above article provides instructions on how to split your computer screen with extremely simple steps. Hopefully, this information is useful, and we wish you success!