How to Publish WEB Server, FTP Server and VPN Server via ADSL?
The current speed of internet access has not yet met the user's 'desire', for example, when watching football matches over the image network is still a bit 'jerky'. But compared to before, when there is no ADSL broadband system, it is possible to see the current speed of access has a long step forward.
In this article we talk about another problem, a lot of people are interested in how to allow users outside the Internet to connect to servers on the local network such as WEB, FTP, VPN . To access information on File / Mail Server or manage your company's system of Domain Controler / DNS / DHCP Server servers.
To do this, you must first build Web servers or Vpn servers on your local network or at home first (in this article we do not discuss this aspect), the remaining problem is Publish these servers to the Internet via ADSL modem with dynamic IP address .
First, install the necessary services on your local network such as Web, FTP or VPN Server. In this tutorial we will not discuss building these services and see if you have set up these web / ftp services for your system. The remaining problem is how to allow Internet Users to access these servers via ADSL modem of your company / home from outside the Internet.
Test Network Model: Security365.Org Office LAN

Security365's test network system.Org has a LAN IP layer of 192.168.1.x / 24, using ADSL Router Prestige H650 E Series.ISP ISP SaiGonPostel with Web servers 192.168.1.3, Ftp 192.168.1.4 and VPN, PDC, DNS, DHCP have IP of 192.168.1.5
As we know, computers on a company's internal network or private homes are usually set up with separate address ranges (Private), which are not allocated to organizations, including IP belongs to the following sequence:
Class A: 10.0.0.0 - 10.255.255.255
Class B: 172.16.0.0 - 172.31.255.255
Class C: 192.168.0.0 - 192.168.255.255
In addition, there are other purpose-reserved address ranges such as loopback address 127.0.0.1, Apipa address range allocated to DHCP Client in case of failure to receive IP, you can refer to Add these dedicated addresses at http://www.duxcw.com/faq/network/privip.htm or RFC1918.
So in Security365.Org network (Secure Solution) also takes the C class address as follows: 192.168.1.0/24 (the machines will only be 192.168.1.x and sunnet mask 255.255.255), with This structure we will have a maximum of 254 hosts in the same network layer. Secure Solution company has an ADSL line of SPT used to connect to the Internet, and every time the company connects to the internet through its ISP service (is SPT, or Viettel, VDC .) will be issued an address. IP (real IP) for example 221.121.34.66, this is the address that other computers on the network can 'see' (ie, can initiate connections). This address is also a gateway for computers on the network to access outside the internet, so that external computers can access a local machine that has your 192.168.1.x address. This means that whether you want to access the computer with IP 192.168.1.3 (web) or 192.168.1.4 (ftp), the internet users only need to connect to IP 221.121.34.66, and depending on the protocol That internet user uses the requests that will be driven to the appropriate machines. For example, with the request http://221.121.34.66 , the request will be forwarded to the Web Server and when the request is ftp://221.121.34.66 , the request will be forwarded to 192.168.1.4 as the ftp server. And for your Modem / Router ADSL to understand the requirements and transfer to the appropriate computers on the local network, you need to perform NAT on the modem / ADSL router and of course you must have a 'child'. ADSL modems are good enough to meet these requirements.
Back to the main issue, you refer to the test network model of Security365.Org Office LAN above, we will conduct NAT Web Server 192.168.1.3 and FTP Server 192.168.1.4 and other servers such as VPN and PDC (Domain Controller) is for you in answering questions.
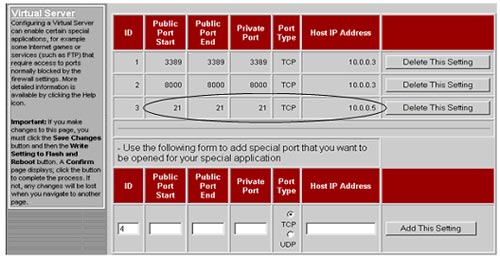
First, we installed Web / Ftp Server services on two computers 192.168.1.3 and 192.168.1.4 (refer to building Web / Ftp Server in Elearning) and then proceed with NAT on ADSL router of me There are many different ADSL modems / routers, but the way to implement NAT is not much different, you just need to look at the NAT section of the modem's instructions to know how to use it immediately. For example, if you want NAT / Public FTP Server 10.0.0.5 on the Zoom X 5 modem, configure it as follows:
In the test network model of Security365.Org Office LAN we use ADSL Router Prestige 650 H - E Series so it is slightly different. To configure NAT for Web and FTp server, open the web browser and connect to the modem's LAN address in this case it will be 192.168.1.1, after logging in, select Advance Setup and select NAT.
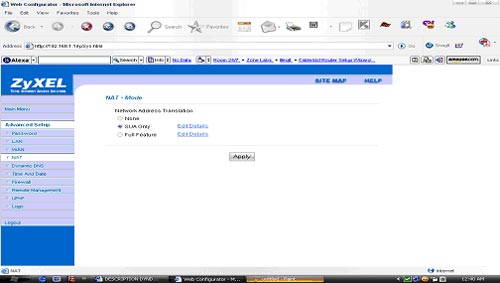
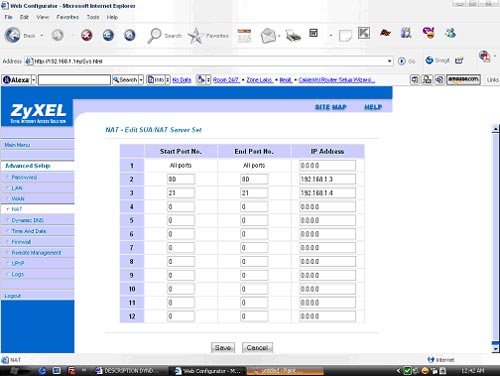
Next select SUA Only and click Edit Details then enter the corresponding information including port number of the service is 80 (web), 21 (ftp) and the corresponding addresses. In case of opening multiple ports on the server, you can enter the corresponding Start Port and End Port, and if you only open the port for a service like ftp, the start port and end port will overlap 21.
So we have configured the services and NAT / Public them through our modem. The next thing is how to provide a certain identifier so that Internet User can connect to. Because we know that external IP addresses of ADSL will often change (most subscribers follow this form), if you want to have a fixed IP, you have to pay a certain additional fee. Therefore users cannot use IP to connect to our servers. Fortunately, there are many Dynamic DNS services (Dynamic DNS gives us great solutions to this problem). You can use no-ip, but the best is dyndns.org because the modems usually integrate the update module for the records created by DynDNS, or the firewall open source software also provides the update mechanism. Similar to this service, typically IPCOP Firewall (please refer to the article on how to set up IPCop firewall on PCWorld of the nttv instructor).
Below is an update of host onlineanytime.dyndns.org information to the Service Provider WWW.DynDNS.ORG , account security365 (email: giaiphapantoan@gmail.com )
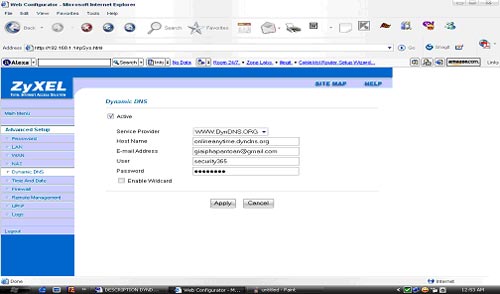
In the next section, we will guide in detail how to configure DYNDNS and update your IP information, in this section we guide quite meticulously so for some you have experience of the system will slightly 'annoyed'. However, this is a very important operation in network governance so we realize that there is a need for clear guidance (step-by-step).
Step 1: Open the dyndns.org website and select SignUp Now
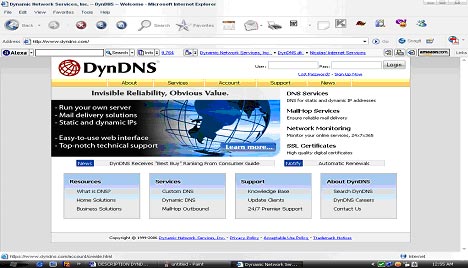
Step 2: Check the box I have read and agree to the Acceptable Use Policy above on the Create page and fill in the account information in the Create Account page as shown below (change with your corresponding information):
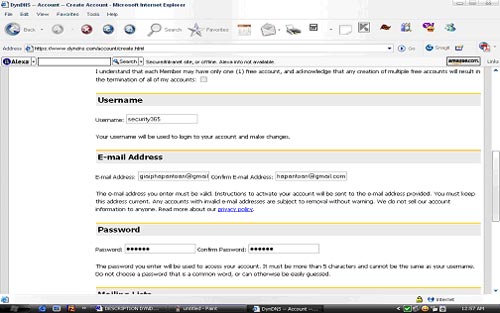
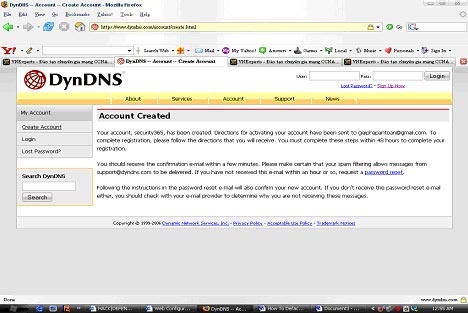
The process of creating an account is complete, open the mail box and confirm the registration information.
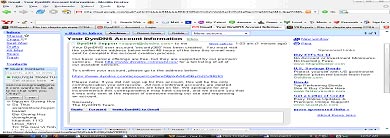
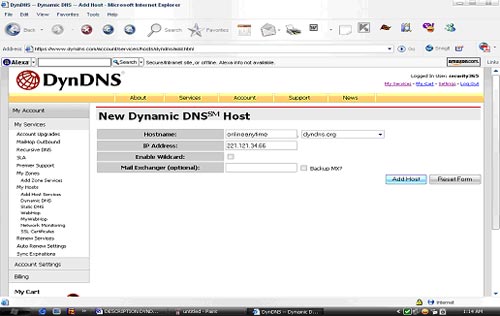
After confirming the registration information we can log in to DynDNS.Org to create the necessary hostnames for our system. In this case, we will create a host onlineanytime.dyndns.org (Note that you must set the tail to dyndns.org or choose from the list available, so we should use the extension dyndns.org )
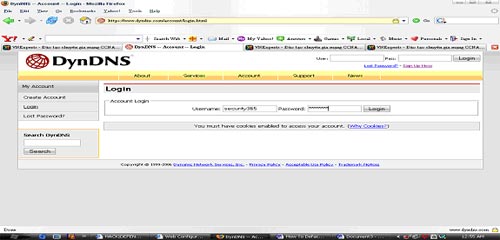
We can create a host record directly in DynDNS.Org Website, but you can create it using the DynDNS Updater program (this is the program used to update your IP address information with DynDNS.Org when If there is a change, you can install this program on any computer on the network, or configure it directly on the modem admin page if supported as shown above.
To create the host record, select My Services -> Dynamic DNS and Add Host as shown below:
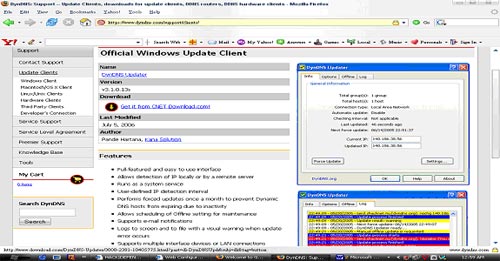
Download DynDNS Updater : Select the Update Clients page and click Get it from CNET Download.com! to Download the DynDNS Updater program. After downloading, please install according to some following instructions:
Some Photos Of Dyndns Updater Installation And Configuration
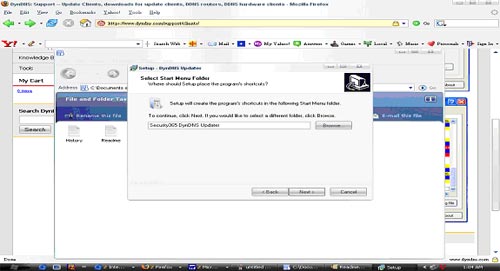
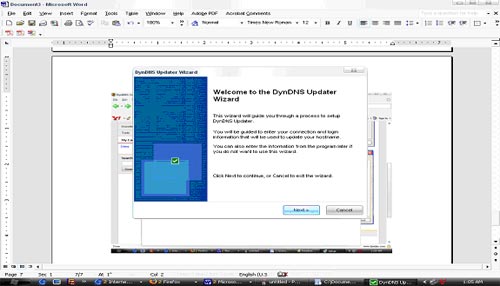
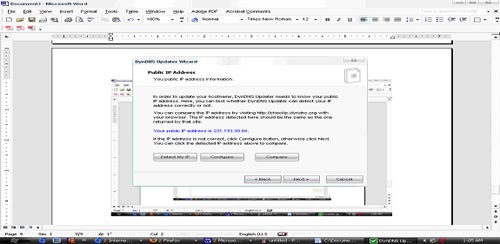
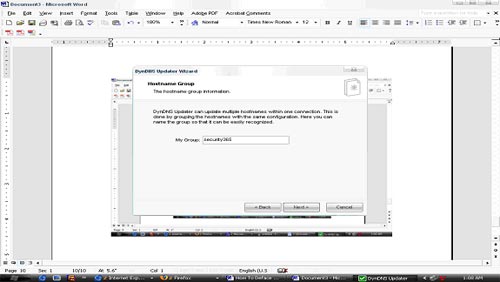
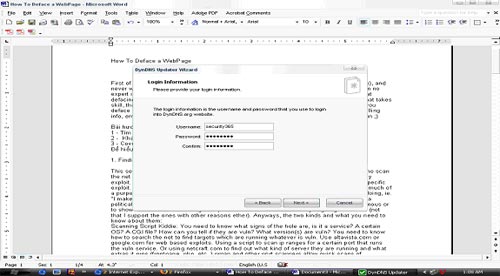
Enter account information (username & password) that you registered with DynDNS.Org above
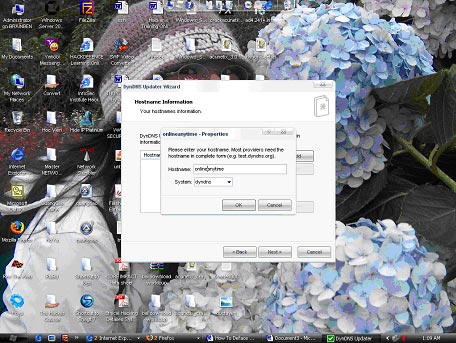
Enter the DynDNS host information, for example onlineanytime.dyndns.org
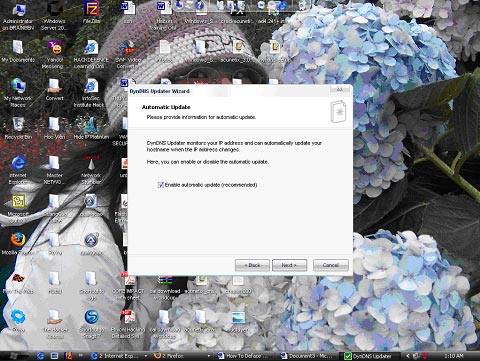
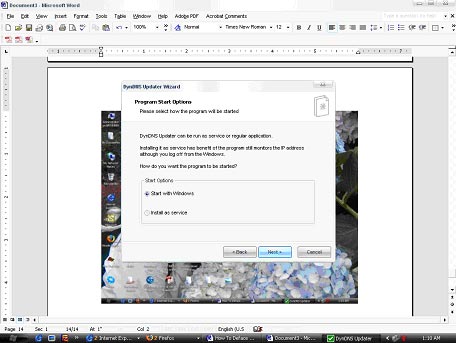
Select boot mode (Start with Windows)
Now on the Task Bar will appear a square icon with a green V indicating that your DynDNS system is working properly. Open the command-line interface and ping the onlineanytime.dyndns.org address to see the following result:
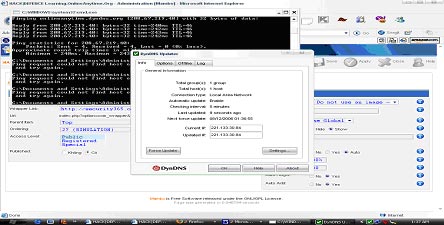
So you have successfully configured the DynDNS service for your system, now internet users can connect to Web servers (192.168.1.3) or Ftp (192.168.1.4) via http:/// onlineanytime.dyndns.org or ftp://onlineanytime.dyndns.org.
Security365 Team - Learning.OnlineAnytime.Org
Instructor@Security365.Org